...
![]() In Popup configuration page b
In Popup configuration page b
- Popup TemplateType: Assign the template Corresponding to this popup. You can add more templates on the Manage Template pageeach popup type, you can select popup default template compatible.
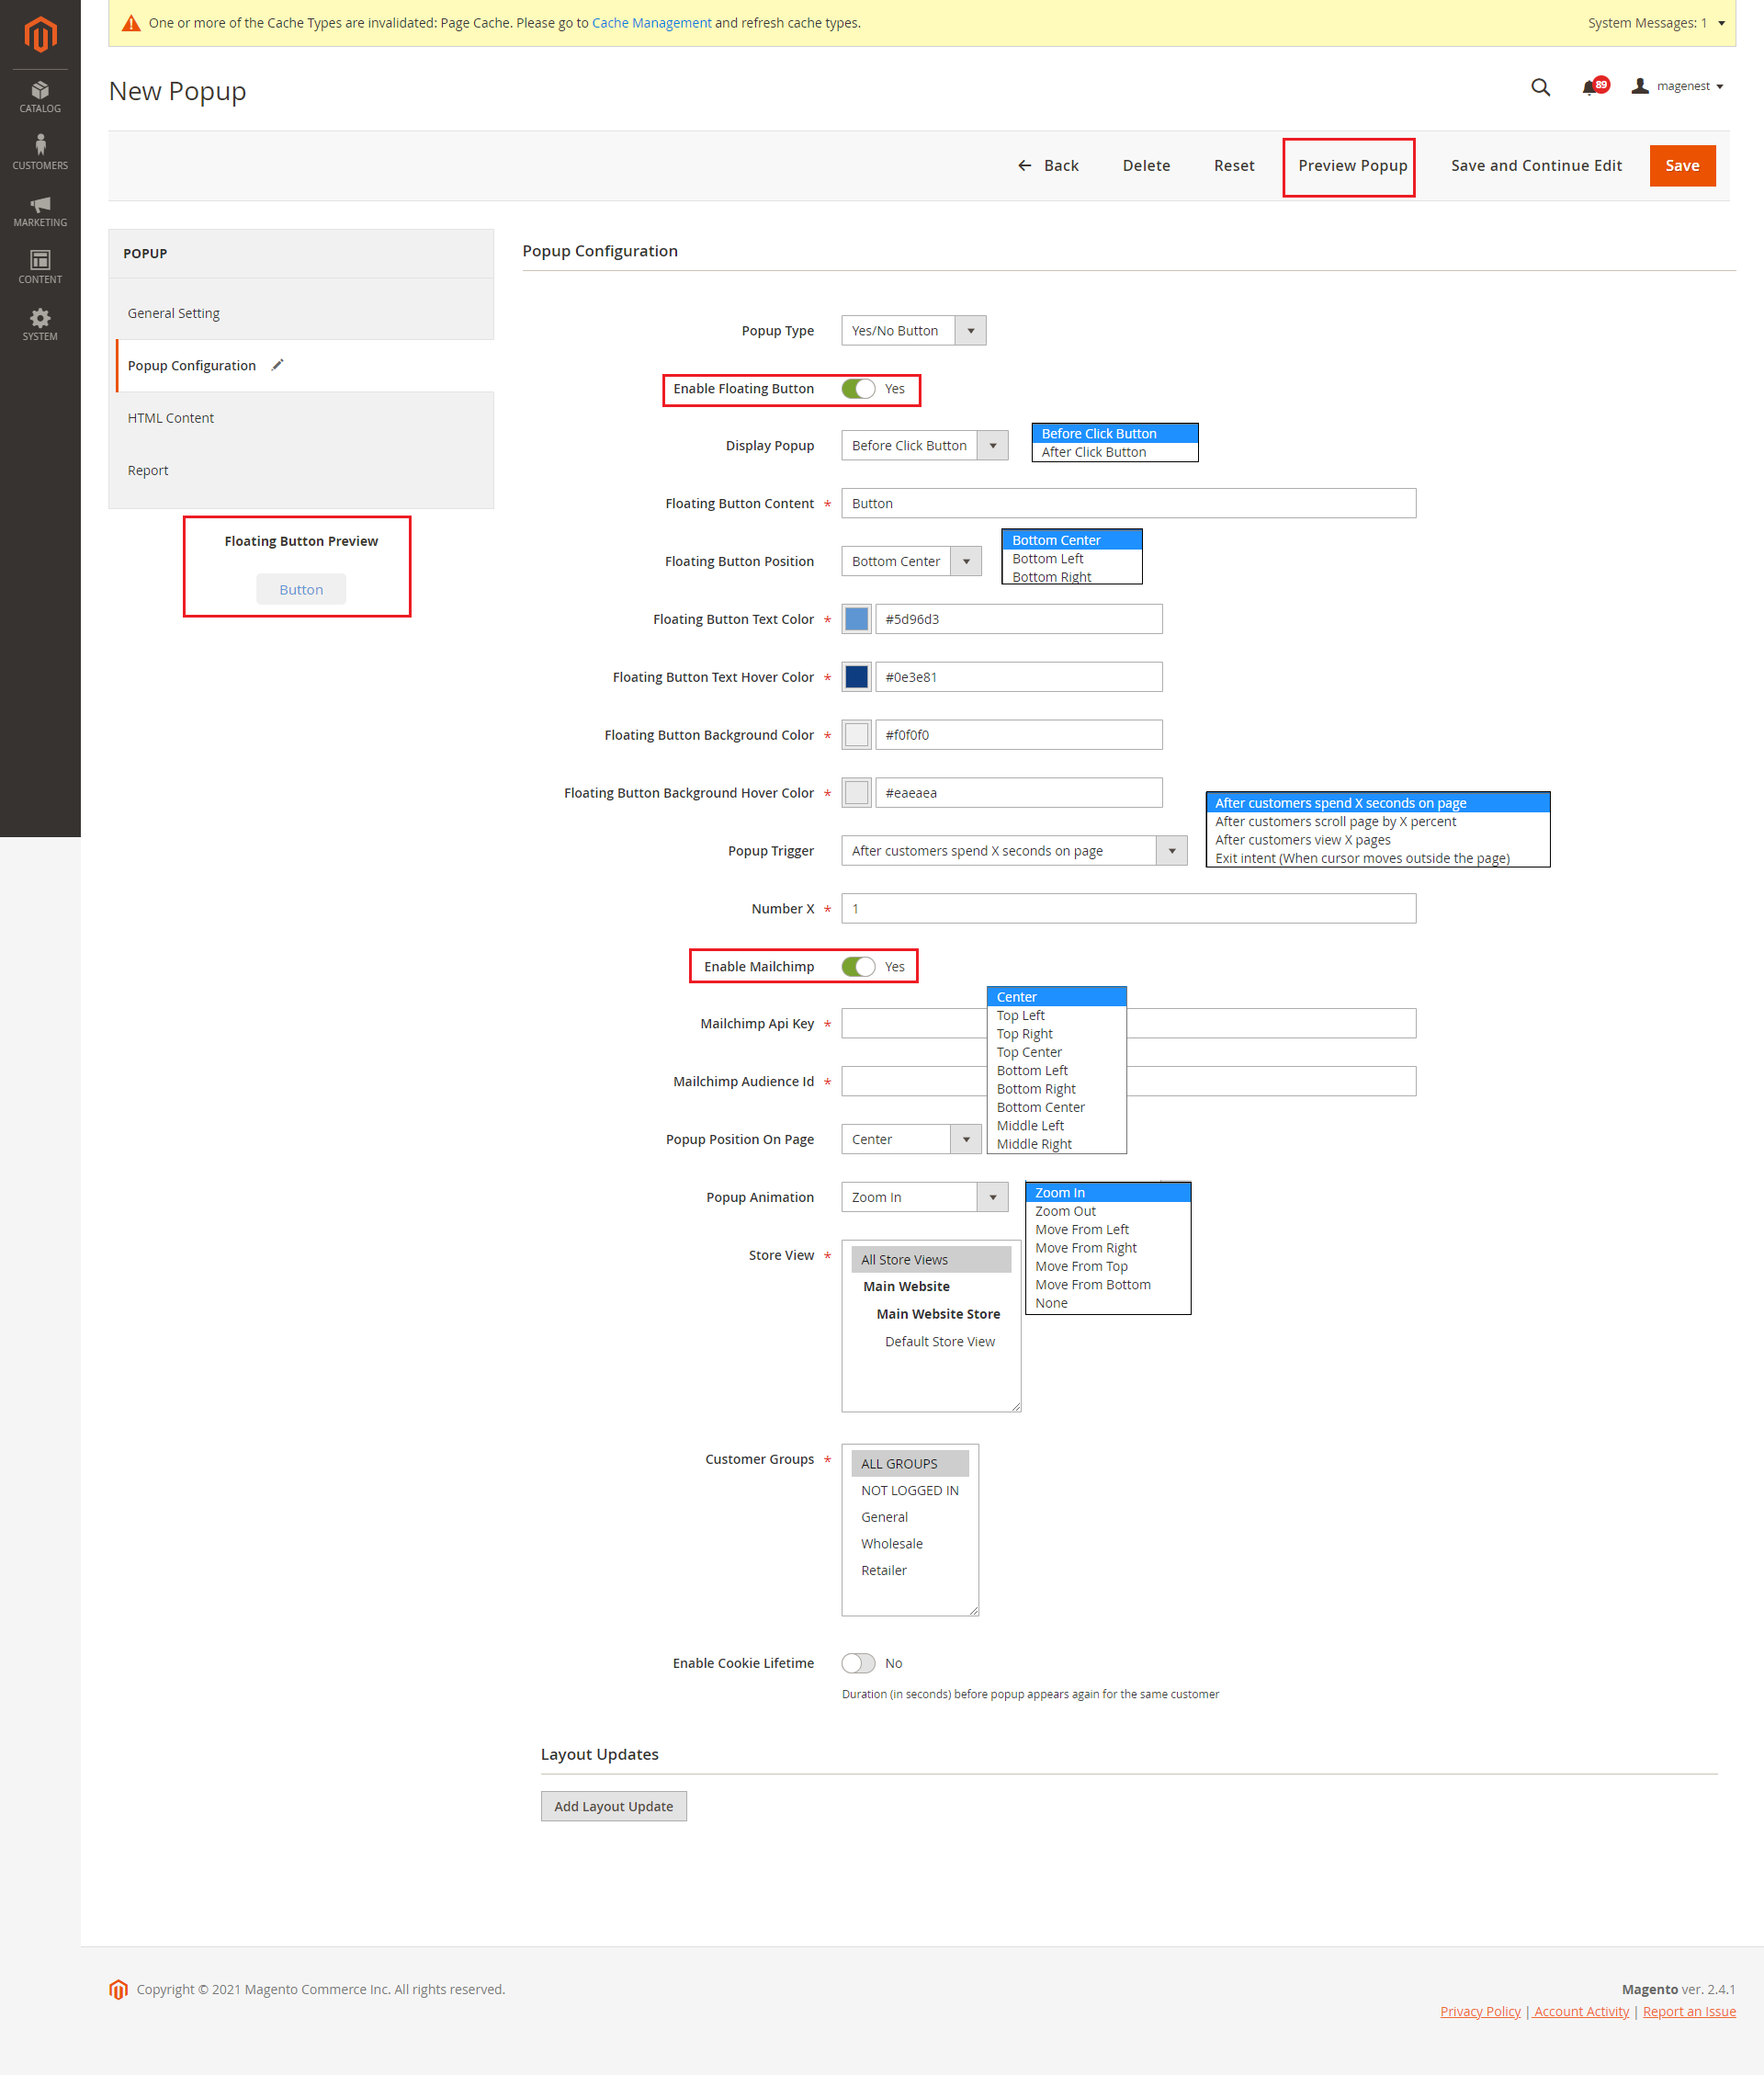
- Enable Floating Button: Select Yes to enable the floating button to trigger the popup.
Once you enable it, you will see a floating button preview [new]
- Display Popup: Choose to display the popup before or after clicking on the floating button.
- Floating Button Content: Enter the name of the button.
- Floating Button Position: Select a position to display the button on the storefront.
- Floating Button Text Color: Select a color for the button text in the color scheme.
Floating Button Text Hover Color [new]: Select a color for the button text when users hover it
- Floating Button Background Color: Select a color for the button background in the color scheme.
Floating Button Background Hover Color [new]: Select a color for the button background when users hover it
- Popup Trigger: Select a popup trigger method.
- Number X: Define the X value in the Popup Trigger setting.
Enable Mailchimp: In case you have selected the Contact Form and Subscribe Form popup type. Choose Yes to enable the MailChimp.
Mailchimp API Key: To find your API Key, follow these steps
Copy an existing API key or click the Create A Key button. Paste this into Mailchimp API Key.
Click the Extras menu and choose API keys.
Click your profile name to expand the Account Panel and choose Account.
Mailchimp Audience Id: To find your audience ID, follow these steps
In the Audience ID section, you’ll see a string of letters and numbers. This is your audience ID.
Click the Settings drop-down and choose the Audience name and defaults.
Click View Contacts.
If you have more than one audience, click the Current audience drop-down and choose the one you want to work with.
Navigate to the Audience tab.
- Popup Position on page: You can customize the popup position in various areas on the storefront.
Popup Animation: Set animation when a popup displays
Store View
Stores:Set the store view to display the popup
.Customer Groups [new]: Set customer groups can see popup
Enable Cookie Lifetime: Duration (in seconds) before the popup appears again for the same customer.
Layout
UpdateUpdates: Select a page to display the popup.

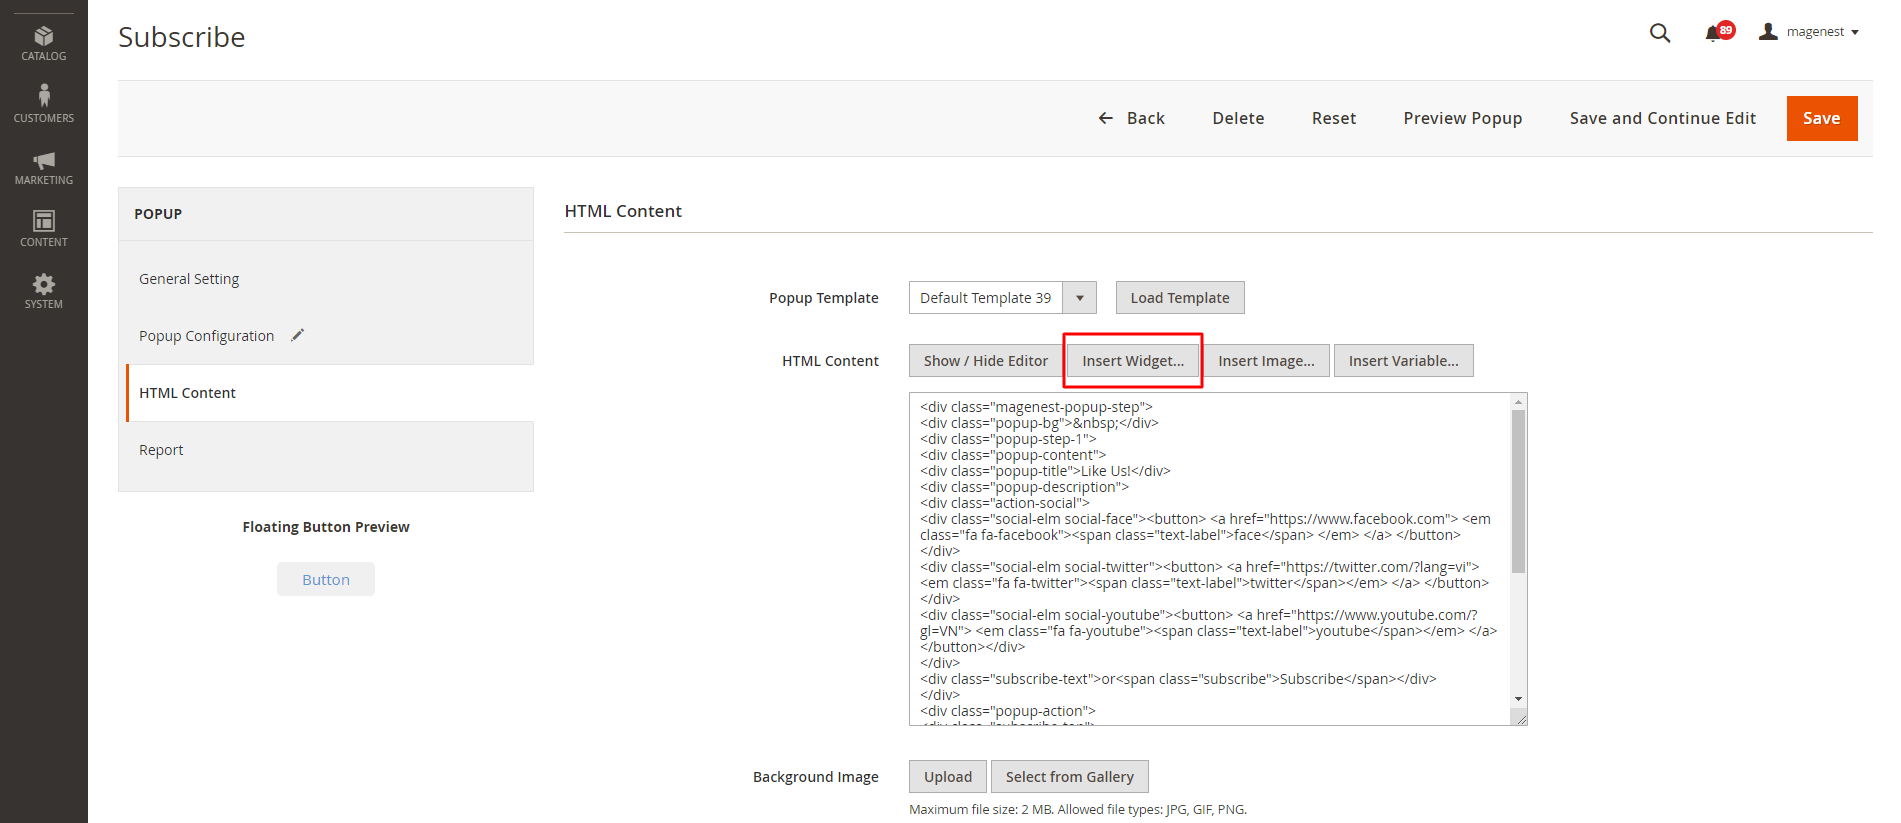
HTML Content
![]() You can customize the content and style of the popup using the WYSIWYG editor.
You can customize the content and style of the popup using the WYSIWYG editor.
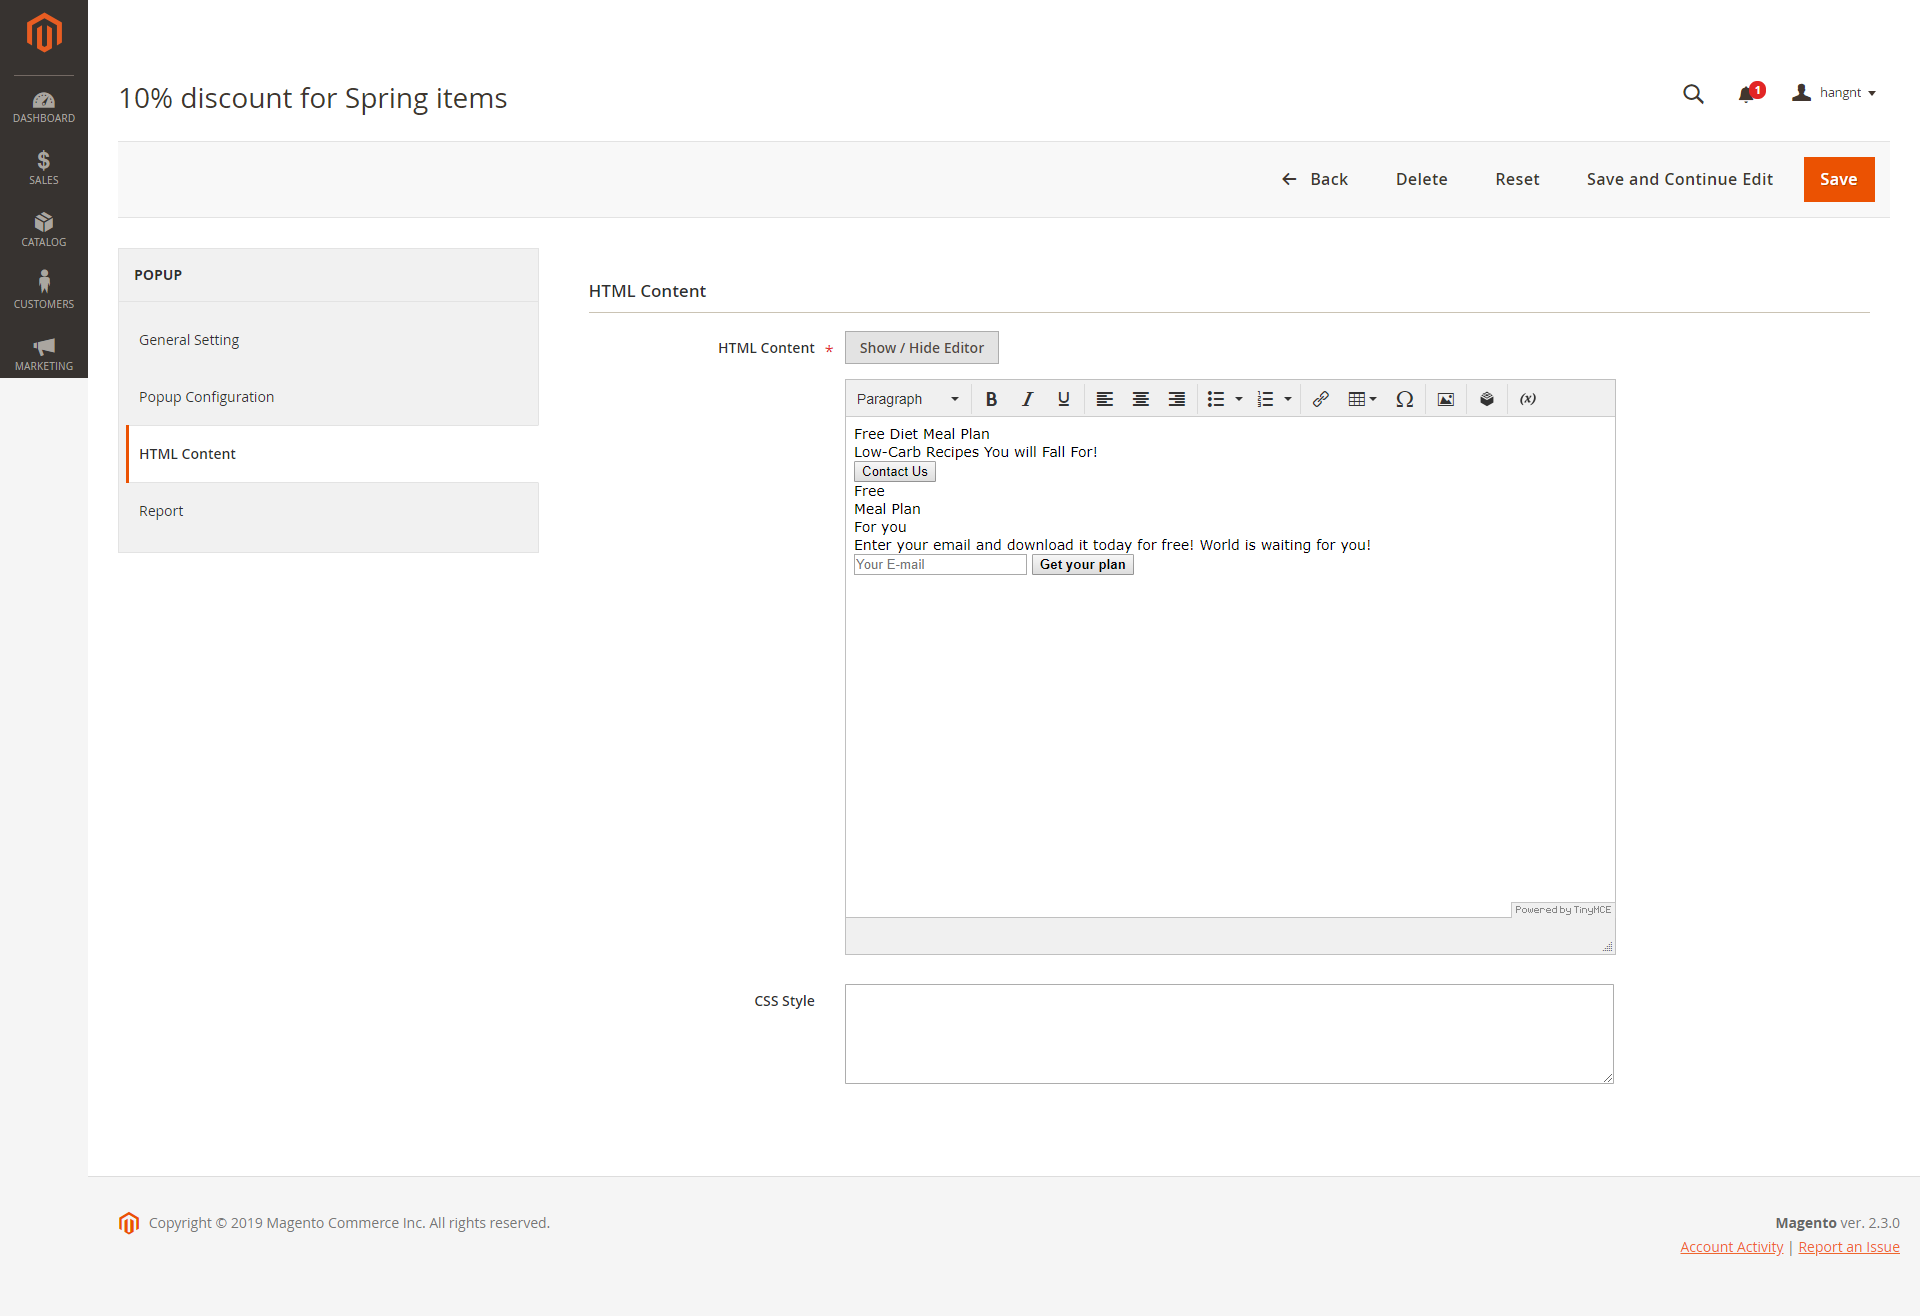
Popup Template: Assign the template to this popup. You can add more templates on the Manage Template page
Load Template Button [new]: Load default template content
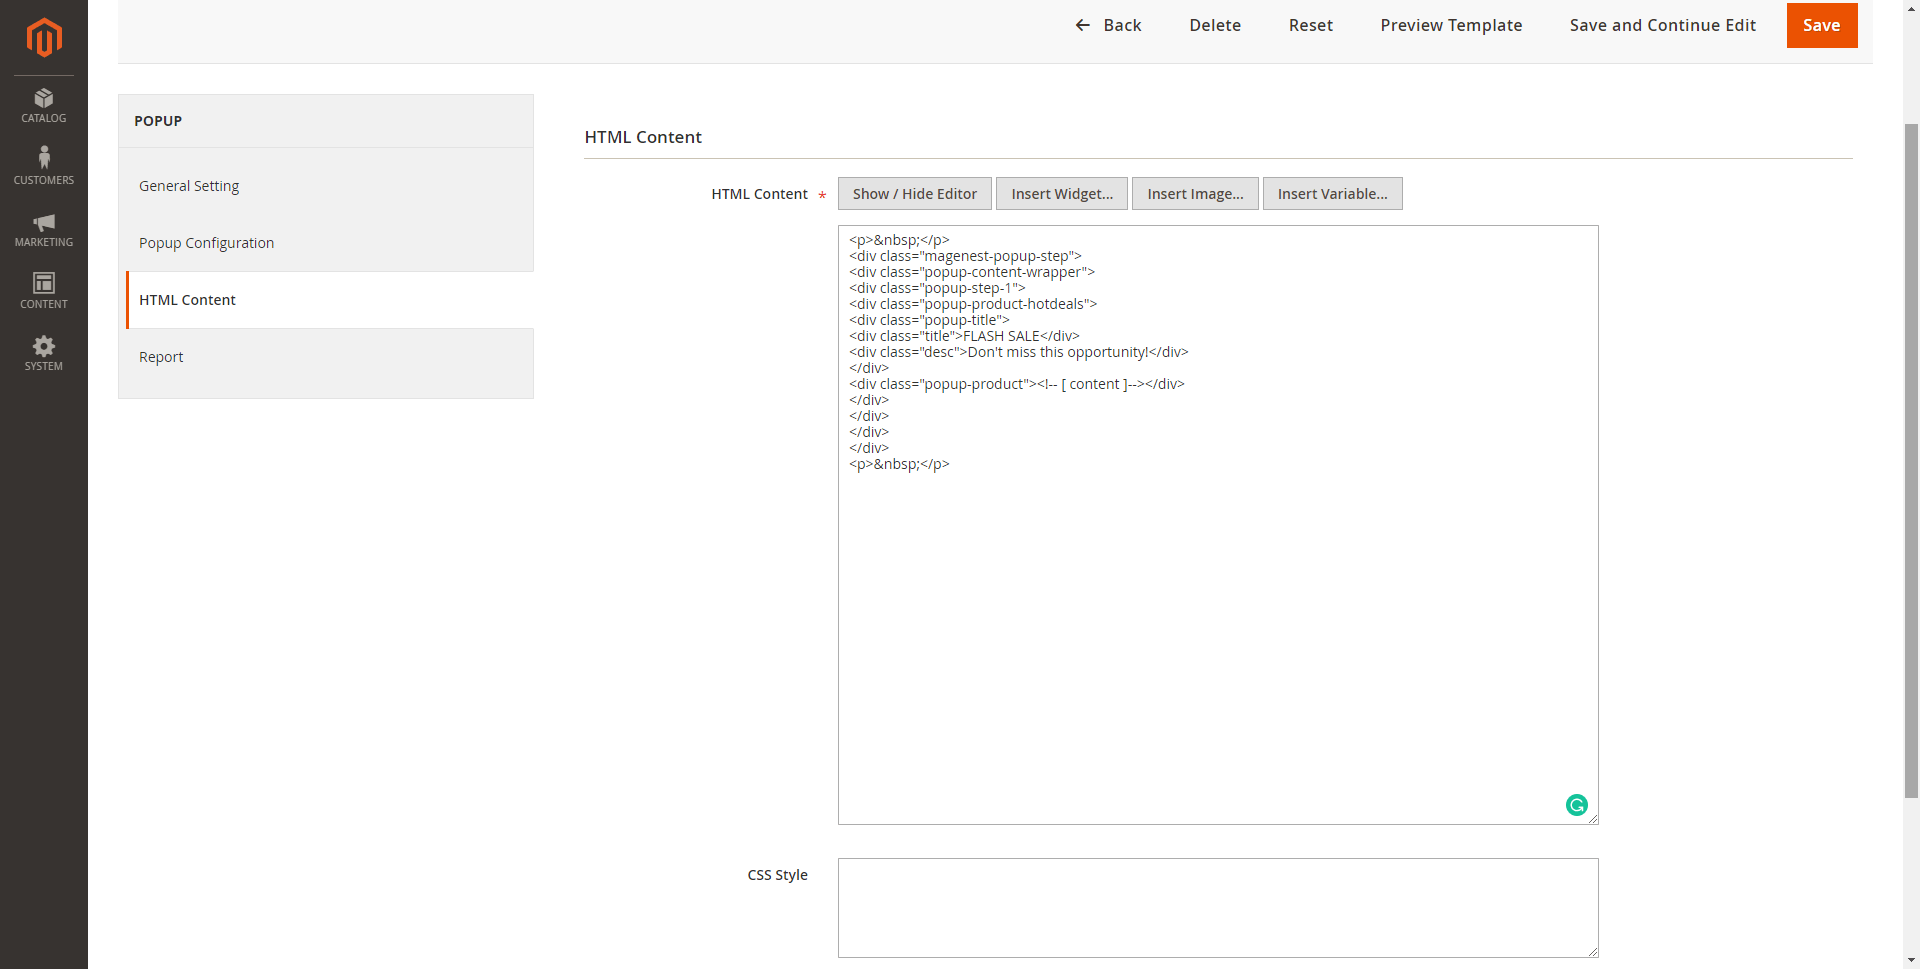
HTML Content: Contain popup HTML content, you can customize the content and style of the popup using the WYSIWYG editor.
Background Image [new]: Upload background popup
CSS Style: You can also select an additional background image to add to the popup
.
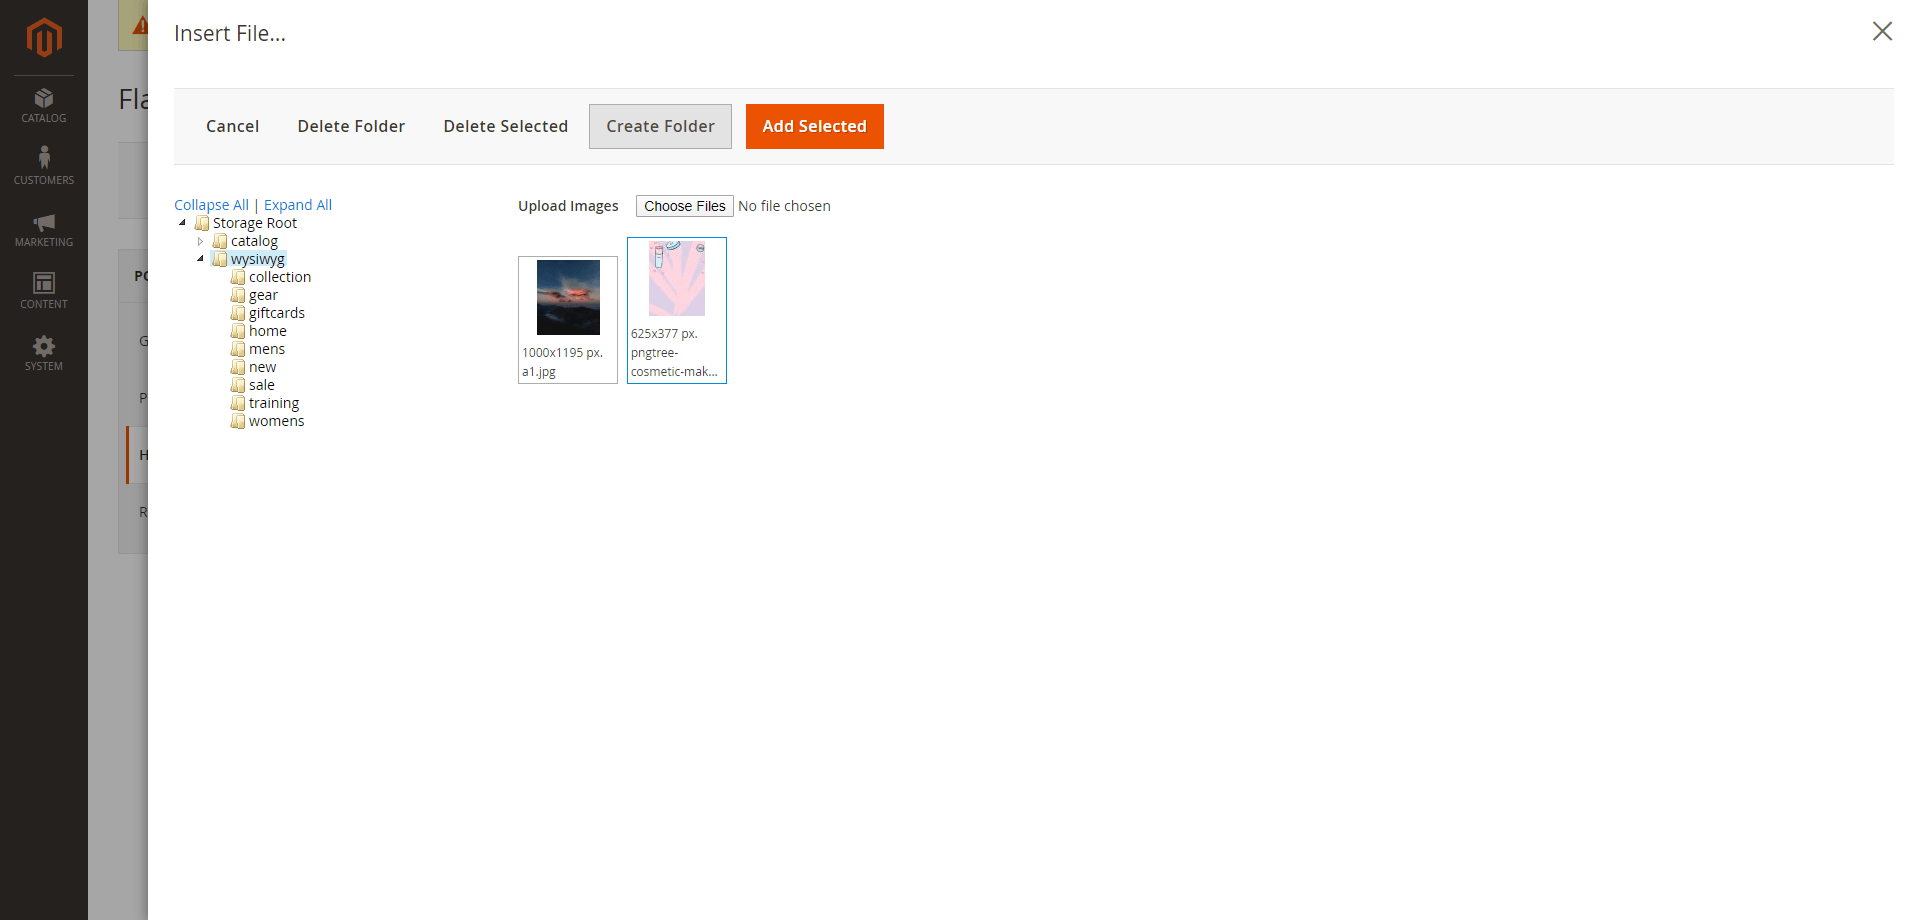
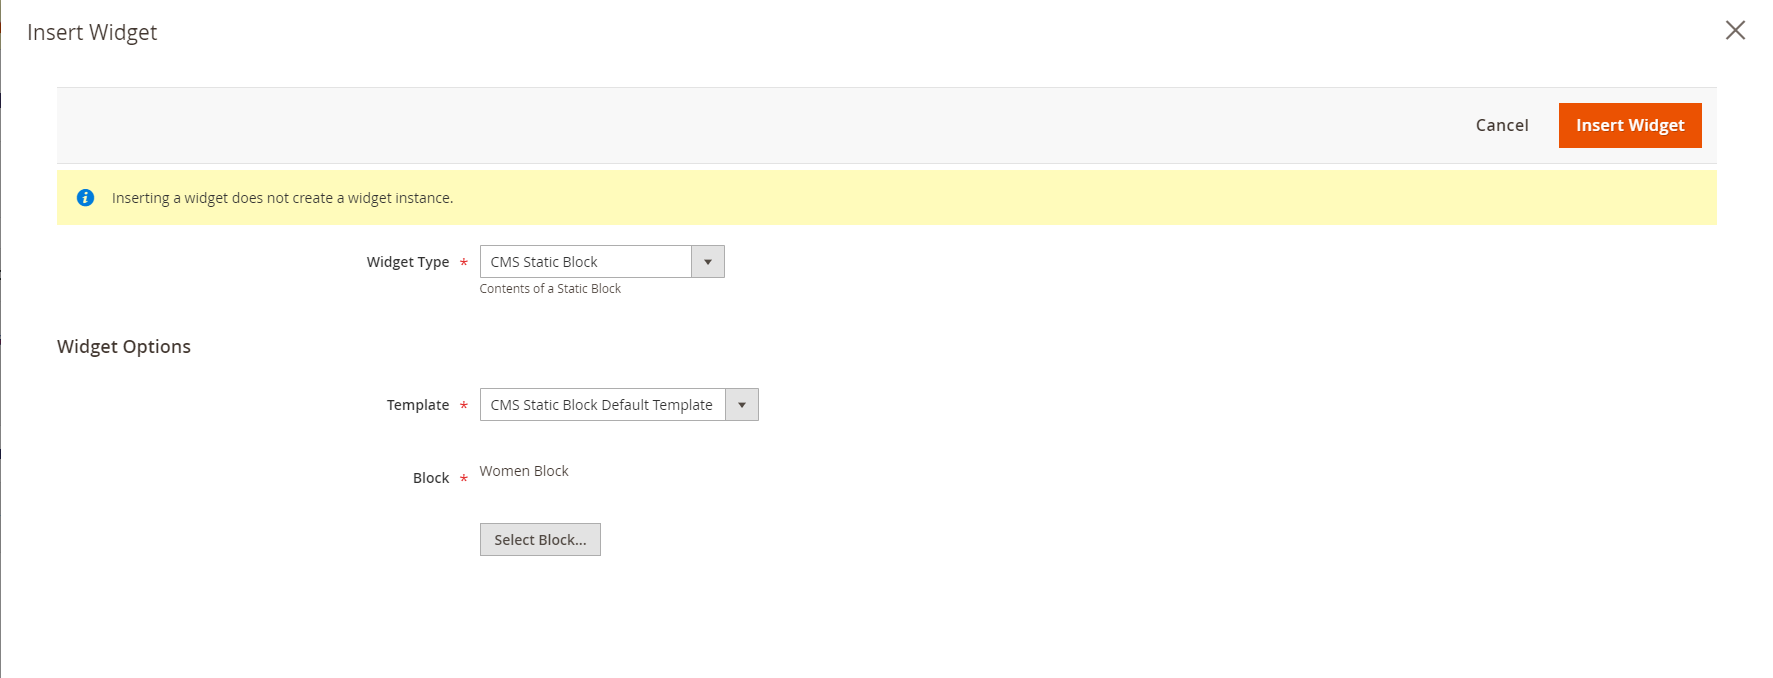
- For the Hot Deal popup only, you can add the products to the popup.
- In order to add the products, you can place your blinking cursor between <div class="popup-product"> and the <div> tag.
Click on the Insert Widget button.
Select the Catalog Product List.

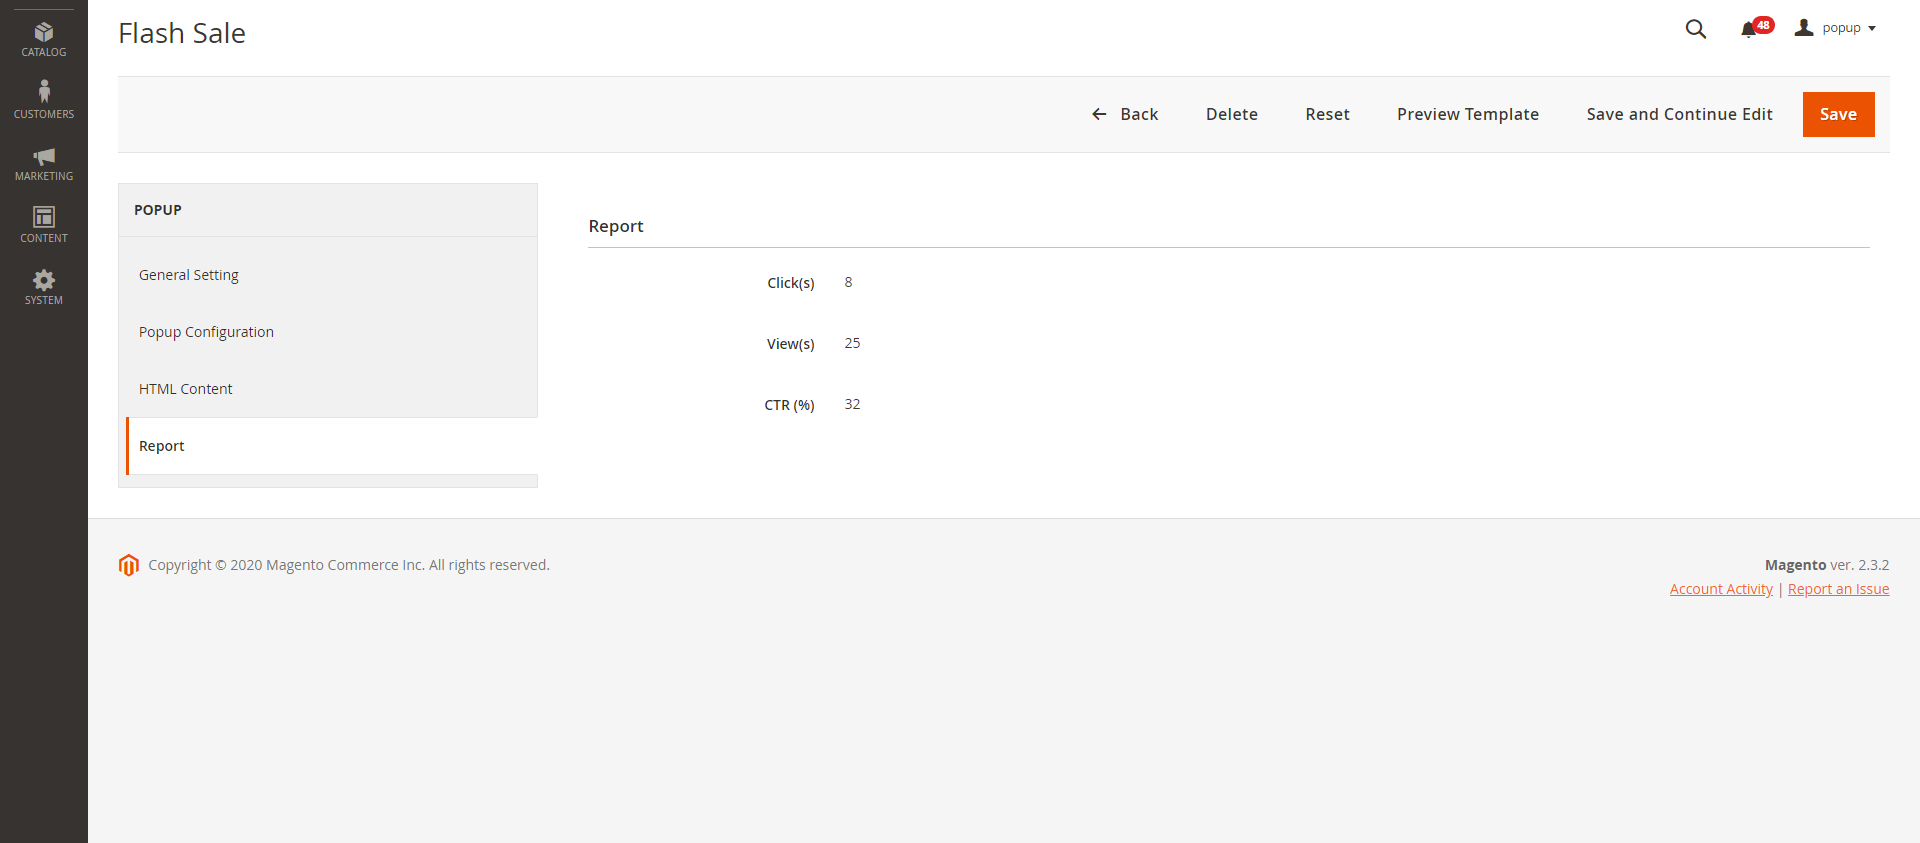
Report
![]() In the Report tab, you can see the popup performance with the number of clicks, views and the CTR (Click-through rate)
In the Report tab, you can see the popup performance with the number of clicks, views and the CTR (Click-through rate)
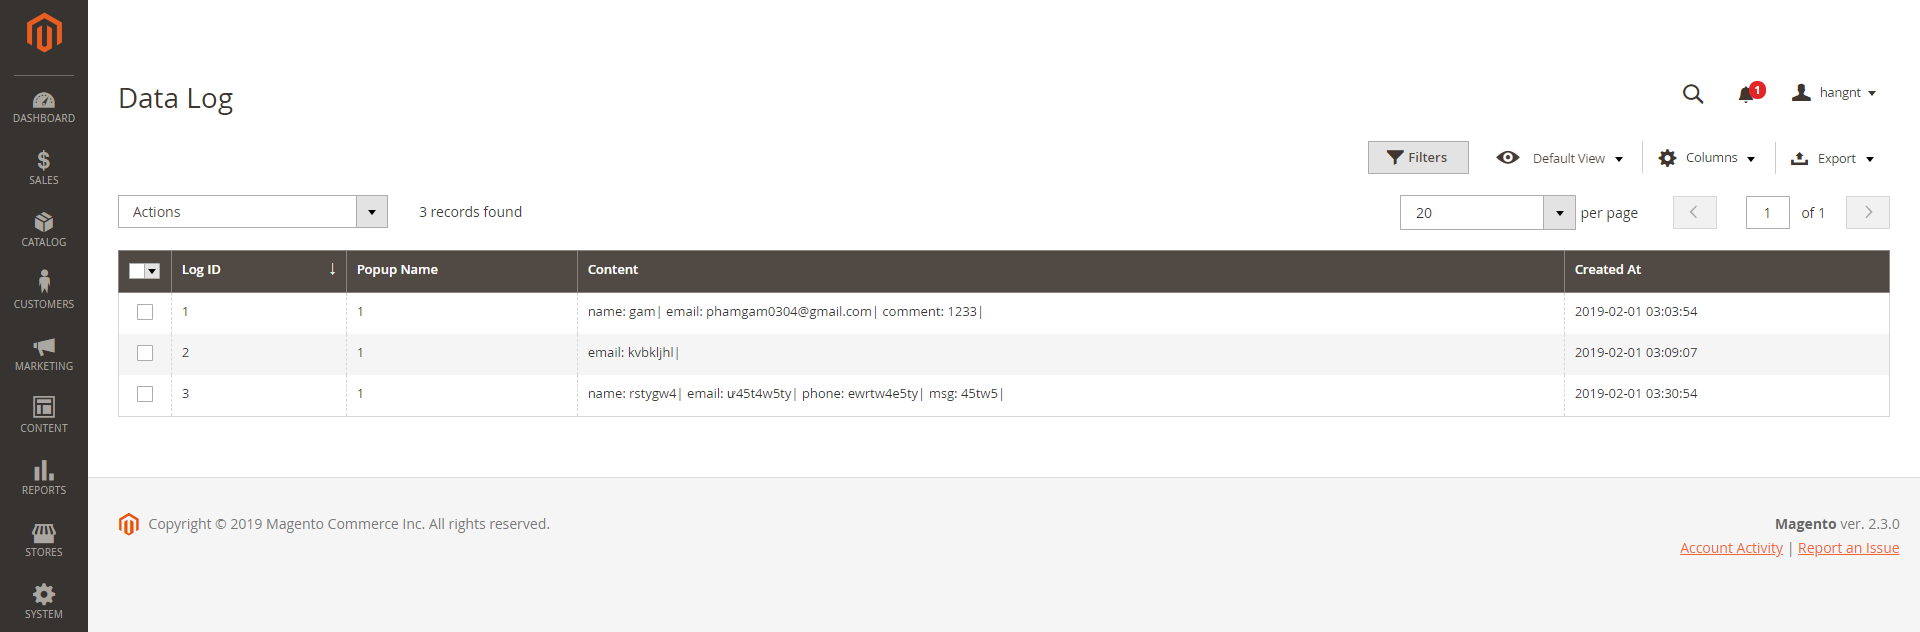
Data Log
On the Magento 2 backend, you can view the data that customers fill in the popup (form) in Content > Magenest Popup > Data Collection.
Storefront Display
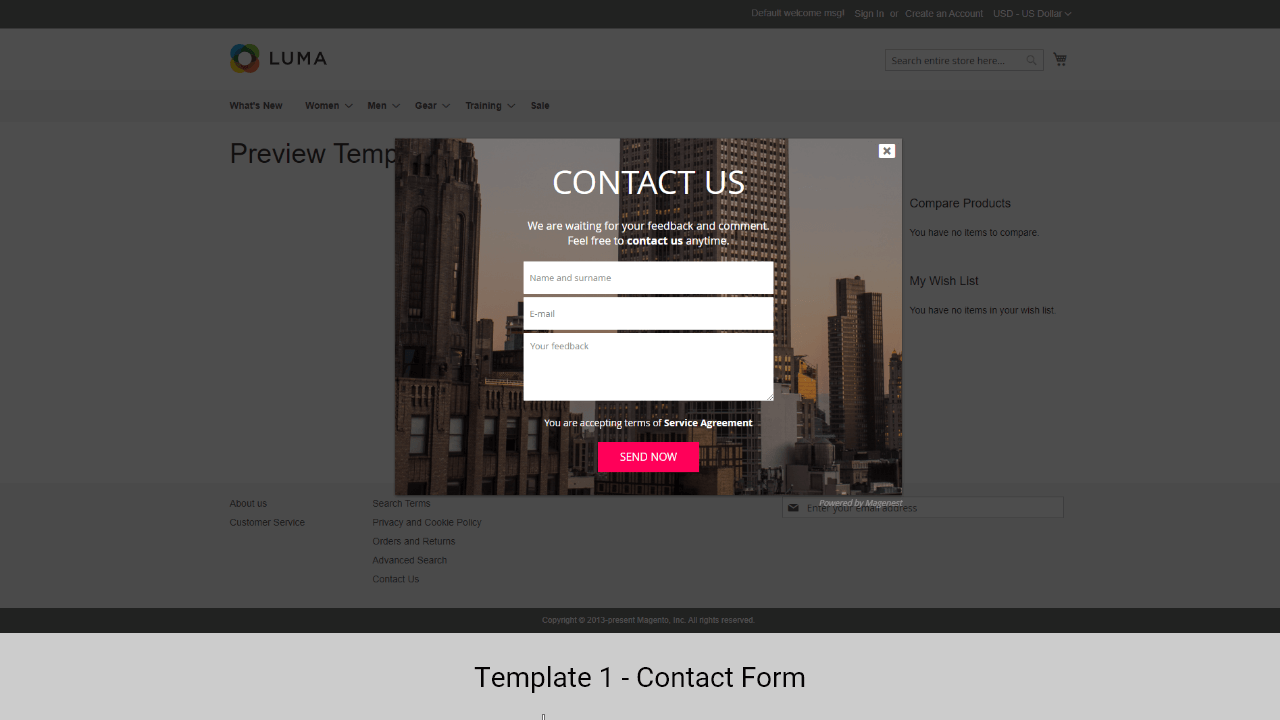
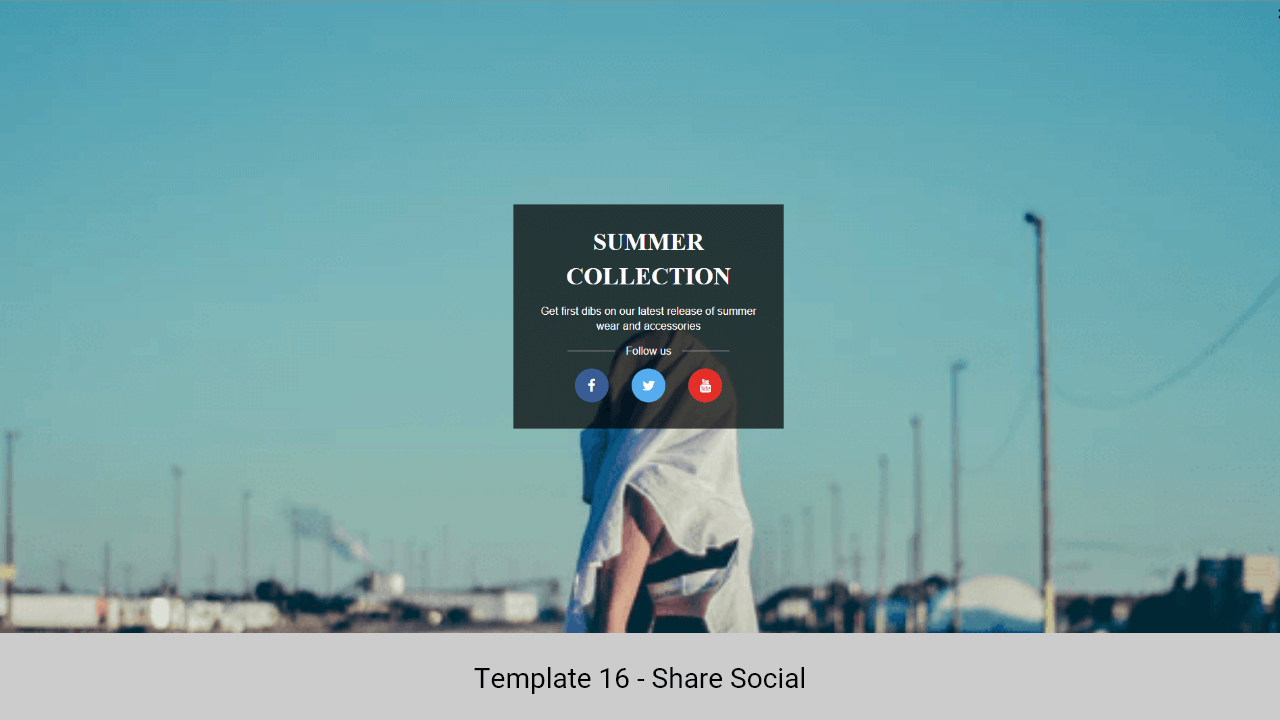
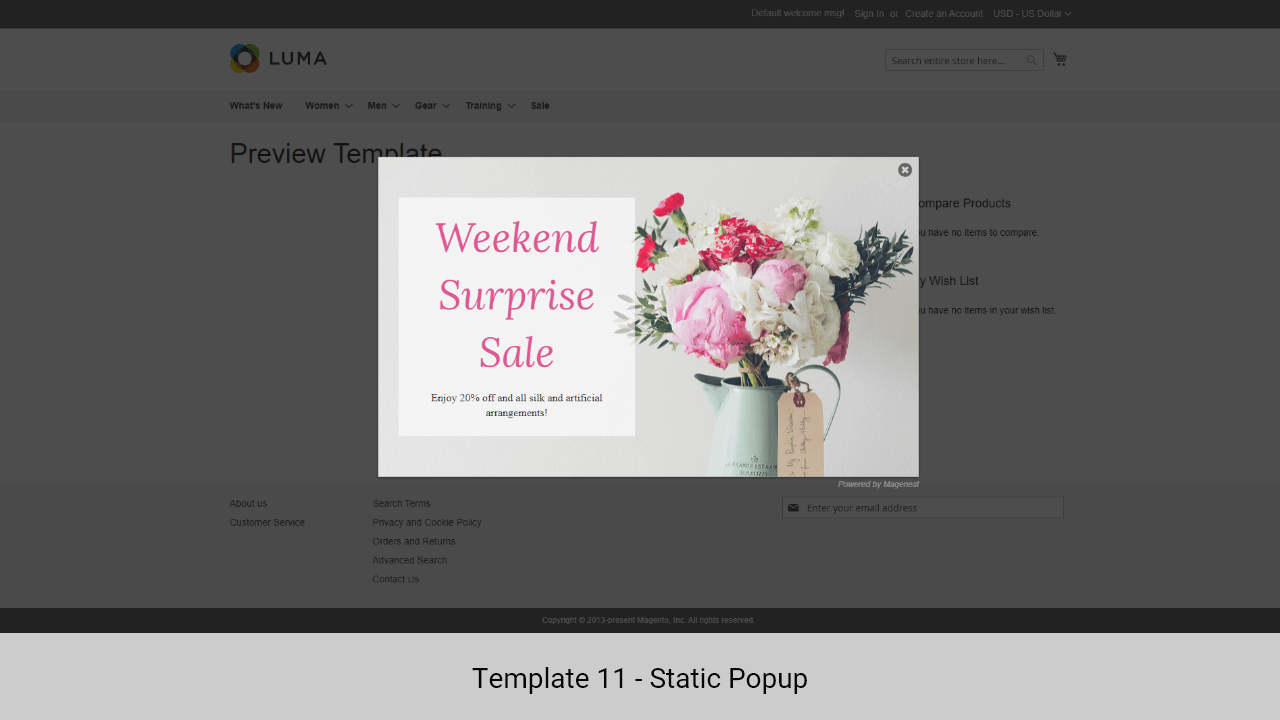
![]() After finishing all the configuration, you can see the popups displayed on the storefront correctly as the requirements.
After finishing all the configuration, you can see the popups displayed on the storefront correctly as the requirements.
- The floating button
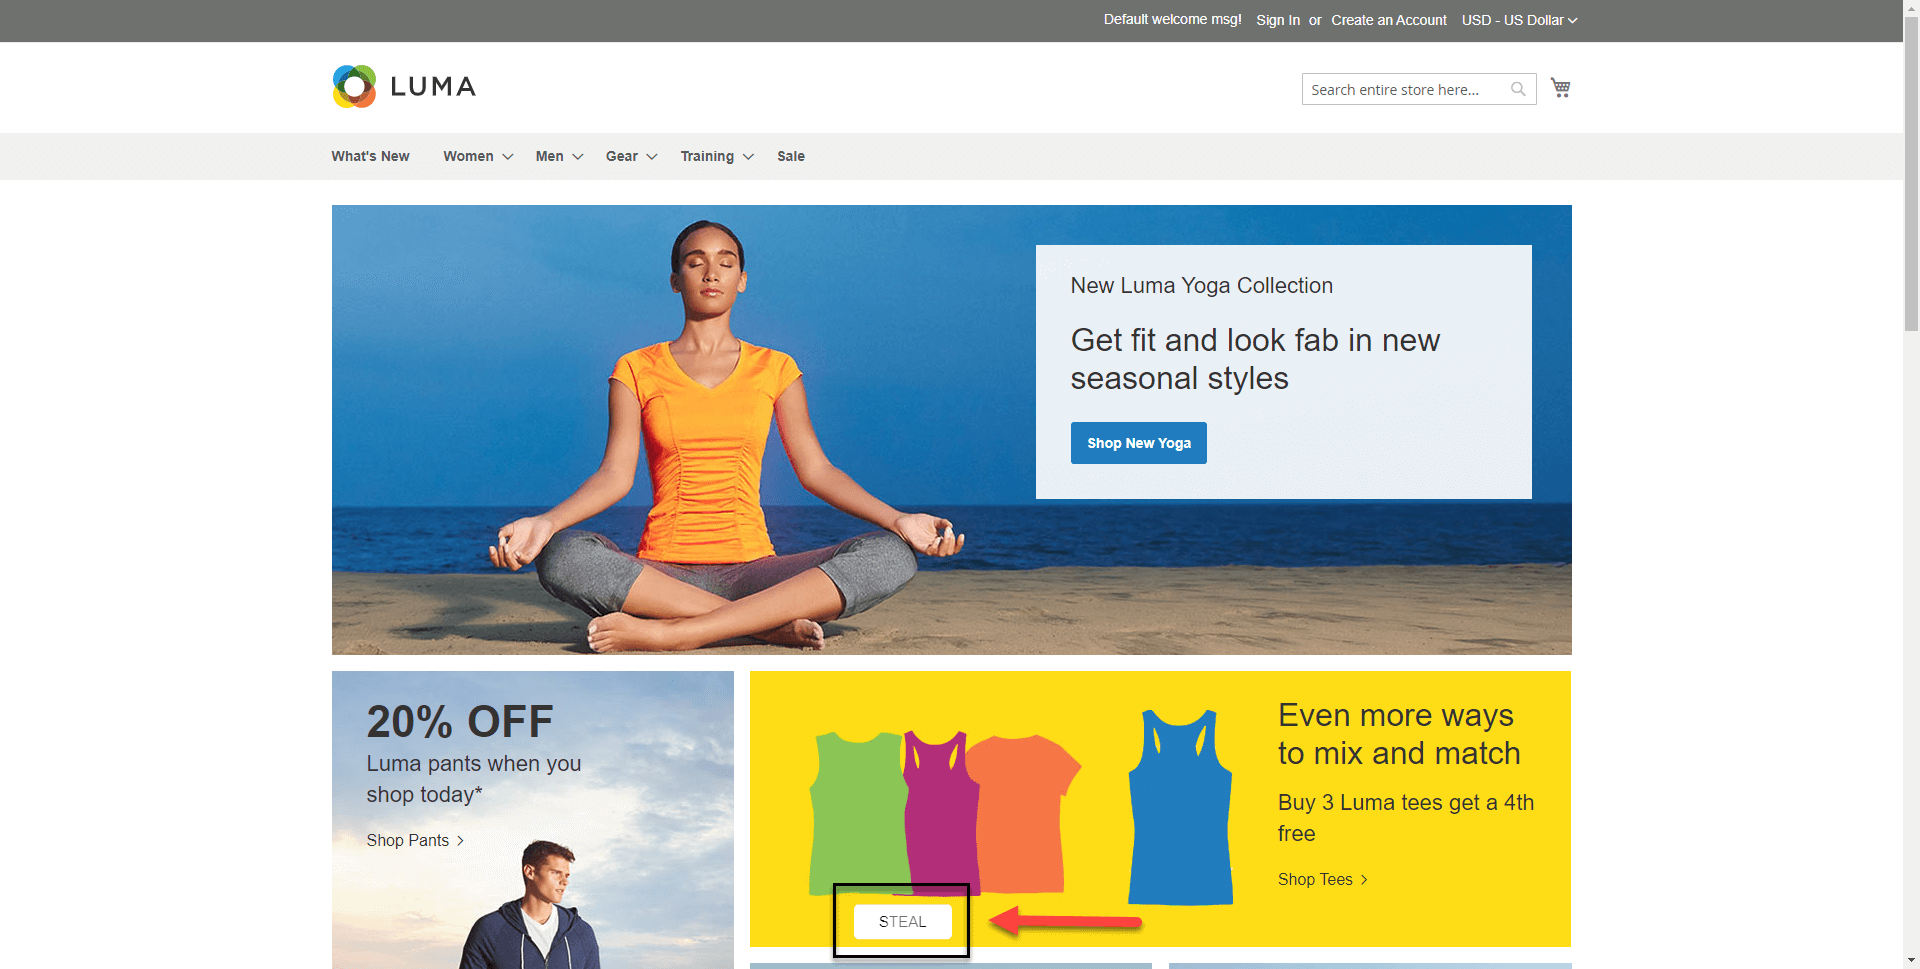
- Popup - Yes/No button

- Popup - Contact Form
- Popup - Social Share
- Popup - Subscribe Form
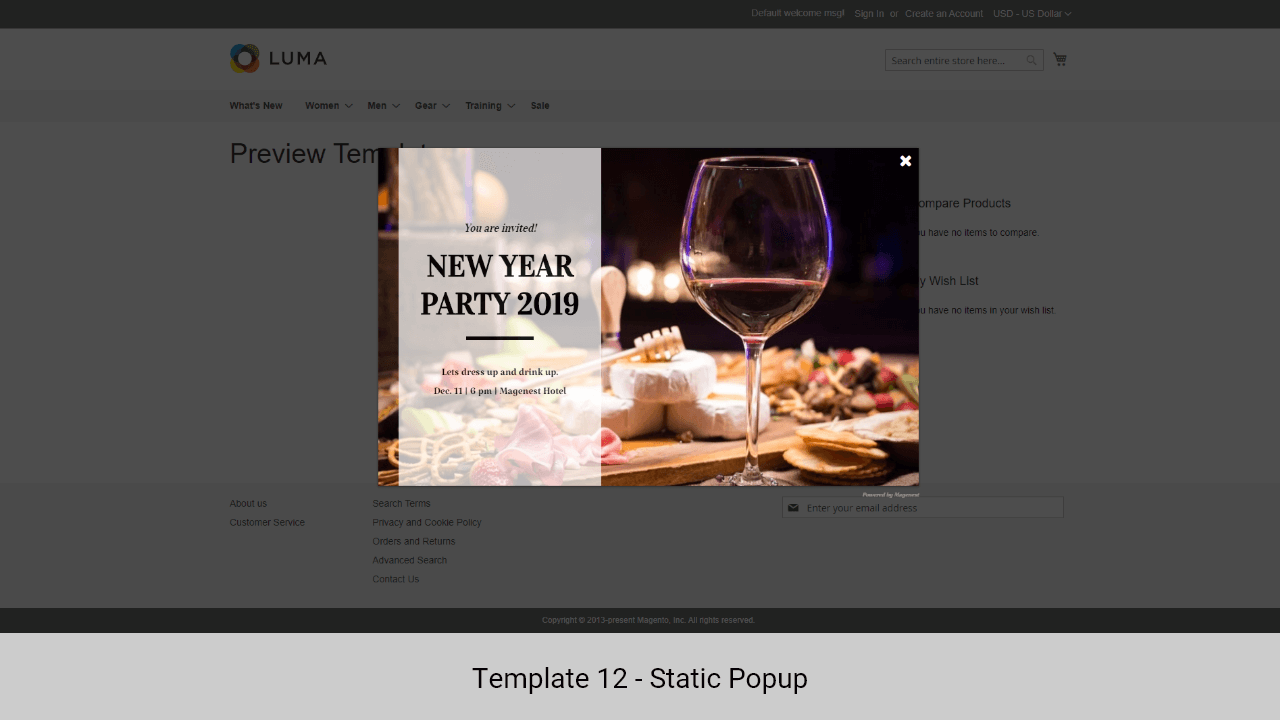
- Popup - Static Popup
- Popup - Hot Deal
We have just updated 4 templates for the hot deal popup type.
- Default template 41

- Default template 42

- Default template 43

- Default template 44


Update
- When a new update is available, we will provide you with a new package containing our updated extension.
- You will have to delete the module directory and repeat the installation steps above.
- Flush the config cache. Your store and newly installed module should be working as expected.
...