...
| Table of Contents |
|---|
...
Introduction

...
Features
For admin
- Create product as the event ticket type
- Support multiple locations, multiple dates, multiple sessions/timeslot for the event.
- Add event to the menu bar
- Specify custom ticket type for each event (ticket options) and set name, price, quantity, and sequence of available tickets for each type
- Automatically generate Bar code and QR code
- Design pdf template with XY coordinates in the admin panel
- Preview and print the pdf ticket instantly in the admin panel
- Add Google map to event details
- Create unlimited email templates
- Assign email template to each event
- Allow customers to fill in attendee information at the checkout page
- Easily track attendees, purchased number of tickets of for each event
- Add terms and conditions for each event
- Send ticket confirmation emails to event attendees
- Send pdf tickets to all the attendees or to the purchaser only
- Export event attendees, event list, ticket list into CSV, XML files
For customers
- Choose from multiple ticket options (location, date, time, and ticket type)
- View the location of each event with a pinpoint on Google map integrated on product page
...
Your store should be running on
Magento Open Source 2.12.x, 2.23.x, 2.3.x4
Magento Commerce 2.12.x,2.23.x, 2.3.x
Video Tutorial
Widget Connector width 853 url https://www.youtube.com/watch?v=EIiS2UAkIno height 480
4
...
Configuration
On the Admin sidebar
Configuration
In the back end, go to Stores > Configuration > Magenest > Event Ticket.
![]() General:
General:
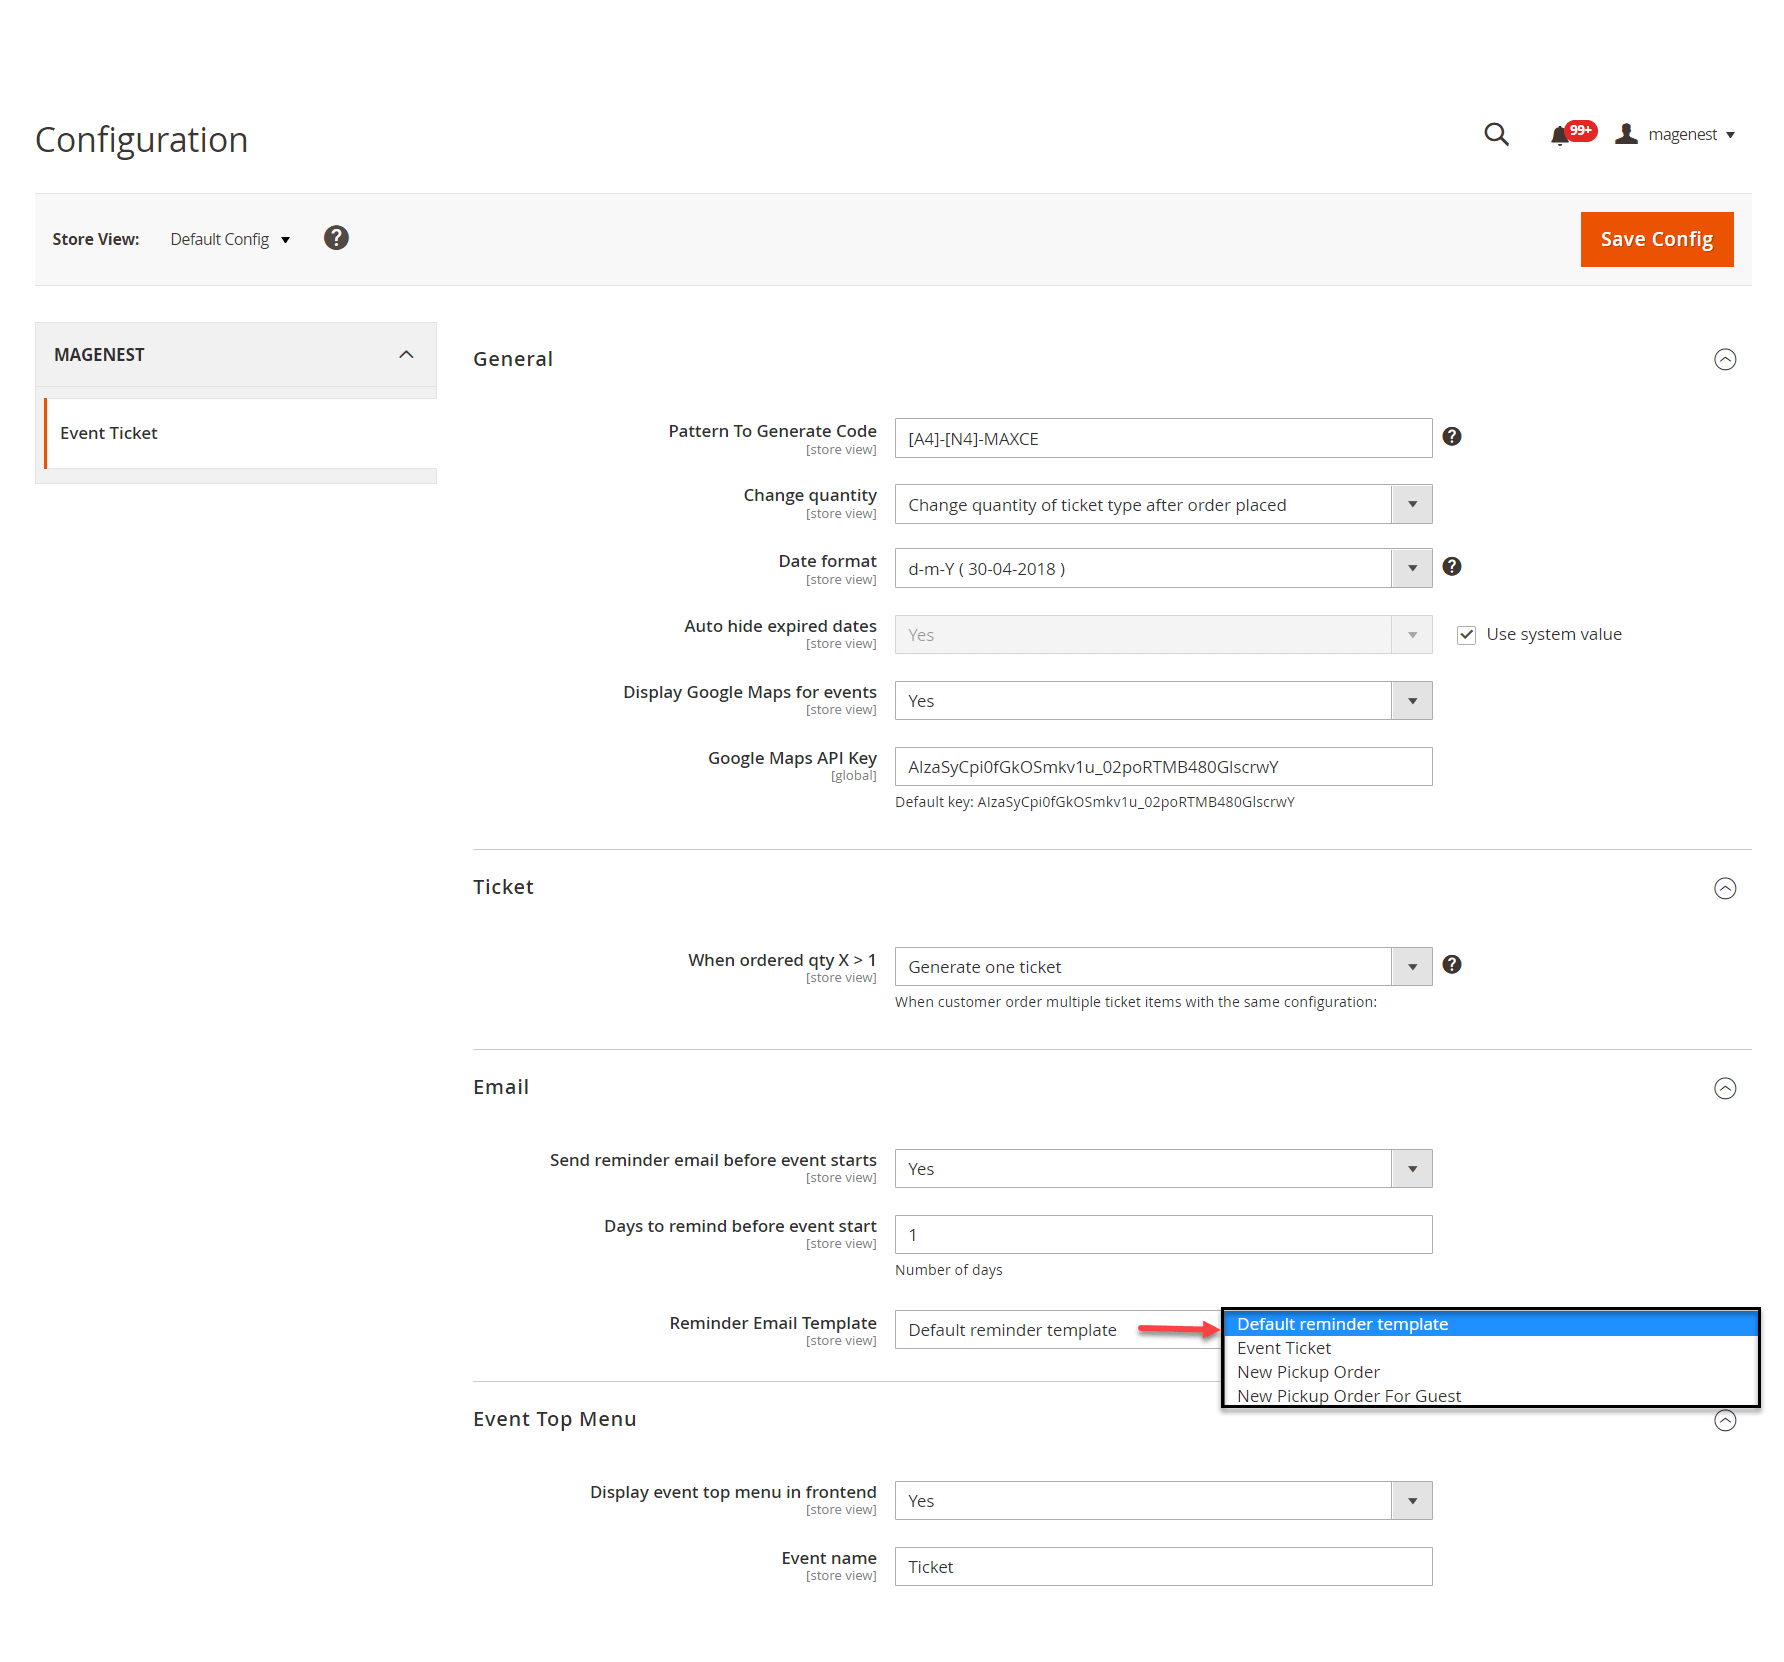
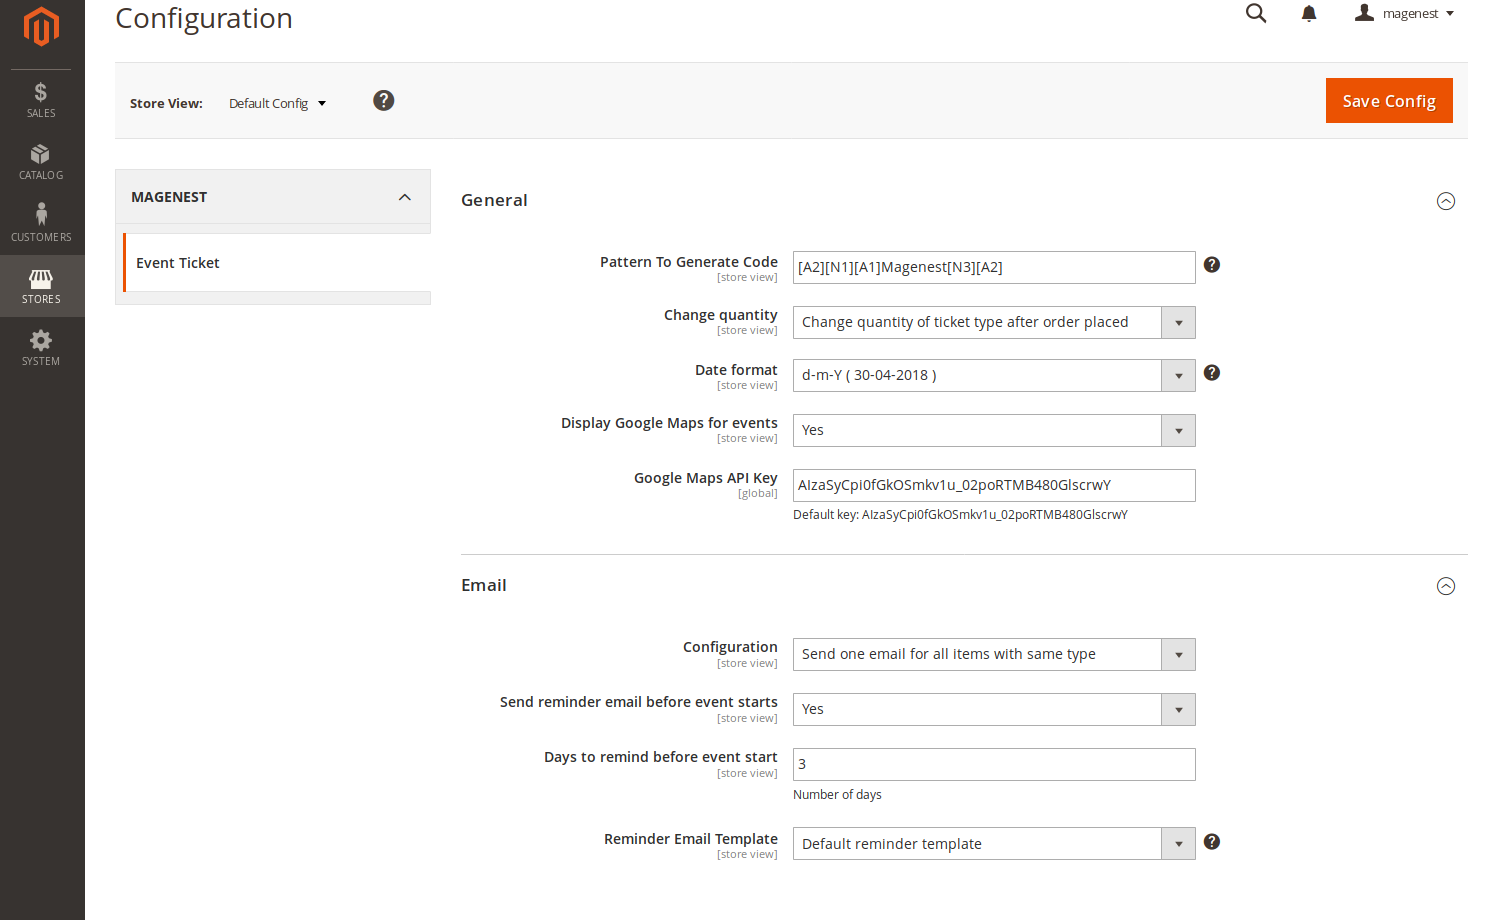
- Pattern to generate code: The ticket code format. [A2] is to generate 2 random characters, [N4] is to generate 4 random numbers while "Magenest" is the hard code
- Change quantity: You can choose to deduct the ticket stock after the order is placed or is invoiced
- Date format: You can choose from 16 available date formats for the event
- Auto-hide expired dates: Select Yes to hide the expired date from the calendar
- Display Google Maps for events: Choose Yes to display Google map for each event location
- Google Map API Keys: Fill in your Google API Keys to integrate Google map. Learn more
![]() Ticket
Ticket
- When ordered quantity X > 1: You When the customer purchase more than 1 ticket, you can choose to generate whether 1 ticket or more than 1 ticket will be generated. All of the tickets will be sent to the customer's email address.
 Note that if multiple tickets are generated, there will be multiple emails sent to the purchaser.
...
- Send reminder email before event starts: Choose Yes to send reminder email of the events to customers
- Days to remind before event starts: Enter the number days before the event in order to send reminder emails
- Reminder Email Templates: See here
Main Features
Create a new event ticket
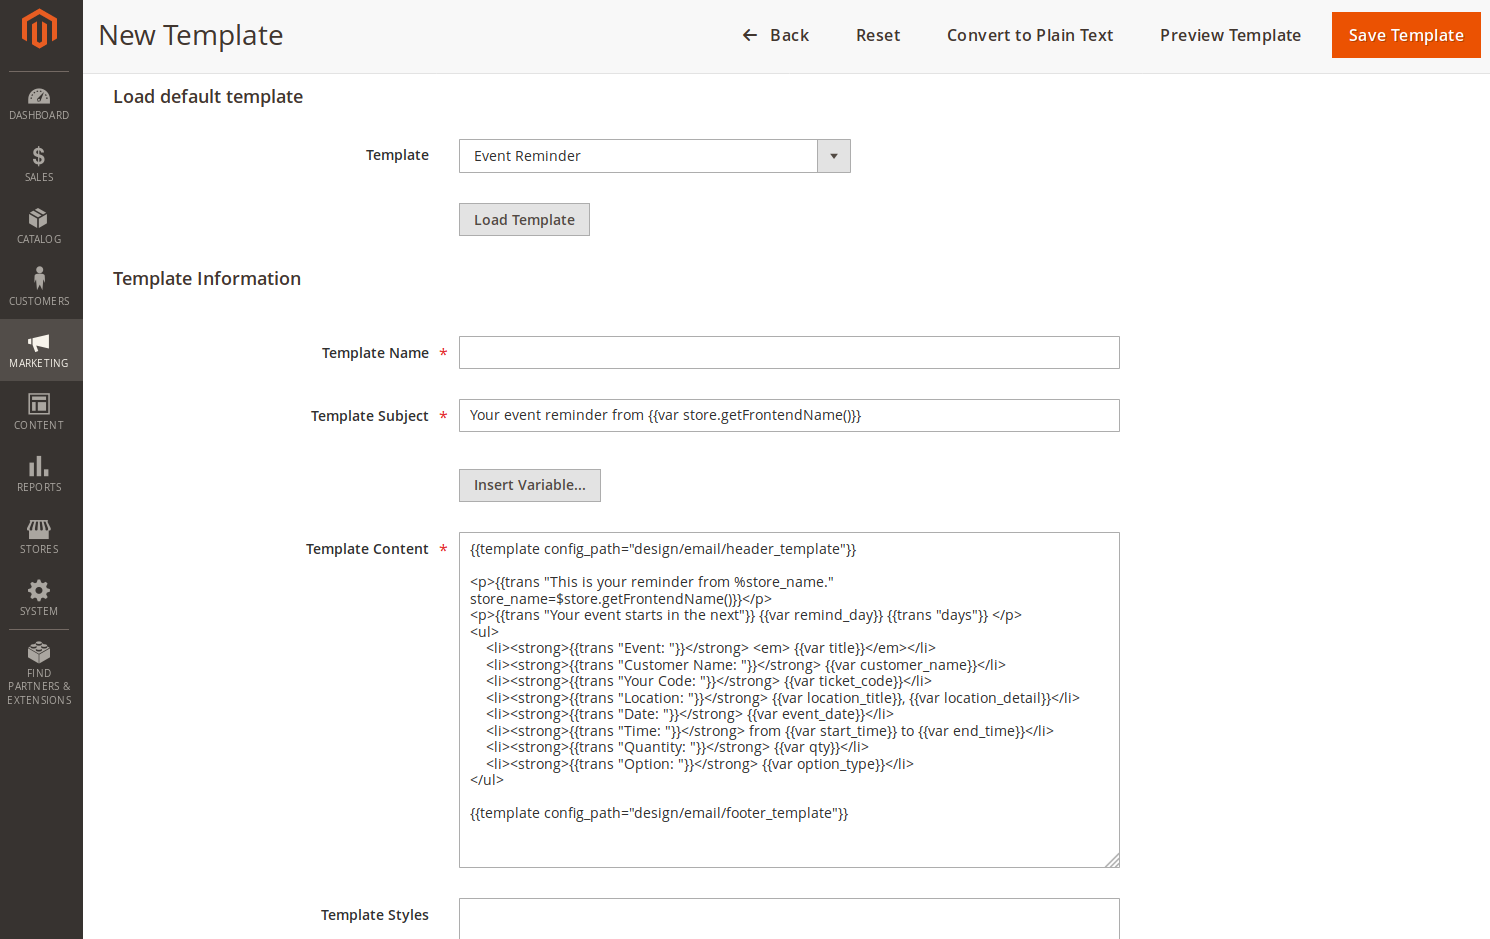
- Assign the email template to send a reminder email. You can create an email template in Marketing > Email Templates
Below is the default email template:
Email Template1
2
3
4
5
6
7
8
9
10
11
12
13
14
15
16{{template config_path="design/email/header_template"}}
<p>{{trans "This is your reminder from %store_name." store_name=$store.getFrontendName()}}</p><p>{{trans "Your event starts in the next"}} {{var remind_day}} {{trans "days"}} </p><ul><li><strong>{{trans "Event: "}}</strong> <em> {{var title}}</em></li><li><strong>{{trans "Customer Name: "}}</strong> {{var customer_name}}</li><li><strong>{{trans "Your Code: "}}</strong> {{var ticket_code}}</li><li><strong>{{trans "Location: "}}</strong> {{var location_title}}, {{var location_detail}}</li><li><strong>{{trans "Date: "}}</strong> {{var event_date}}</li><li><strong>{{trans "Time: "}}</strong> from {{var start_time}} to {{var end_time}}</li><li><strong>{{trans "Quantity: "}}</strong> {{var qty}}</li><li><strong>{{trans "Option: "}}</strong> {{var option_type}}</li></ul>
{{template config_path="design/email/footer_template"}}
![]() Event Top Menu
Event Top Menu
- Display event top menu in frontend: Select Yes to enable the event page in the menu bar on the front end
- Menu name: Enter the event name to display in the Menu bar
![]() After saving the configurations, please clear the cache to apply the changes.
After saving the configurations, please clear the cache to apply the changes.
...
Configurations
Create a new event
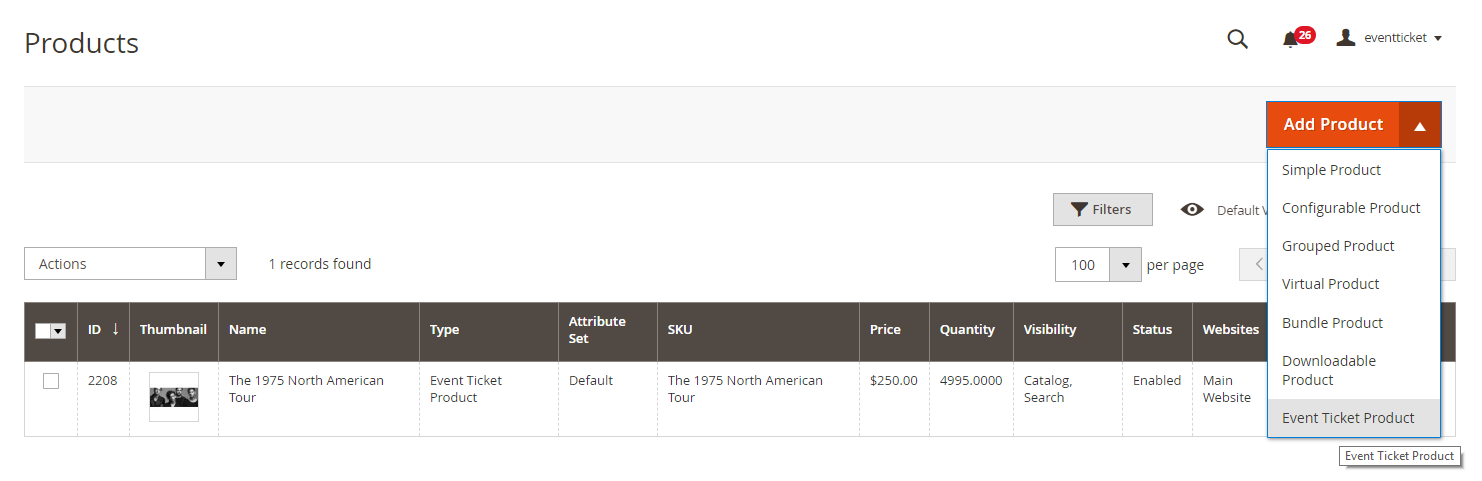
![]() In order to create a new event ticket, go to Catalog > Event Manager > EventThe extension added a new product type called Event Ticket Product into the system, so you need to add a new Event Ticket Product type to get started.
In order to create a new event ticket, go to Catalog > Event Manager > EventThe extension added a new product type called Event Ticket Product into the system, so you need to add a new Event Ticket Product type to get started.
In each product details, there is an Event Ticket settings
...