...
Updated: 13/04/2020 | By: Magenest | Email: [email protected] | Support portal: http://servicedesk.izysync.com/servicedesk/customer/portal/151
| Table of Contents |
|---|
...
Introduction
Banner Slider for Magento 2 lets merchants create and use sliders as banners on product listing pages. This allows you to promote your content and navigate traffic on your website.
...
Magento Open Source 2.1.x, 2.2.x, 2.3.x
Magento Commerce 2.1.x, 2.2.x, 2.3.x
...
Configuration
On ![]() On the Admin sidebar, tap click on Slider, then choose Manage Slider.
On the Admin sidebar, tap click on Slider, then choose Manage Slider.
On ![]() On the Slider Page, the customer can manage the available slider or create a new one.
On the Slider Page, the customer can manage the available slider or create a new one.
Then ![]() Then on the New Slider Page:
Then on the New Slider Page:
- Enable the slider/ banner.
...
- Choose the type for the banner. There are 3 types: Banner, Single Slider, 2 Sliders - Slider Sync.
On ![]() On the quick preview box: This section allows the customer to decor and style the banner/ slider up to their choices.
On the quick preview box: This section allows the customer to decor and style the banner/ slider up to their choices.
 If you choose the Banner typetype:
There are two ways to add a new banner. You can create a new banner, or import one.
 Click on the Add New Slider button on the Manage Banners/Sliders page
Click on the edit icon beside each title to configure for each part of the banner on the Setting box on the right side.![]() On
On
...
Banner Configuration box
- Click on the Edit icon next to Banner, you'll see the Style Configuration box. You could add custom CSS there to style your new banner.
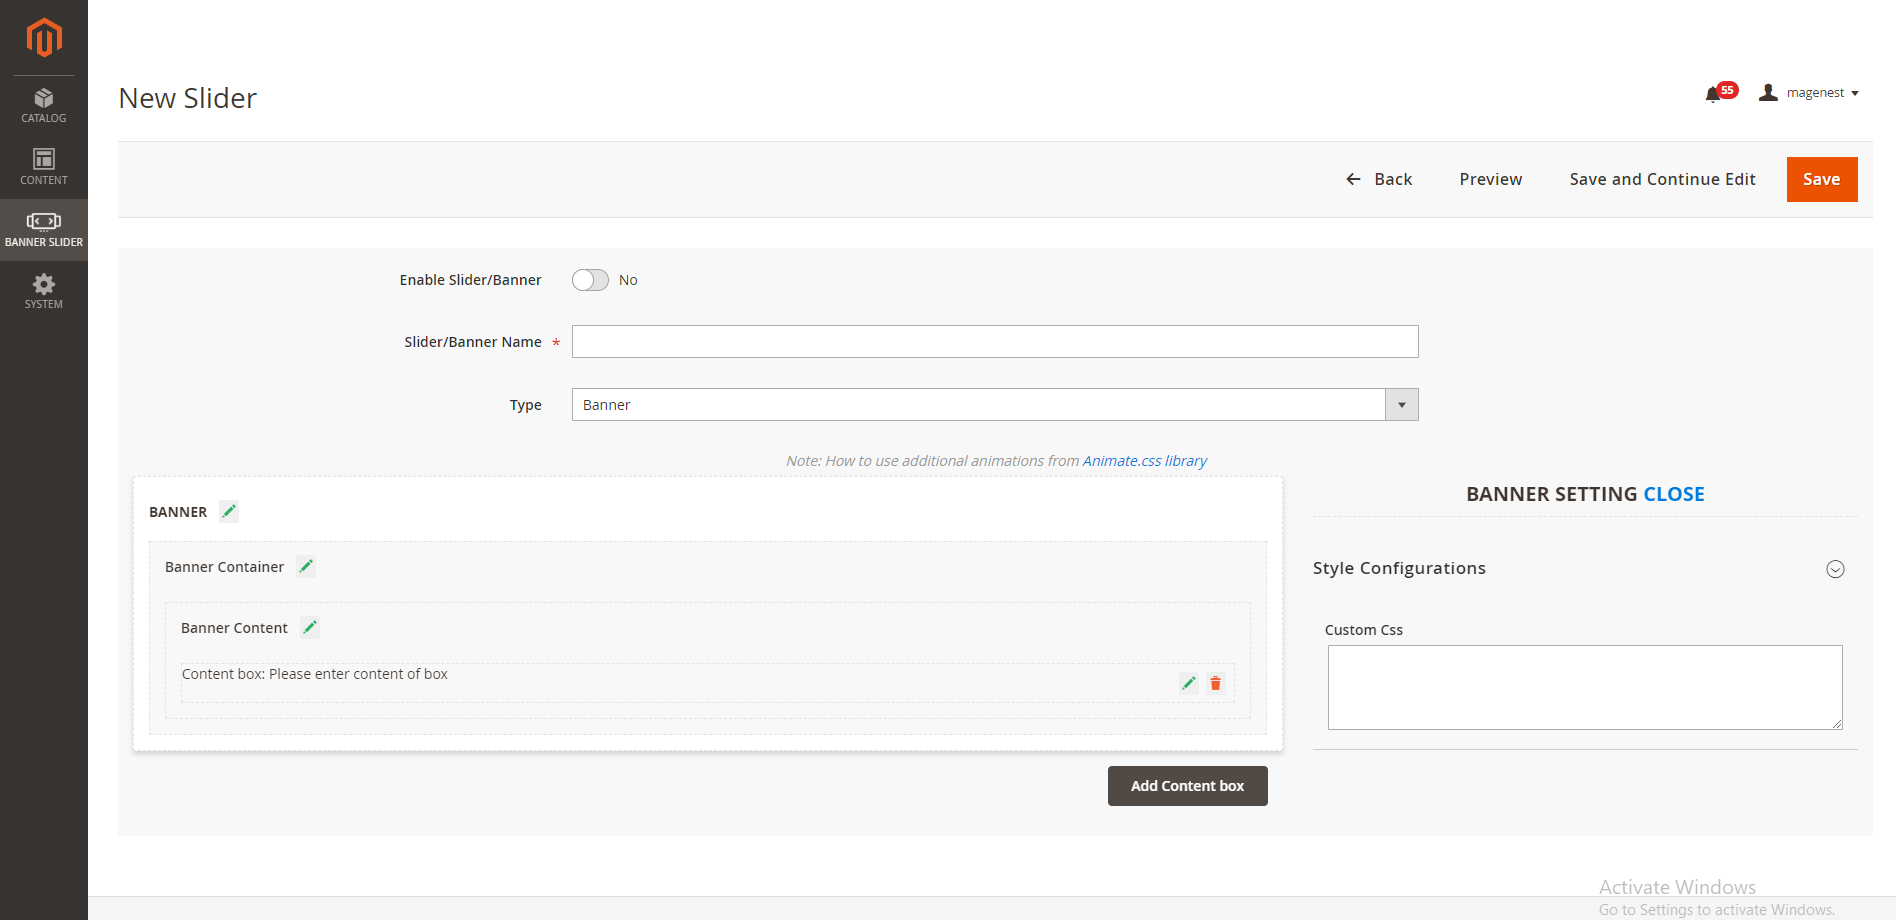
![]() If you do not have a CSS banner available, you could add it with the Banner Container configuration feature.
If you do not have a CSS banner available, you could add it with the Banner Container configuration feature.
- Click on the Edit icon next to the Banner Container
- Customer

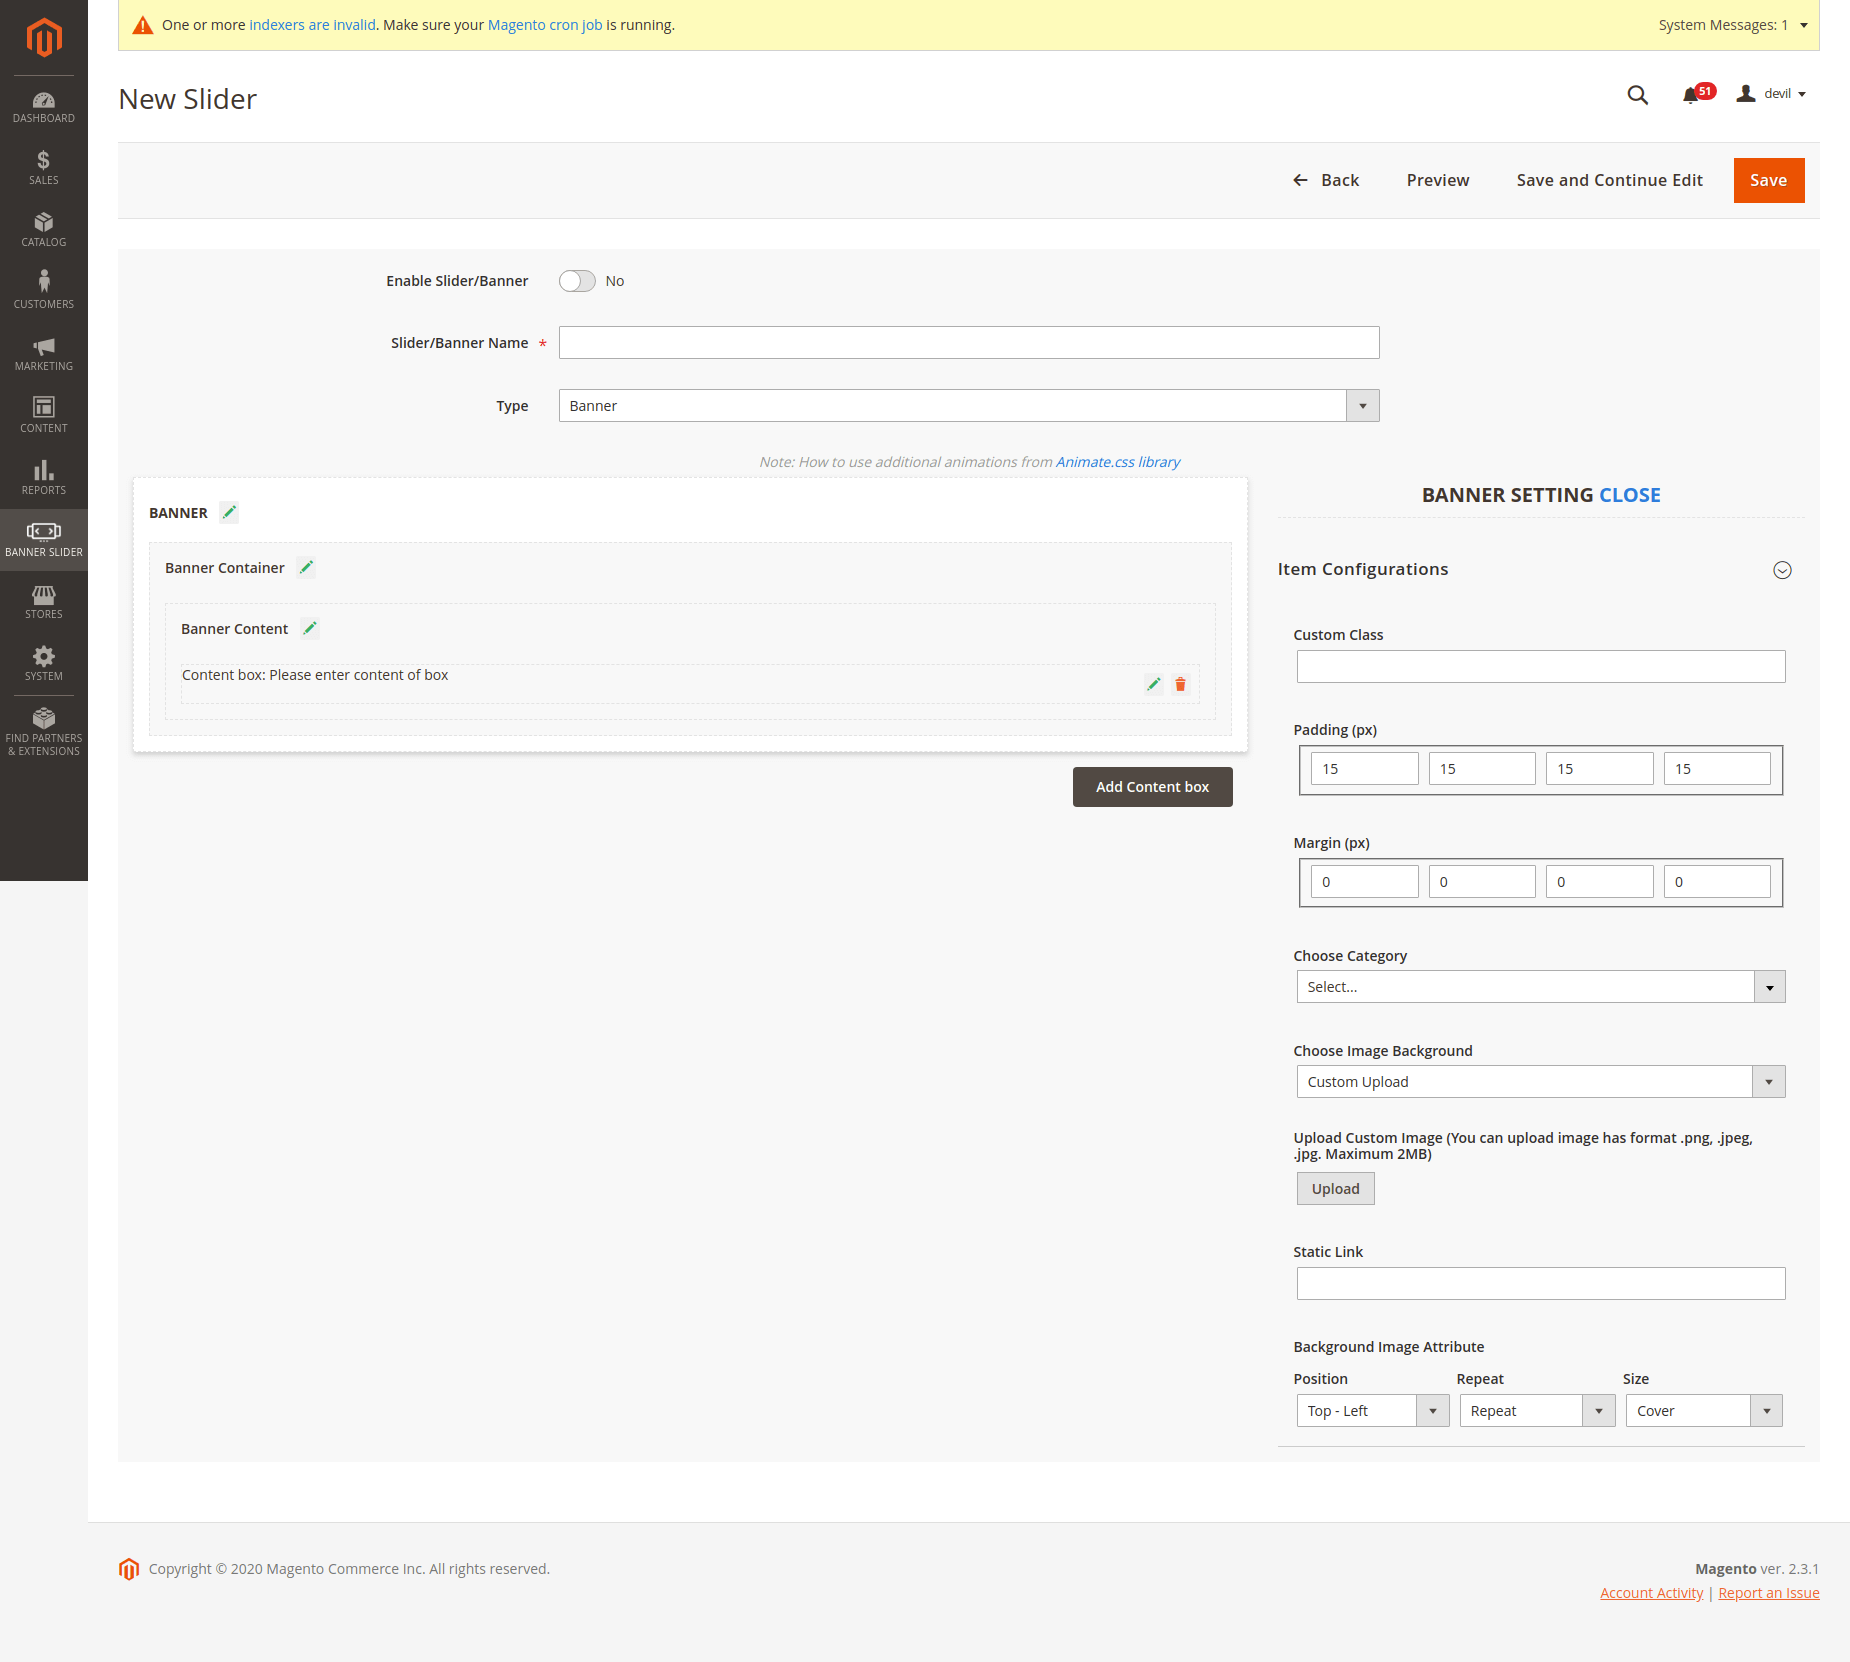
![]() On Item Configuration:
On Item Configuration:

- Custom Class: enter the name of the custom class which is defined on the Style Banner Configuration.
- Padding and Margin section, adjust the dimension for of the banner padding and margin according to fit your requirement. Then see the effects for your changes on the demo banner on the left side.
- Choose Category: select one category on the drop-down list to get data for the banner.
- Choose Image Background:
- If you choose Category, the image of the selected Category above will be set as a banner background.
- Choose Custom Upload to upload a new background image for the banner.
...
- Please note that you can only upload the image with png, .jpeg, .jpg. format with the maximum size of 2MB
- Static link: You can fill in a URL under the http/https format to redirect users to an external link when they click on the banner
![]() On Banner Content Configuration:
On Banner Content Configuration:

- Size: Set the size of the banner
- Padding and Margin section,
- Background Image Attribute: set the attribute for the background image. You can see the effect of each setting on the demo banner.
![]() On Item Content Configurations
On Item Content Configurations

- Size: adjust the dimensions for the height and width of the item content box. You can choose the unit on the right.
- Padding and Margin: adjust the dimension for the banner padding and margin of the item content box to fit your requirement. Then see the effects for each of your change changes on the demo banner on the left side.
- Background Color
- Click on the color box and choose the color on the color board.
- Set the transparency on the opacity box beside.
- Choose the color of the banner background. You could also set the opacity of the background color.
- Position: You can set the banner content position as Left, Right, Center, or Custom. If you select Custom, you'll be able to set the banner margin freely.
- Animation: Choose banner animation. There is a wide range of options for you to select according to your needs
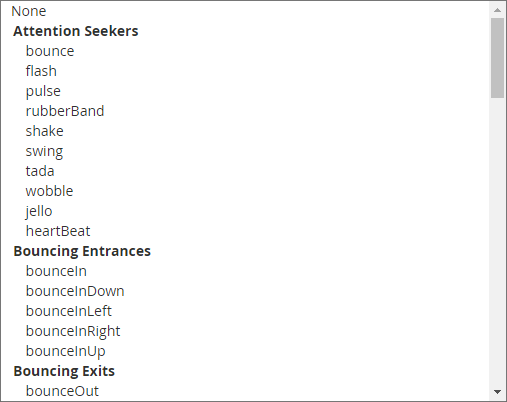
- Animation Delay: Set the time (per second) to delay the banner's effectThen set the Position and Animation for the item content box on the banner.
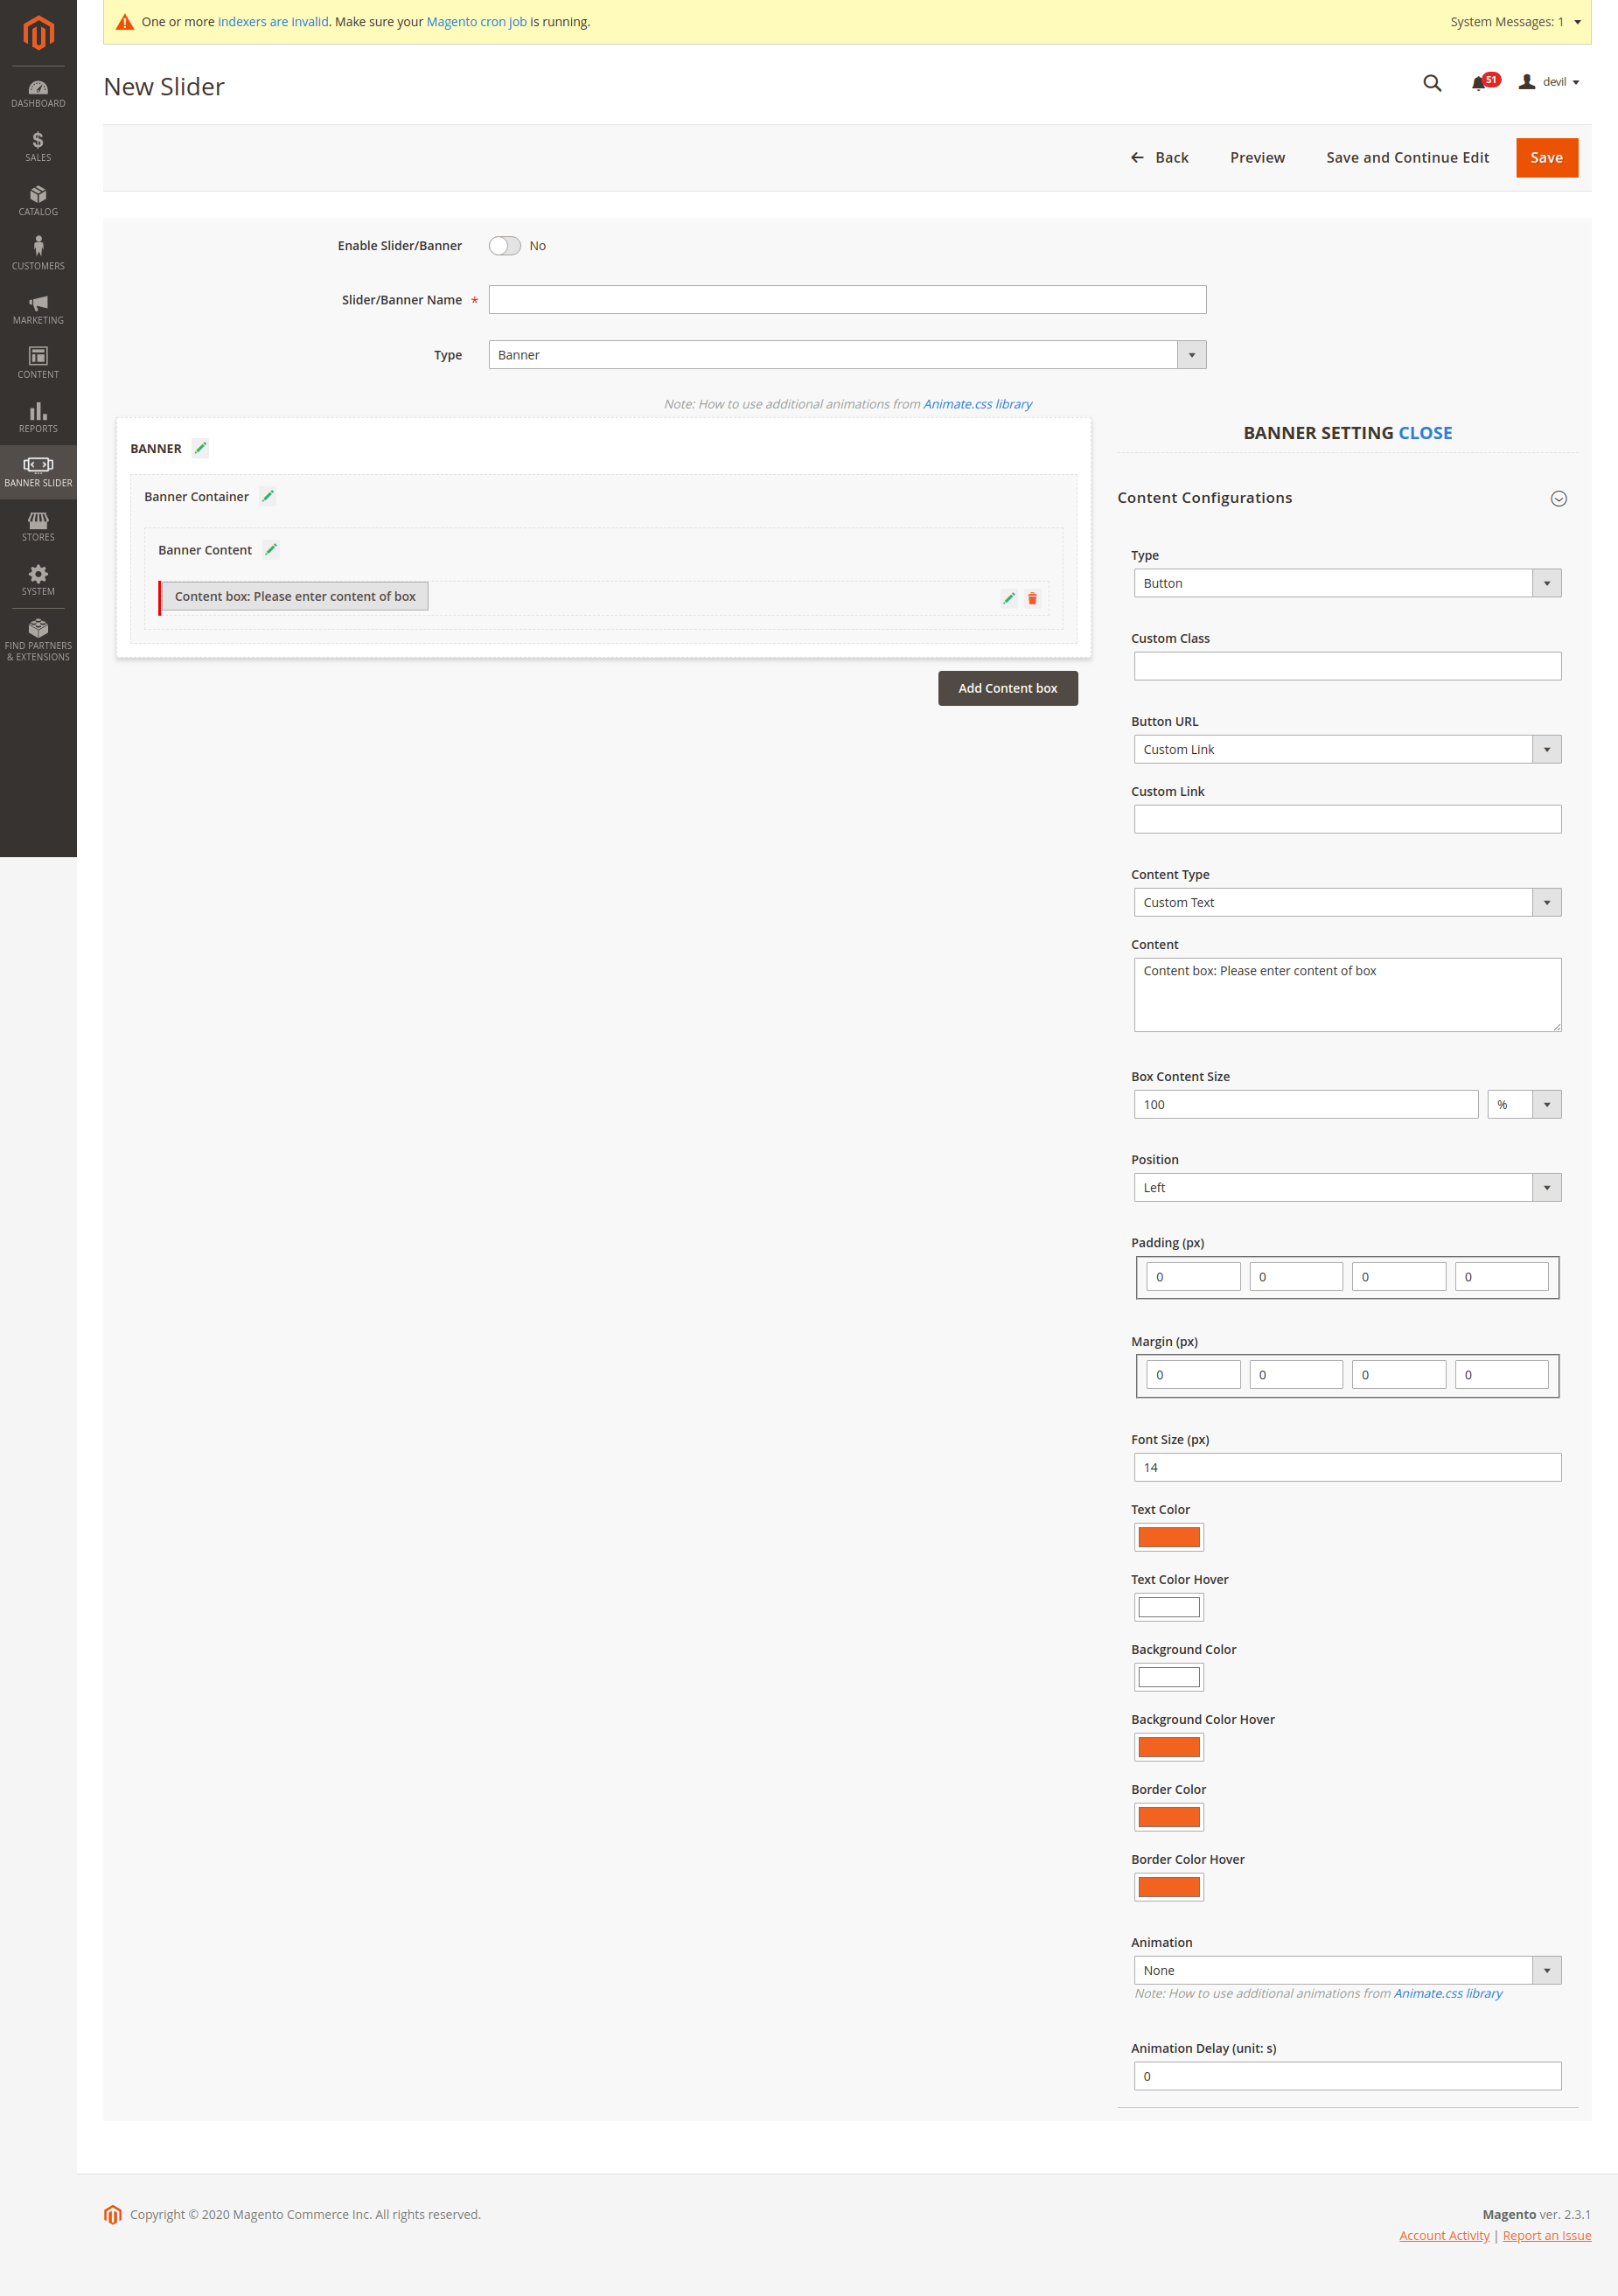
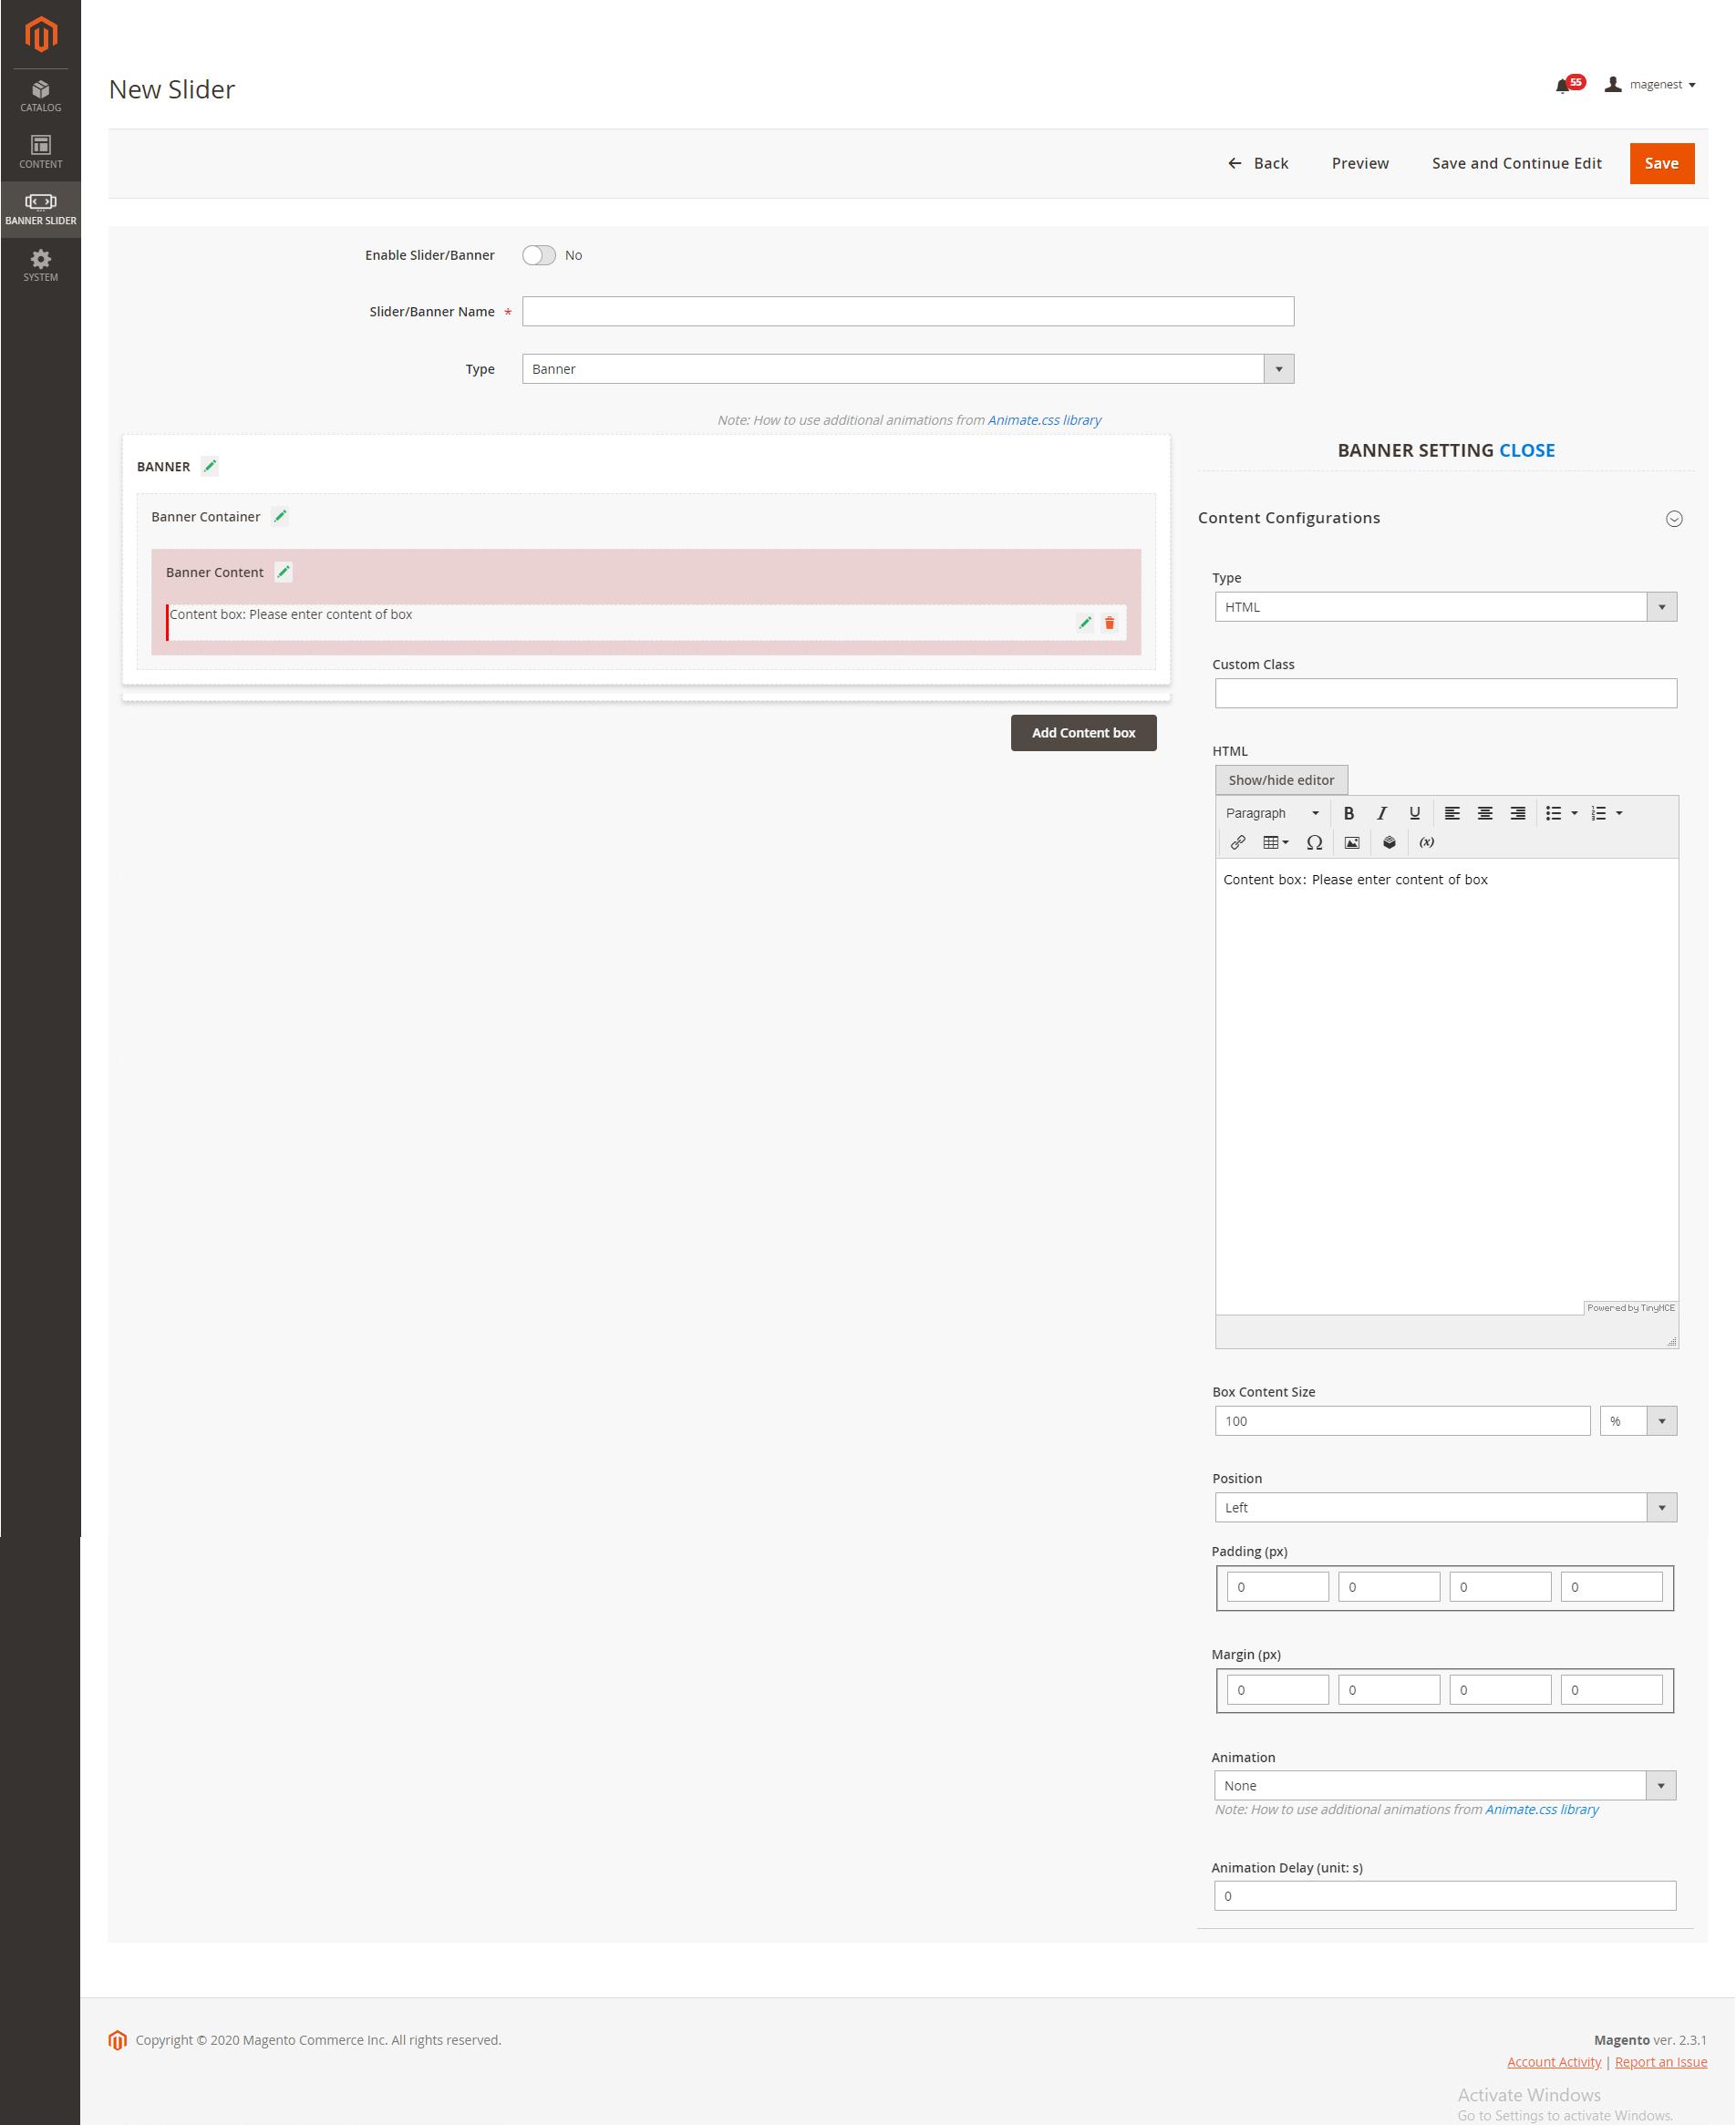
![]() On Content Box Configurations
On Content Box Configurations
If you click on the Content Configuration

- Type: there are three types of content: button, text, HTML.
- Custom Class: enter the custom class which is defined on the Style Configuration.
- Then configure for the content type that you selected.
- To add more content box, click on the Add Content box button under the style box then choose the type for the new content box. Then set the configuration for it.
![]() Note:
Note:
- The change for each setting on Content Configuration will not be displayed on the quick preview box to avoid the layout broken.
Edit icon in the Content box, you'll be able to configure the content.
- Type: You can select Button, Text or HTML
- If you select Button, you'll be able to edit the banner button according to the image below
- If you select the Text type, you'll be able to configure the banner text like the image below
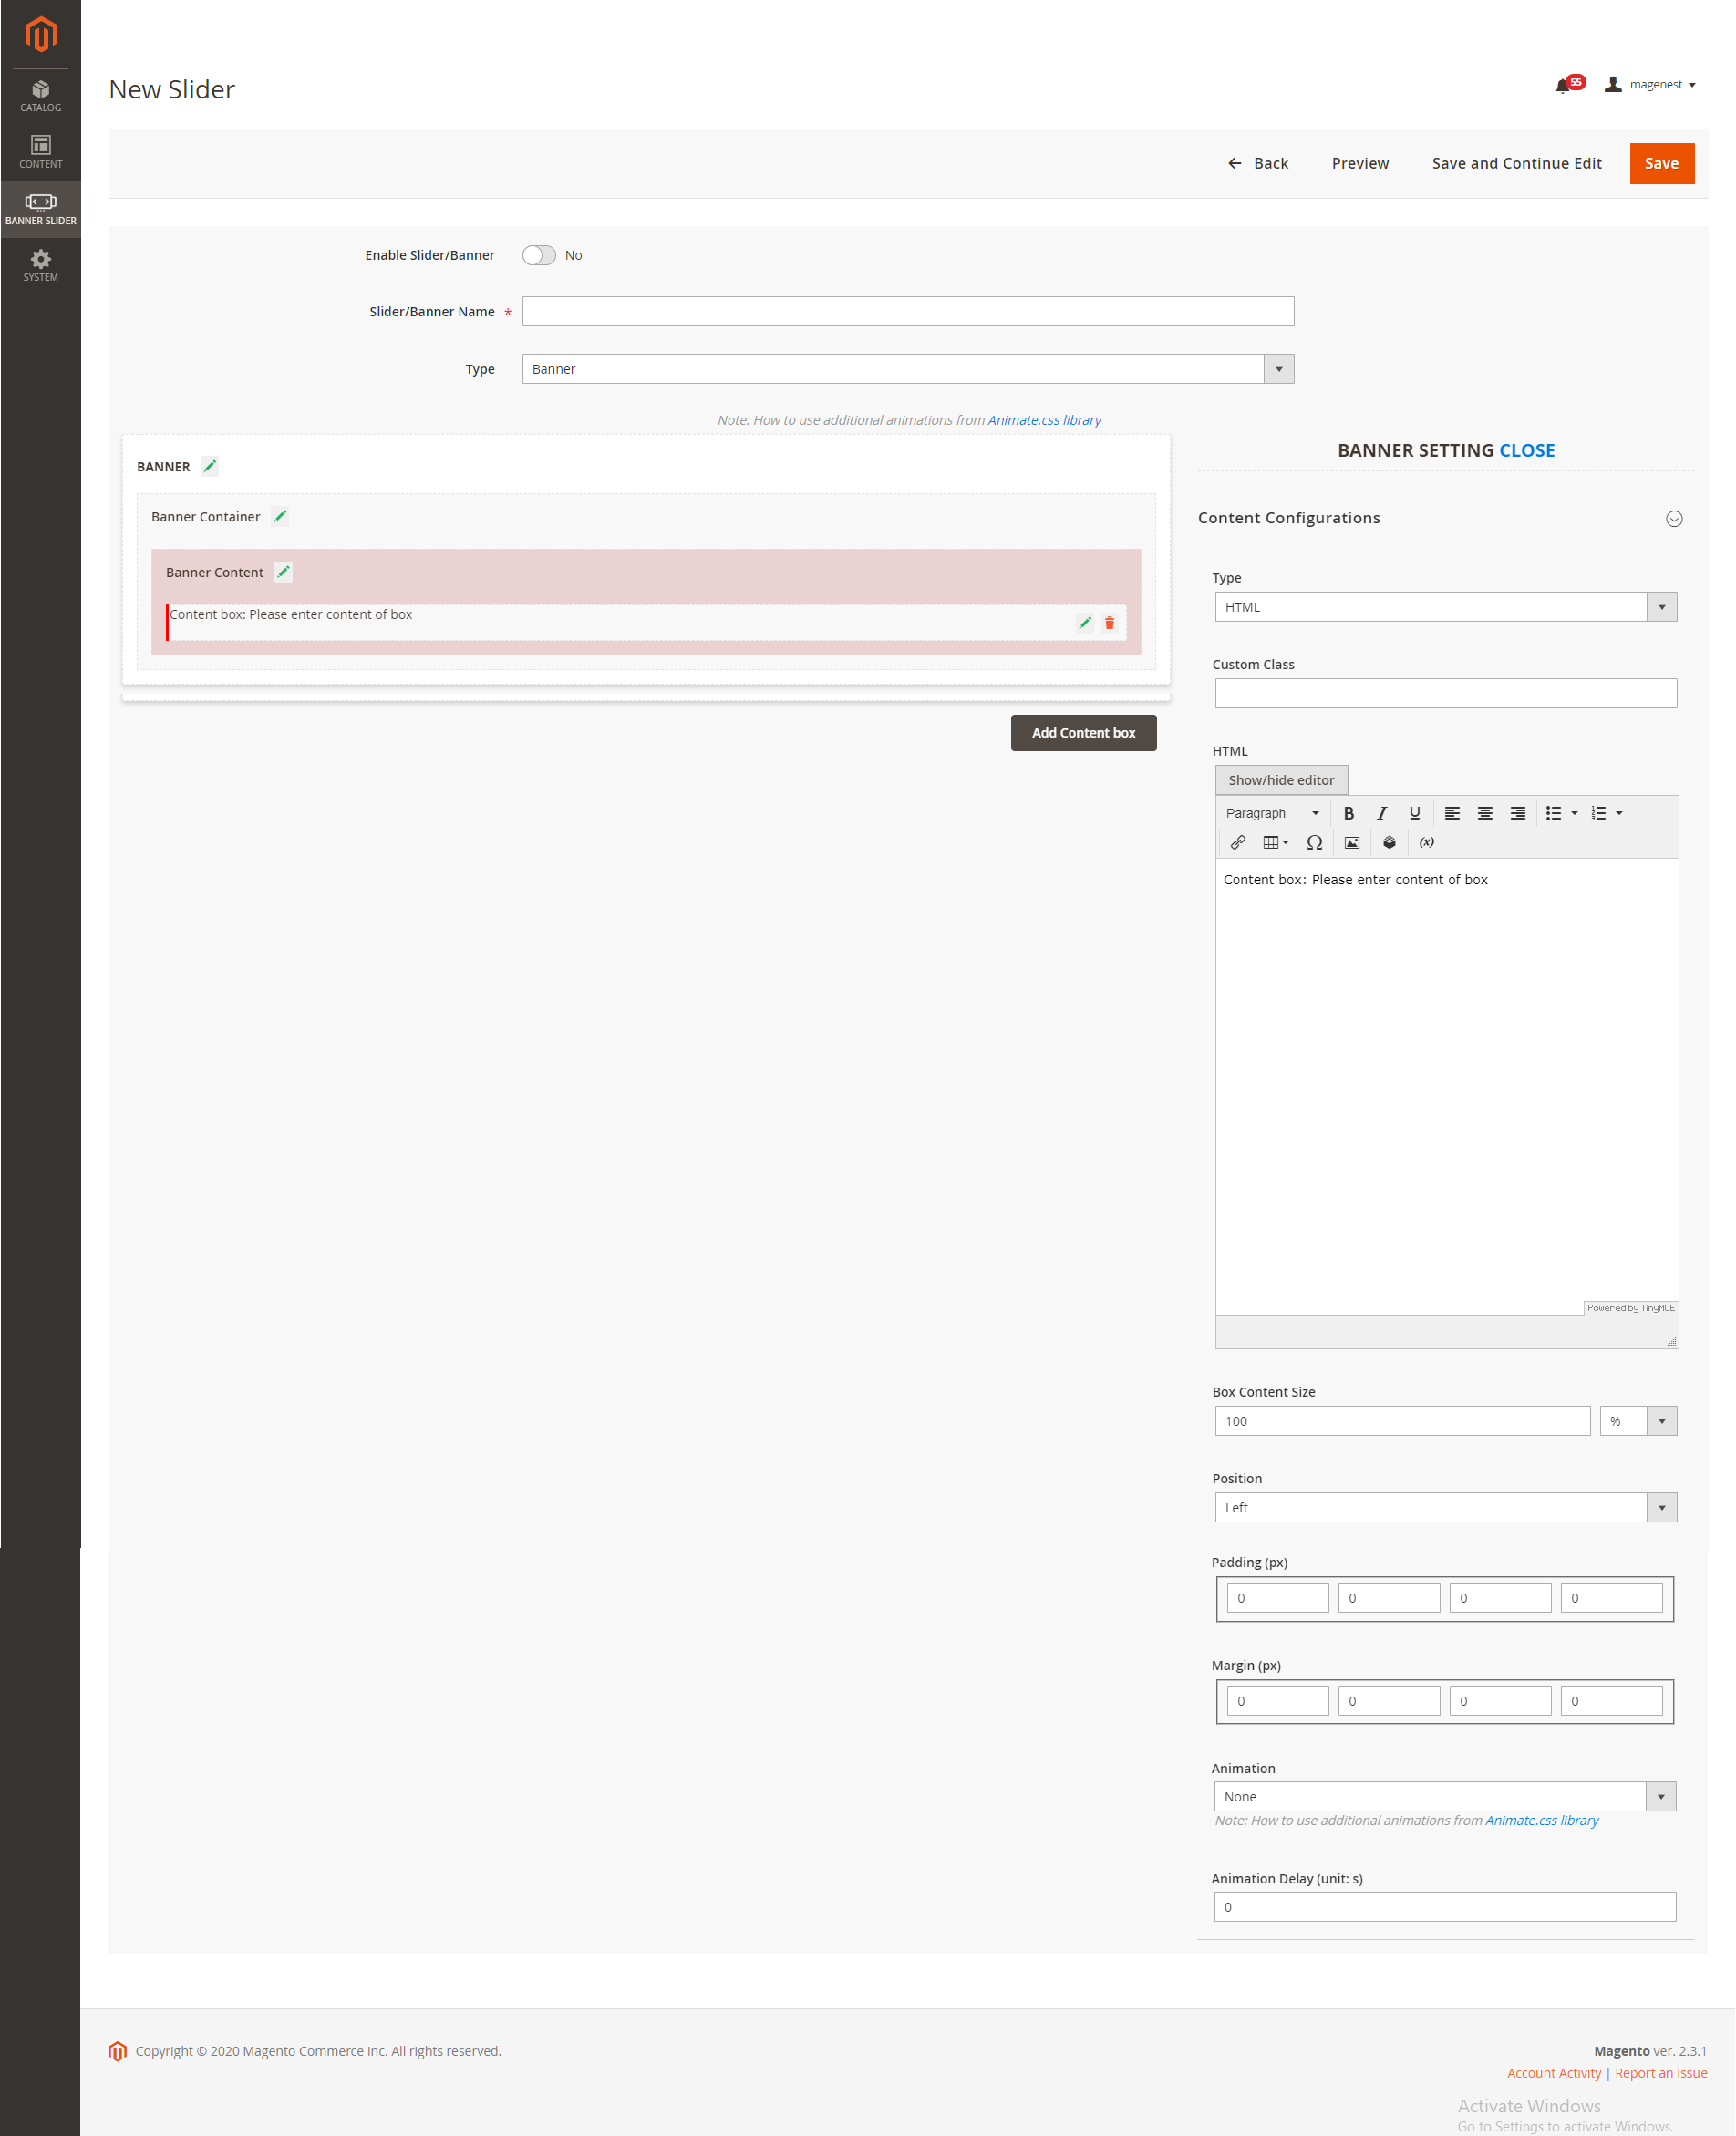
- If you select the HTML type, you can add the banner HTML and configure it like the image below
Click on the Import button to import a banner template
...
- Import cvs or xml file
- Download Sample File: You can have 10 sample templates with wellattrating-design layouts.
If you choose the Single Slider type:
...
On Storefront
- Banner
- Single Slider

...
See more in here
- 2 Sliders - Slider Syncing
...
- We will reply to support request within 2 business days.
- We will offer lifetime free update and 6-month free support for all of our paid products. Support includes answering questions related to our products, bug/error fixing to make sure our products fit well in your site exactly like our demo.
- Support DOES NOT include other services such as customizing our products, installation and uninstallation service.
...