...
Configuration
![]() On the admin sidebar, go to Shop By Brand > Settings to set the general configuration for the extension. On the Configuration page:
On the admin sidebar, go to Shop By Brand > Settings to set the general configuration for the extension. On the Configuration page:
General
This section contains the setting for the brands on the main menu and product pages.
- Add Brands page Link to Main Menu: Choose Yes to add Brands tab on the main menu.
- Menu Title: Enter the name of the brands tab on the main menu. The default title "Brands" will be shown if this field is left blank.
- Display brand icons in product listing: Choose Yes to display the brand icon on each product on product listing page.
- Show brands in product page: Select a layout for the brand information on product detail page. There are four options: No, Brand name only, Icon only, Brand name and icon.
Brands Page
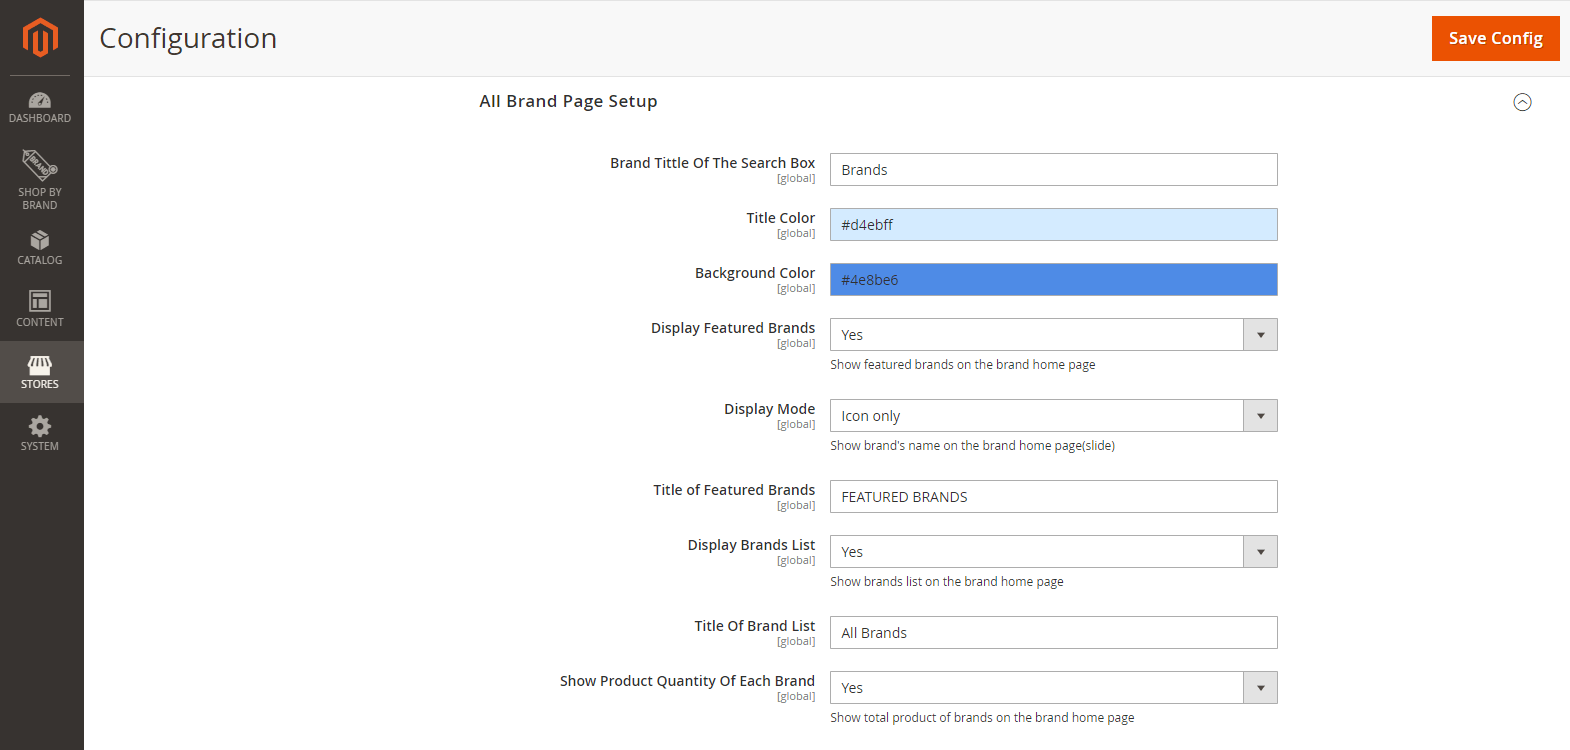
In this section, admin can set the layout for the brands list page.
- Brand Tittle Of The Search Box: Set the title for the brand-search box.
- Title Color: Set color for the search box title.
- Background Color: Set color for the brand-search box.
- Display Featured Brands: Choose Yes to display the most-popular-brand list on Brands page.
- Display Mode: Select the layout for the brands on featured brands list. There are 2 options: Icon only and Brand name and icon.
- Title of Featured Brands: Enter the title for the featured brands list.
- Display Brands List: Choose Yes to enable the list of all brands.
- Title Of Brand List: Enter the title for all-brand list.
- Show Product Quantity Of Each Brand: Choose Yes to display the items quantity on each brand icon on all-brand list.
Brand Detail Page Setup
This section contains the settings for brand detail page.
- Display Features Products: Choose Yes to enable the featured products list on the brand detail page.
- Title Of Featured Product: Enter the title for the featured products list.
SEO Settings
This section contains the Search Engine Optimization settings for the brands page.

![]() After finishing, click on Save button to save the configuration.
After finishing, click on Save button to save the configuration.
Key Features
For admin
- Show featured brand list and featured product list
- Add short description and detail description for brand
- Set image for brand logo and banner on brand page
For Customers
- View brands on brands page, brand detail page, product list and product detail page
- View detail information of a brand on the brand detail page
- View featured brands and featured product list
- View the number of product on each brand
Configuration
On the admin sidebar, go to Shop By Brand > Settings to set the general configuration for the extension. On the Configuration page:
...
Manage Groups
Before creating new brands, admin need to create groups to classify the brands.
...
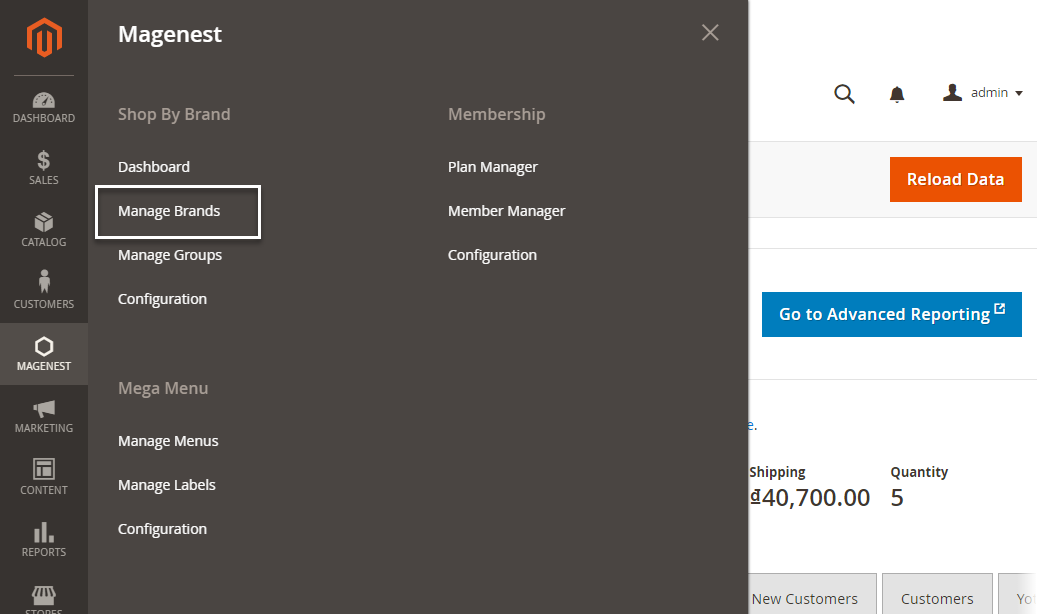
![]() On the admin sidebar, go to Shop By Brand > Manage Groups.
On the admin sidebar, go to Shop By Brand > Manage Groups.
...
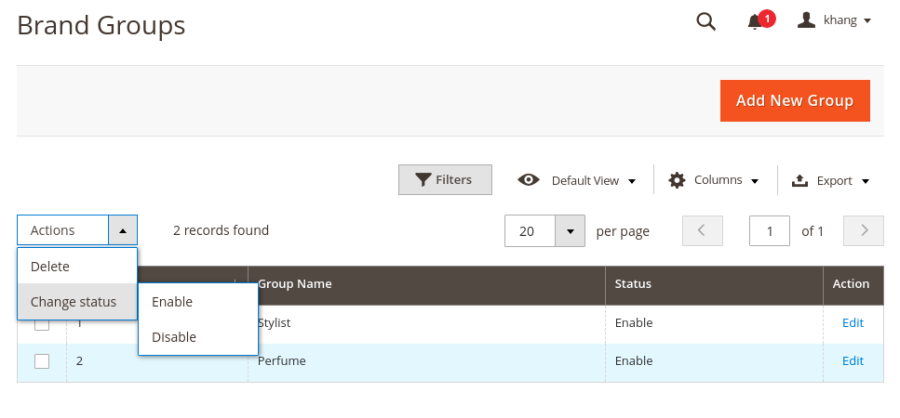
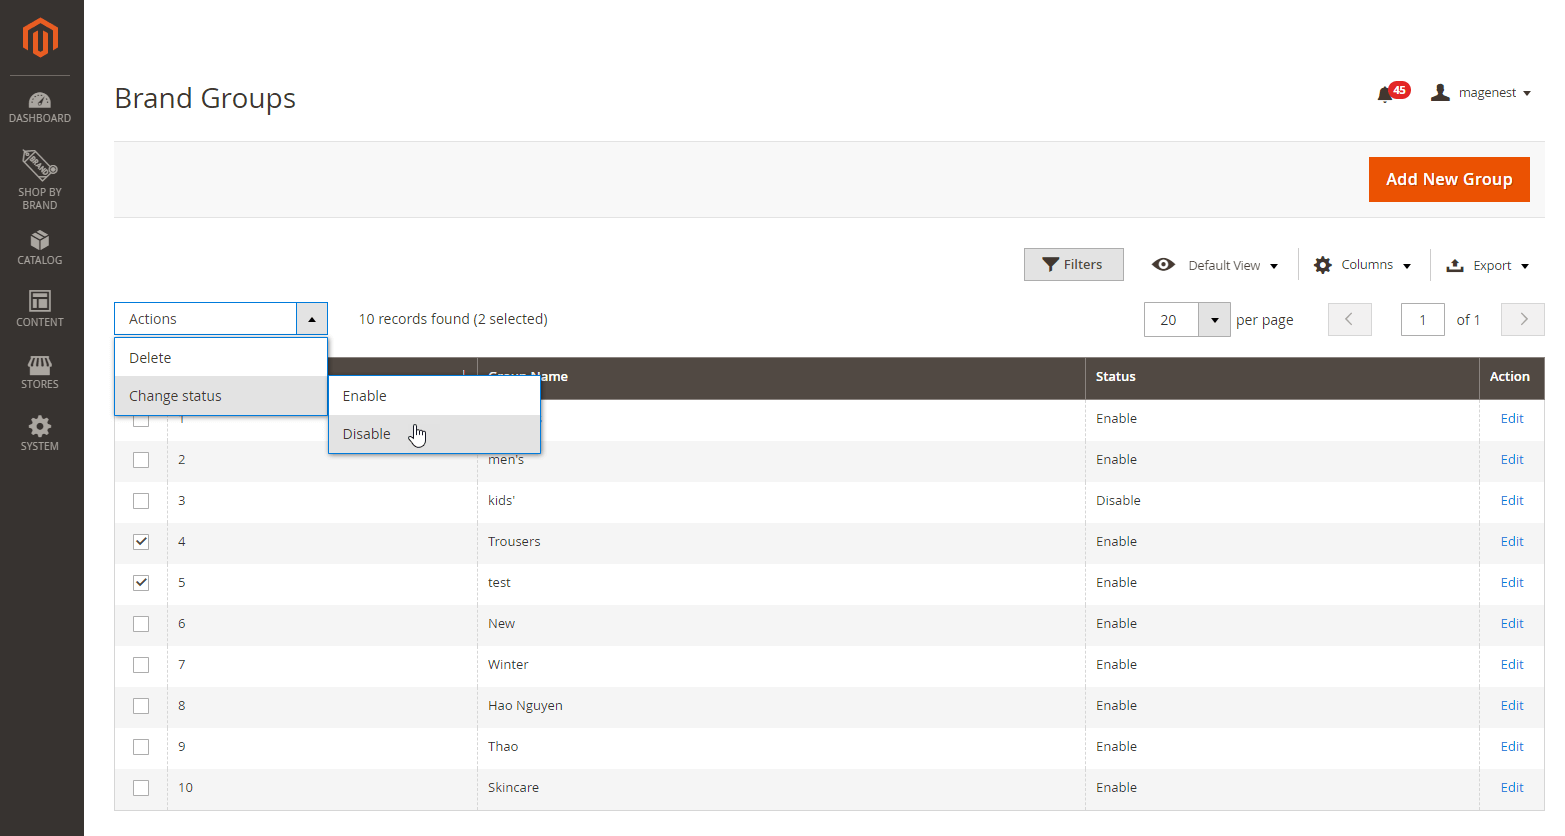
![]() On Brand Groups page, admin can delete or change status of the available groups.
On Brand Groups page, admin can delete or change status of the available groups.
...
![]() To create a new group, click on Add New Group button.
To create a new group, click on Add New Group button.
...
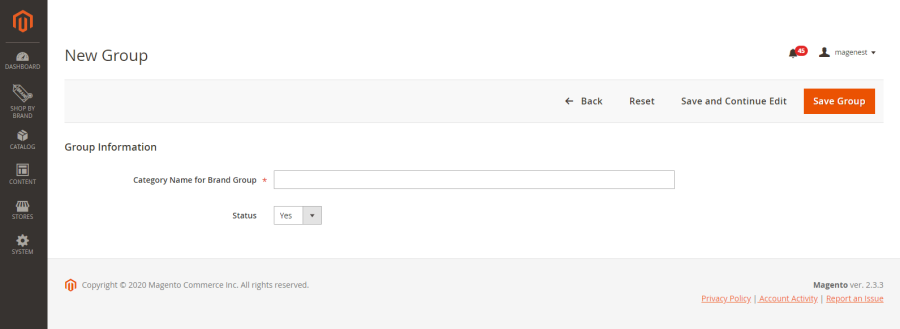
![]() On New Group page, set name and status for the new group. Then click on Save Group button to save.
On New Group page, set name and status for the new group. Then click on Save Group button to save.

...
Manage Brands
...
![]() On the admin site bar, go to Shop By Brand > Manage Brands.
On the admin site bar, go to Shop By Brand > Manage Brands.
...
![]() On the Shop By Brands page, admin can edit or delete the available brands on the list grid.
On the Shop By Brands page, admin can edit or delete the available brands on the list grid.
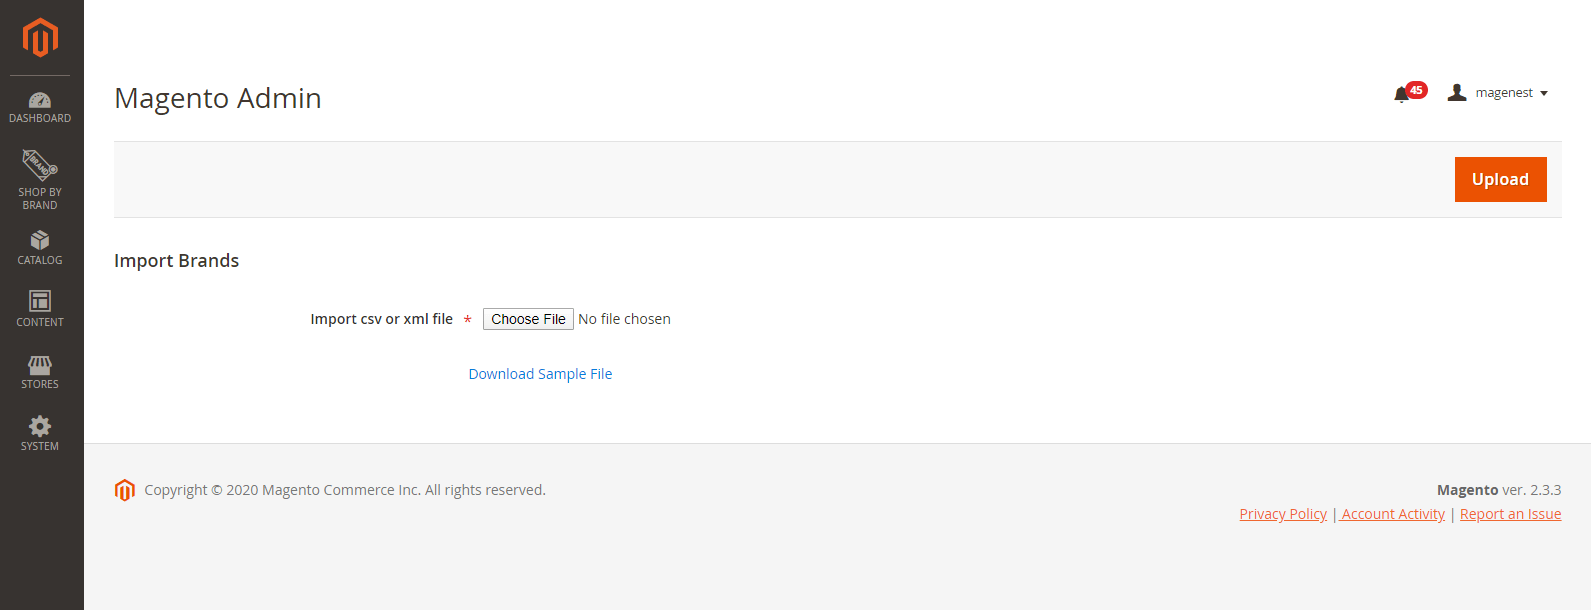
Import brands
- To import brands, click on Import button, go to Import Brands page.
- Click on Download Sample File to to download the sample file. Then fill in the file with brands information.
- Click on Choose File button and select the completed file to import.
- Click on Upload button, then the brands will be add to the store.
...
Create a new brand
To ![]() To create a new brand, click on Add New Brand button. On the New Brand page:
To create a new brand, click on Add New Brand button. On the New Brand page:
...
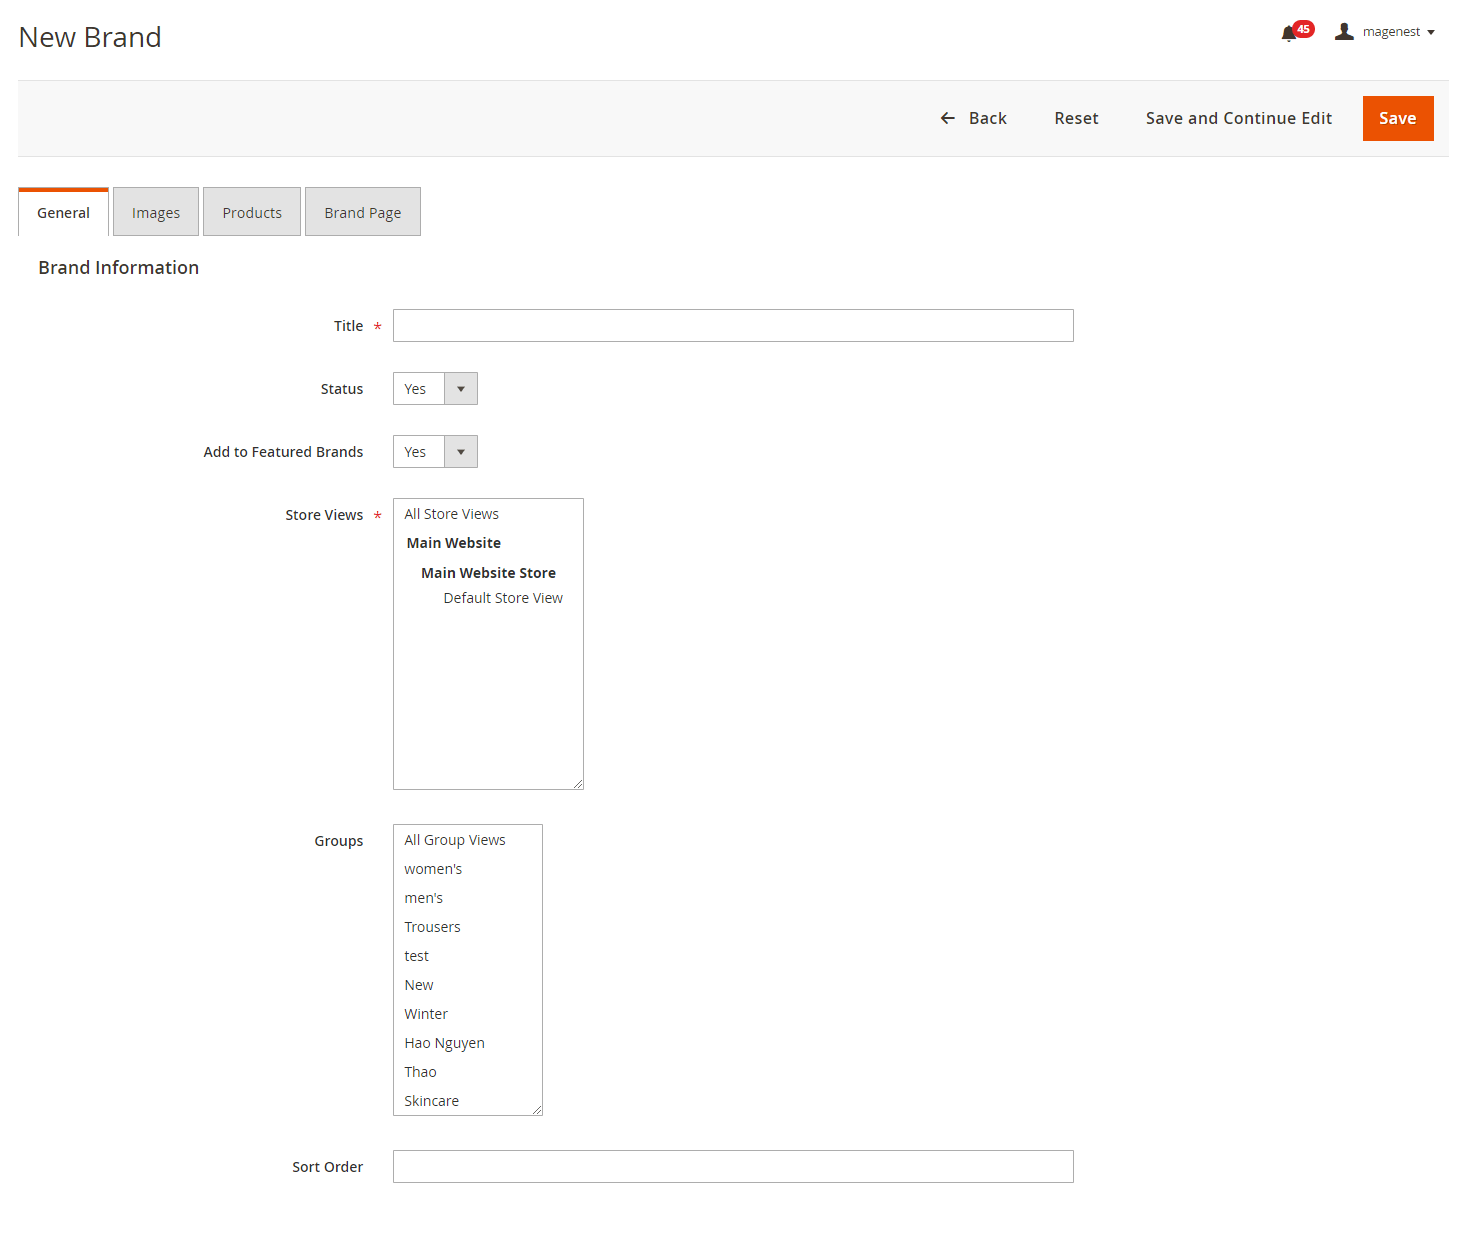
 General
- Title: Set a name for the new brand.
- Status: Choose Yes to activate the brand.
- Add to Featured Brands: If choose Yes, the brand will be added to the featured brands list.
- Store Views: Select a store view for the brand.
- Group: Assign the brand to one or several groups.
- Sort Order: set the brand position on the featured brands list.
 Note: If several brands are set in the same position, they will be arranged by alphabet order.

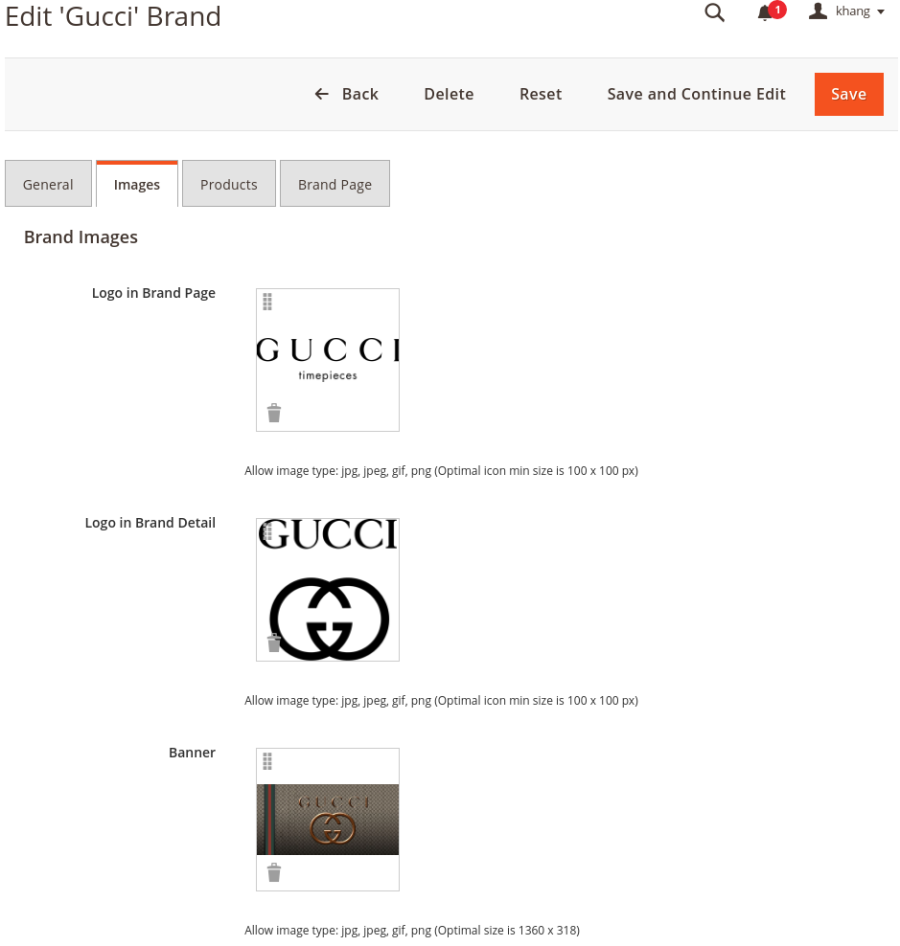
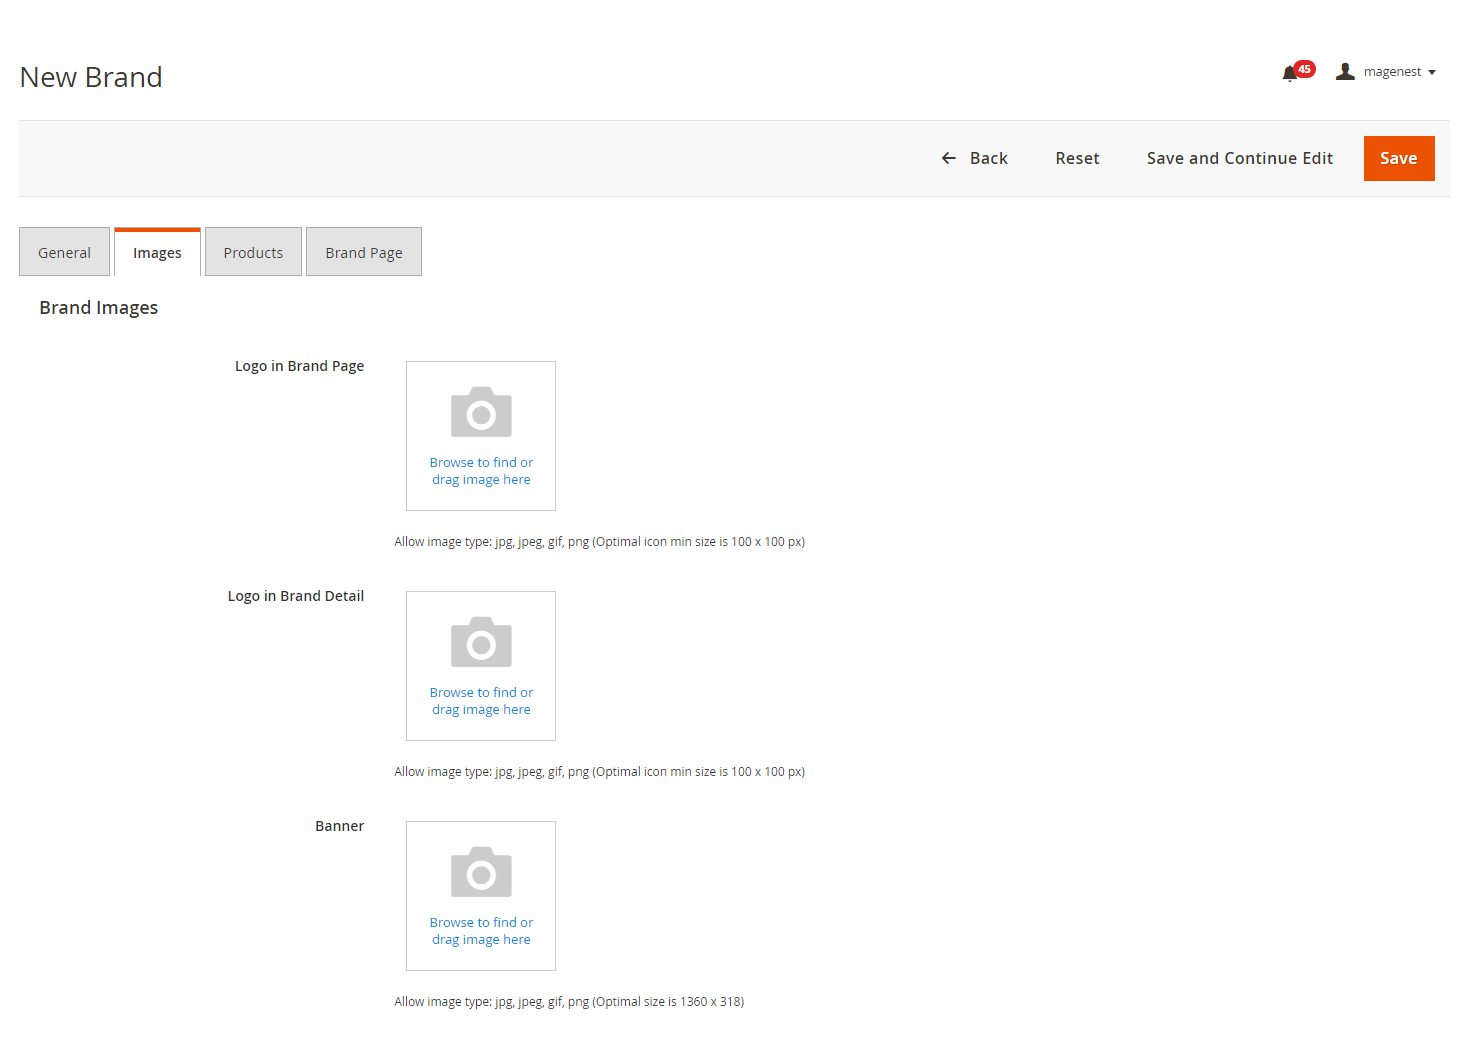
Images
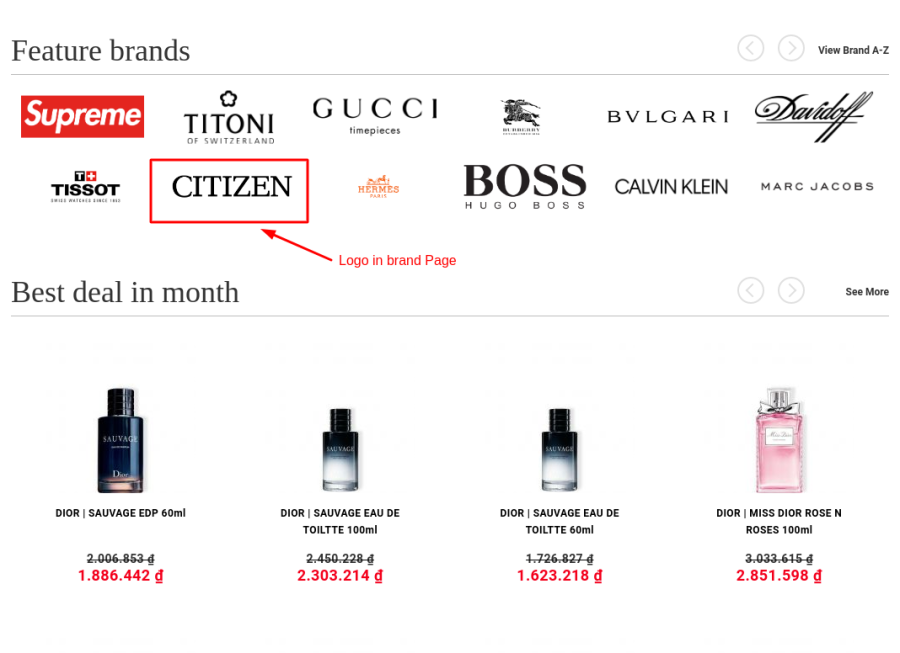
- Logo in Brand Page: Set the brand logo on brands page.
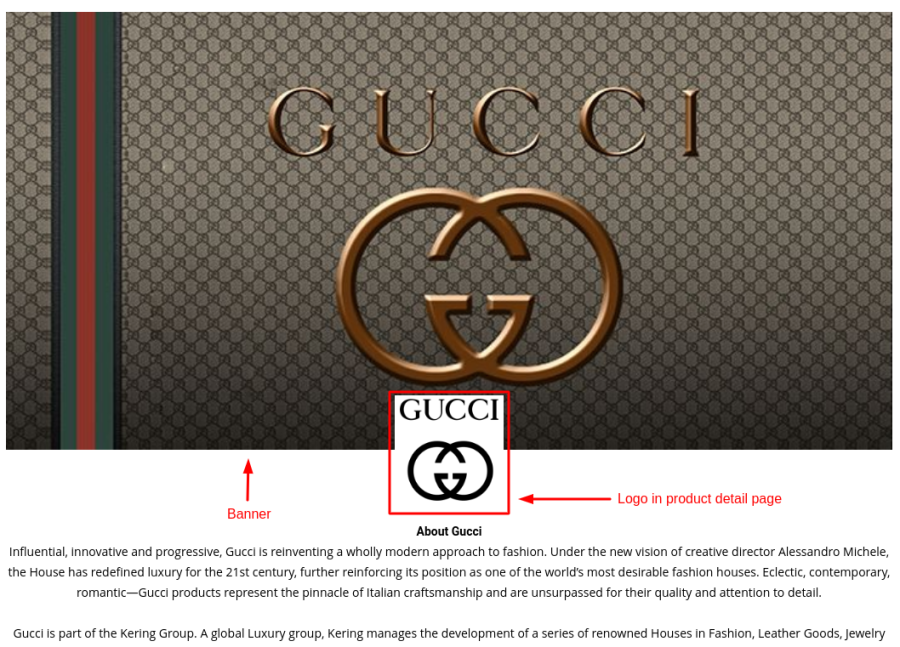
- Logo in Brand Detail: Set the brand logo on the brand detail page.
- Banner: Set the banner on the brand detail page.
- Front-end layout
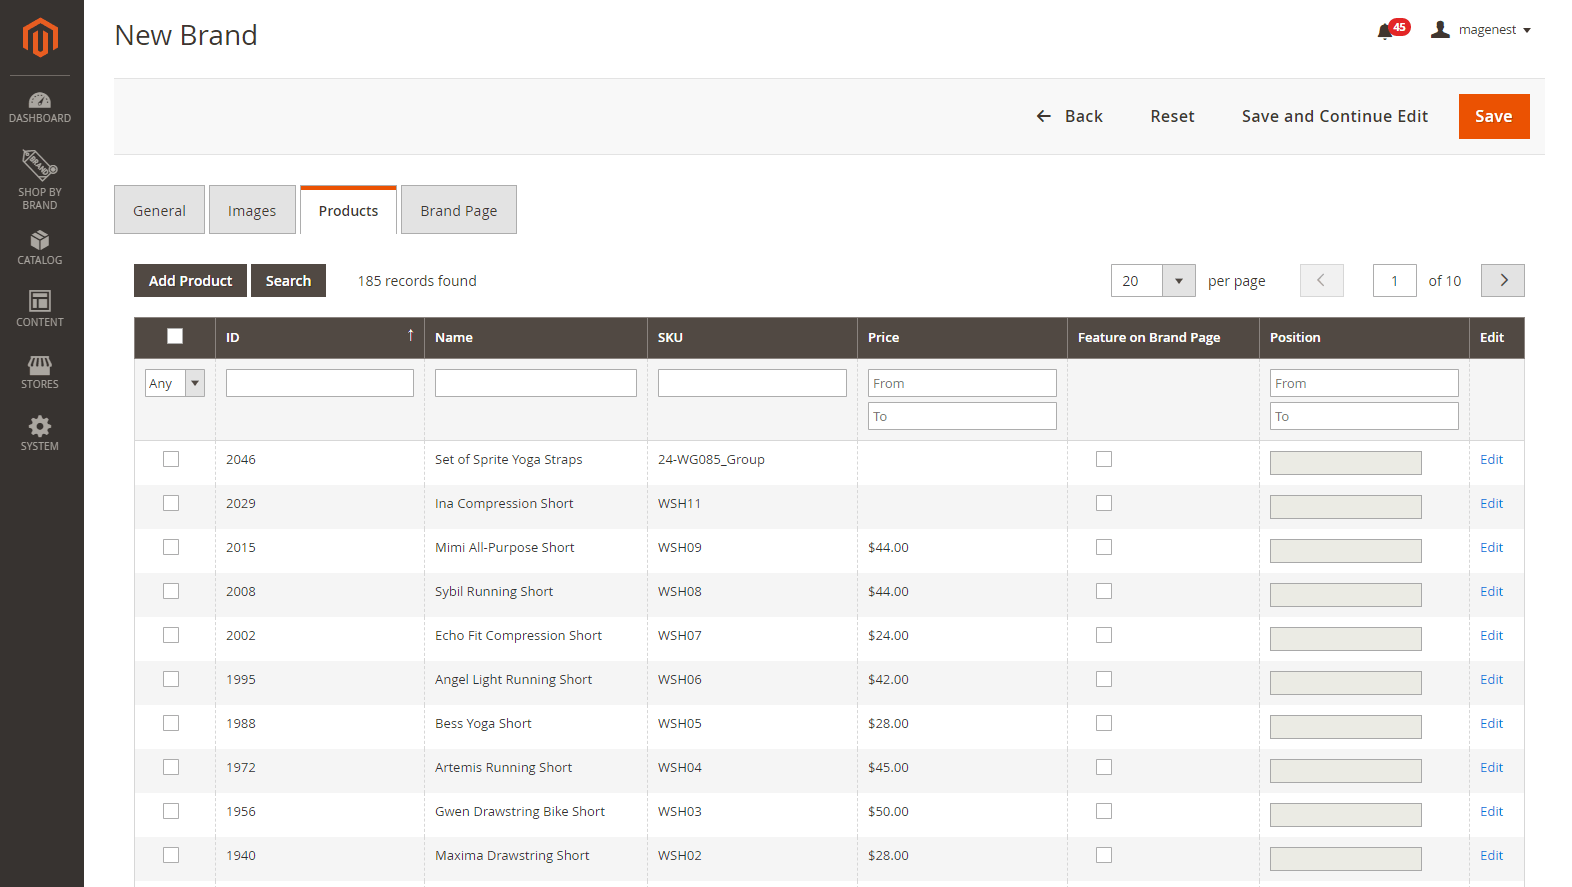
Products
Products
Select products to add to the new brand.
When editing a brand, in case admin want to add more products to the available list, click on Add Product button then select products to add.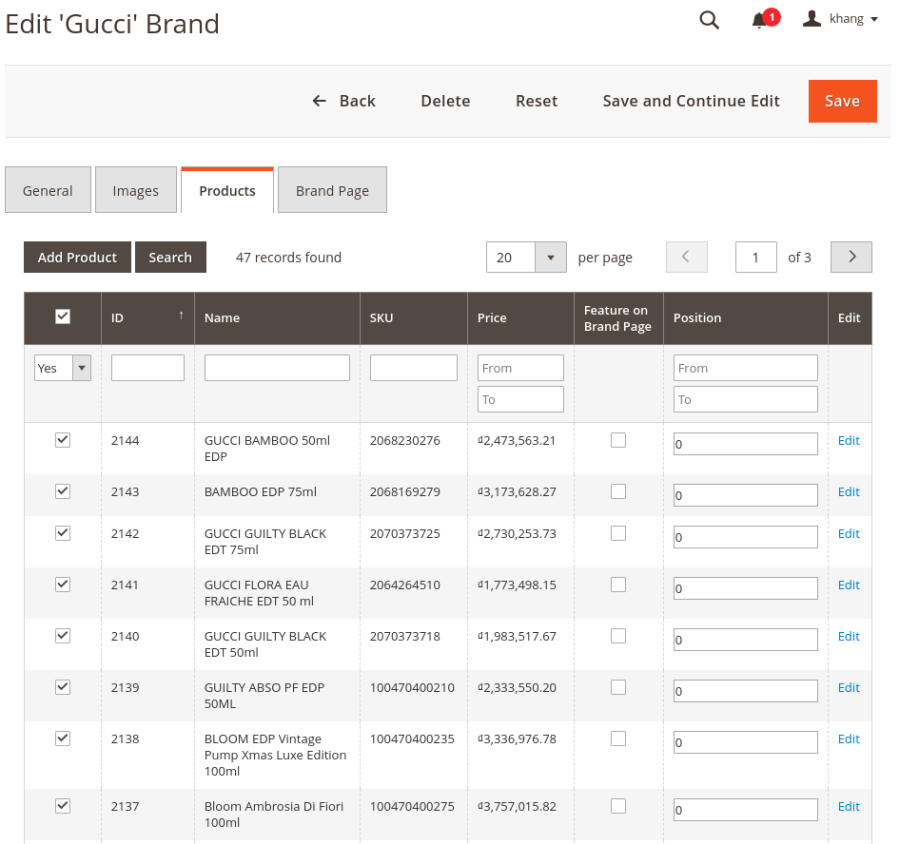
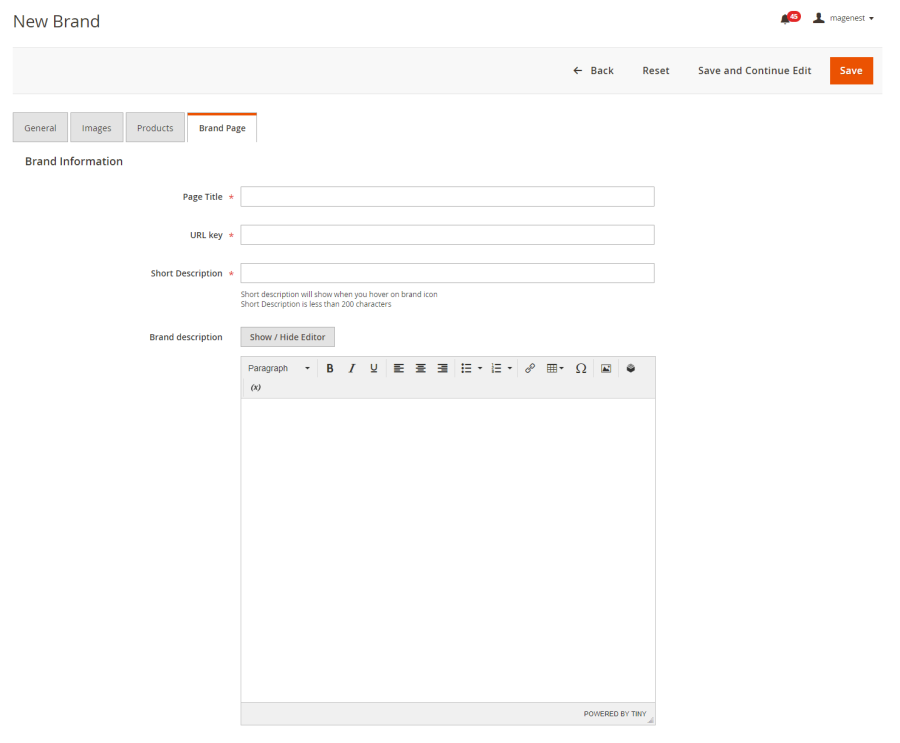
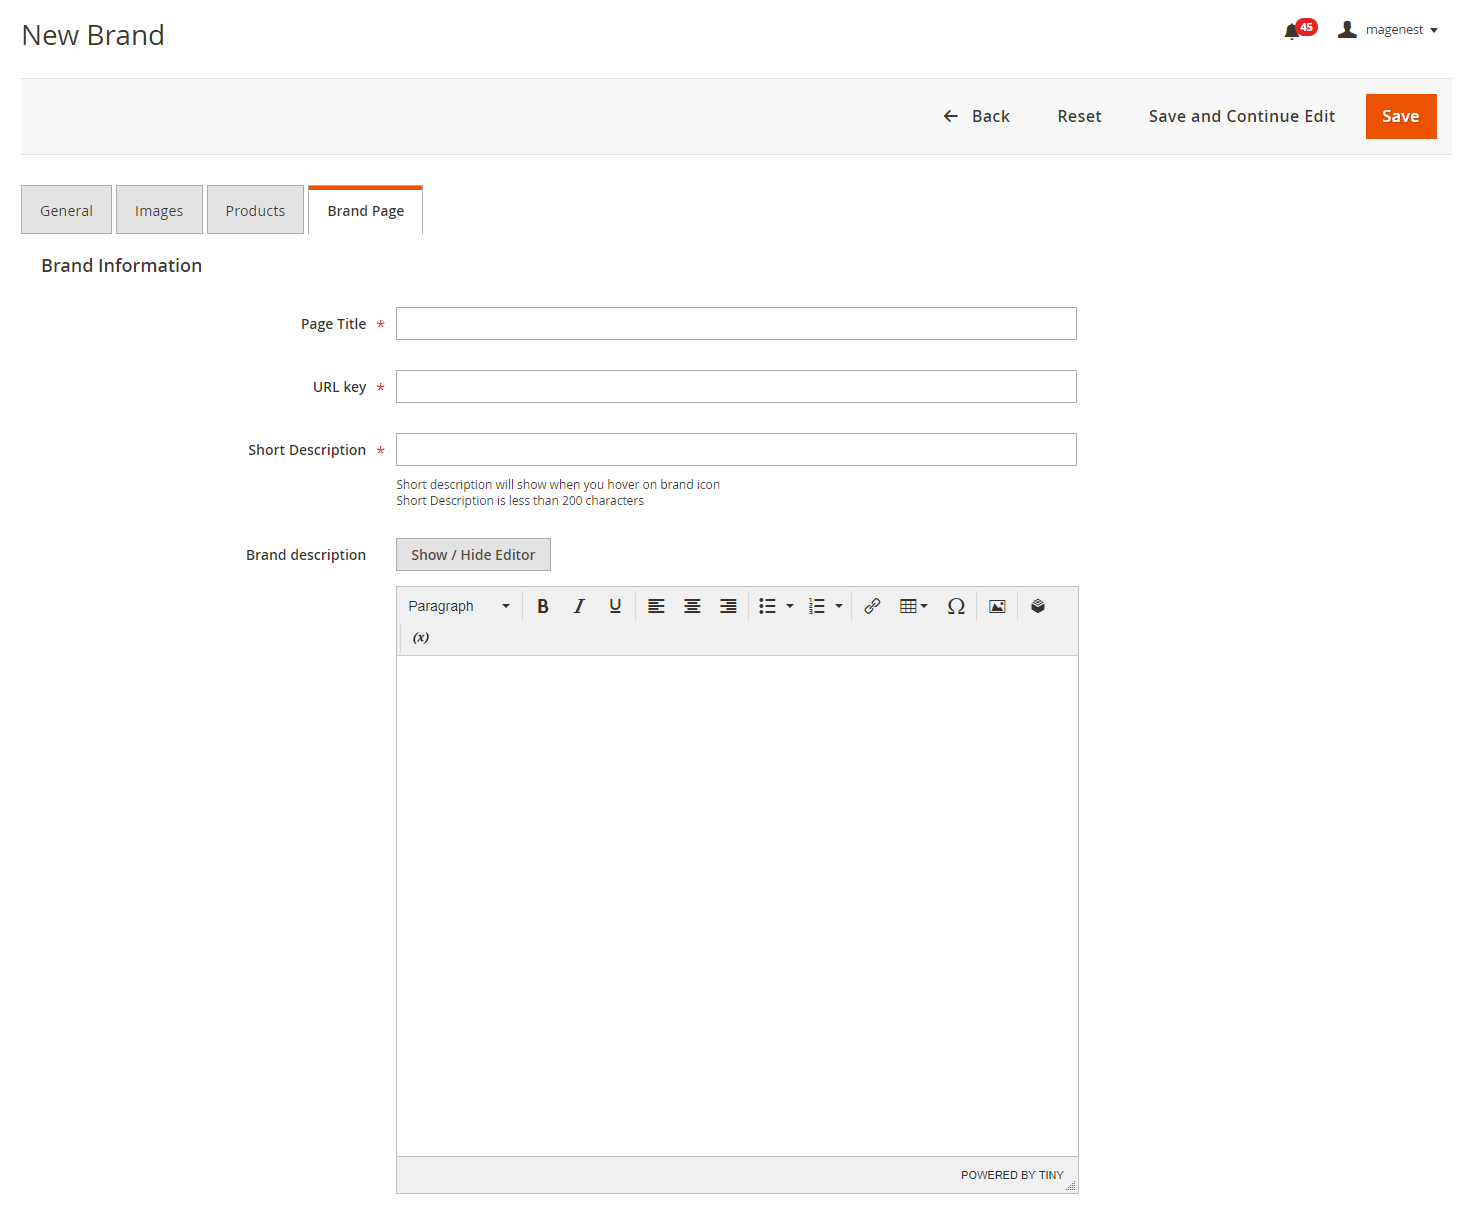
Brand Brand Page
Setup the detail page for the brand.
- Page Title: Enter the title in the header html.
- URL Key: Enter the URL Key for marketing purposes.
- Short Description: Insert a short description for the brand. This description will display when users hover on the brand icon.
- Brand Description: Enter a detailed description for the brand using the .
Click ![]() Click Save to save the brand.
Click Save to save the brand.
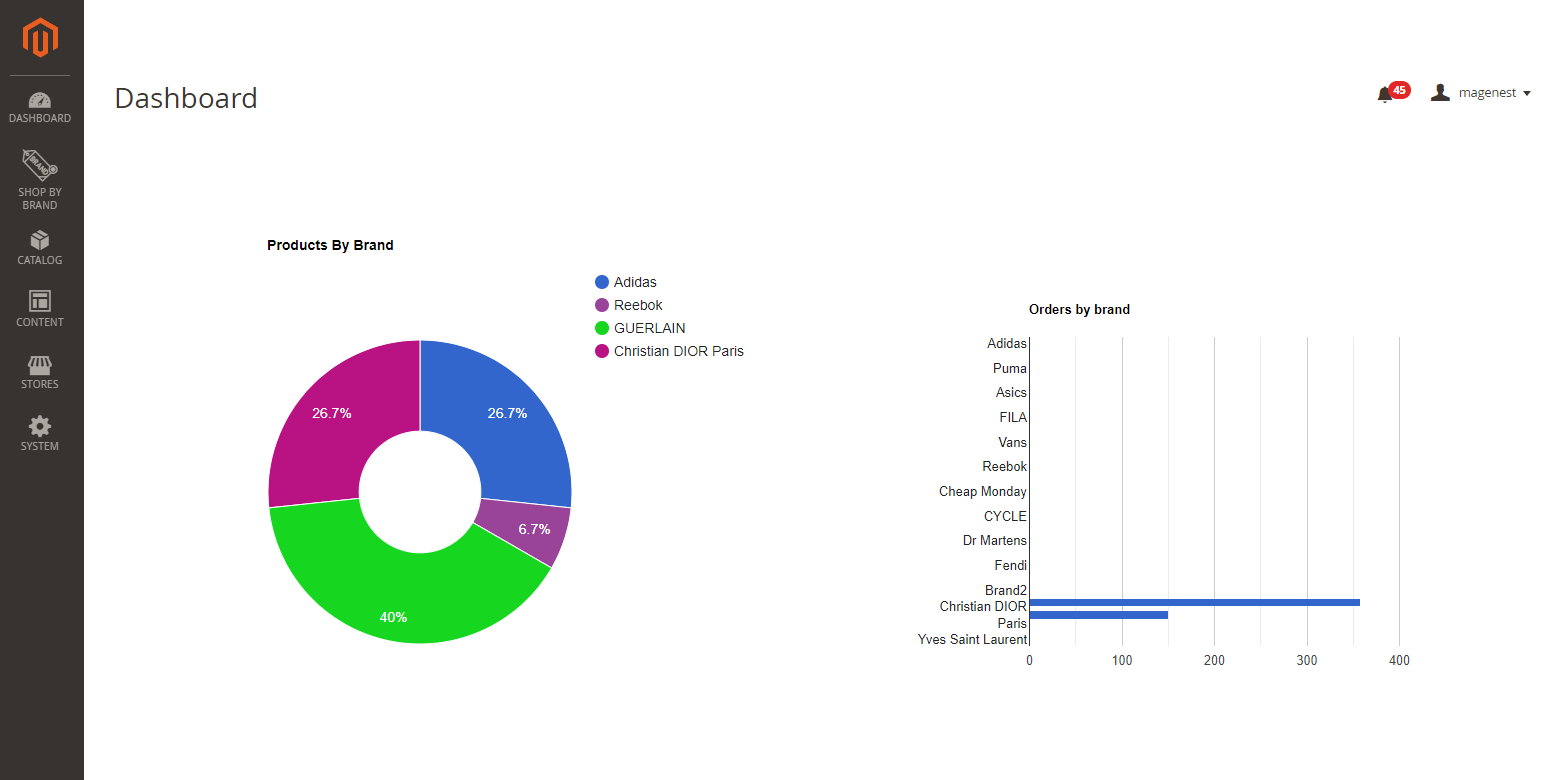
Brands report
On the admin sidebar, go to Shop By Brand > Dashboard. On the dashboard page, admin can view the report about orders by brand.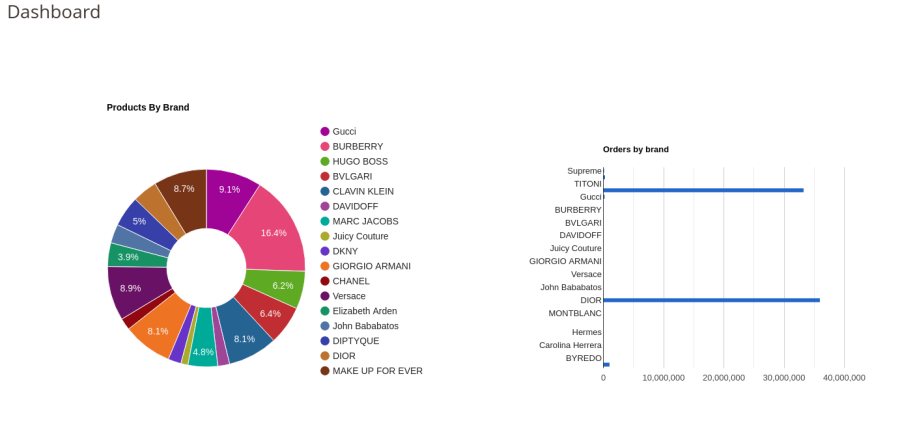
...