Thank you for purchasing our extension. If you have any questions that are beyond the scope of this document, please feel free to contact us, we will be happy to assist.
Updated: 2613/04/2019 2020 | By: Magenest | Email: [email protected] | Support portal: http://servicedesk.izysync.com/servicedesk/customer/portal/151
...
Choose between three types of banner and slider.
Create sliders in Magento 2 back-endbackend.
Upload photos to use as a slide.
Add links to slides.
Highly customizable appearance.
Multiple slider animations.
...
On the quick preview box: This section allows the customer to decor and style the banner/ slider up to their choices.
 If you choose the Banner type:
There are two ways to add a new banner
 Click on the Add New Slider button on the Manage Banners/Sliders page
- Click on the edit icon beside each title to configure for each part of the banner on the Setting box on the right side.
 On Style Configuration
 - Define the Custom Css to style the banner.
...
- The change for each setting on Content Configuration will not be displayed on the quick preview box to avoid the layout broken.
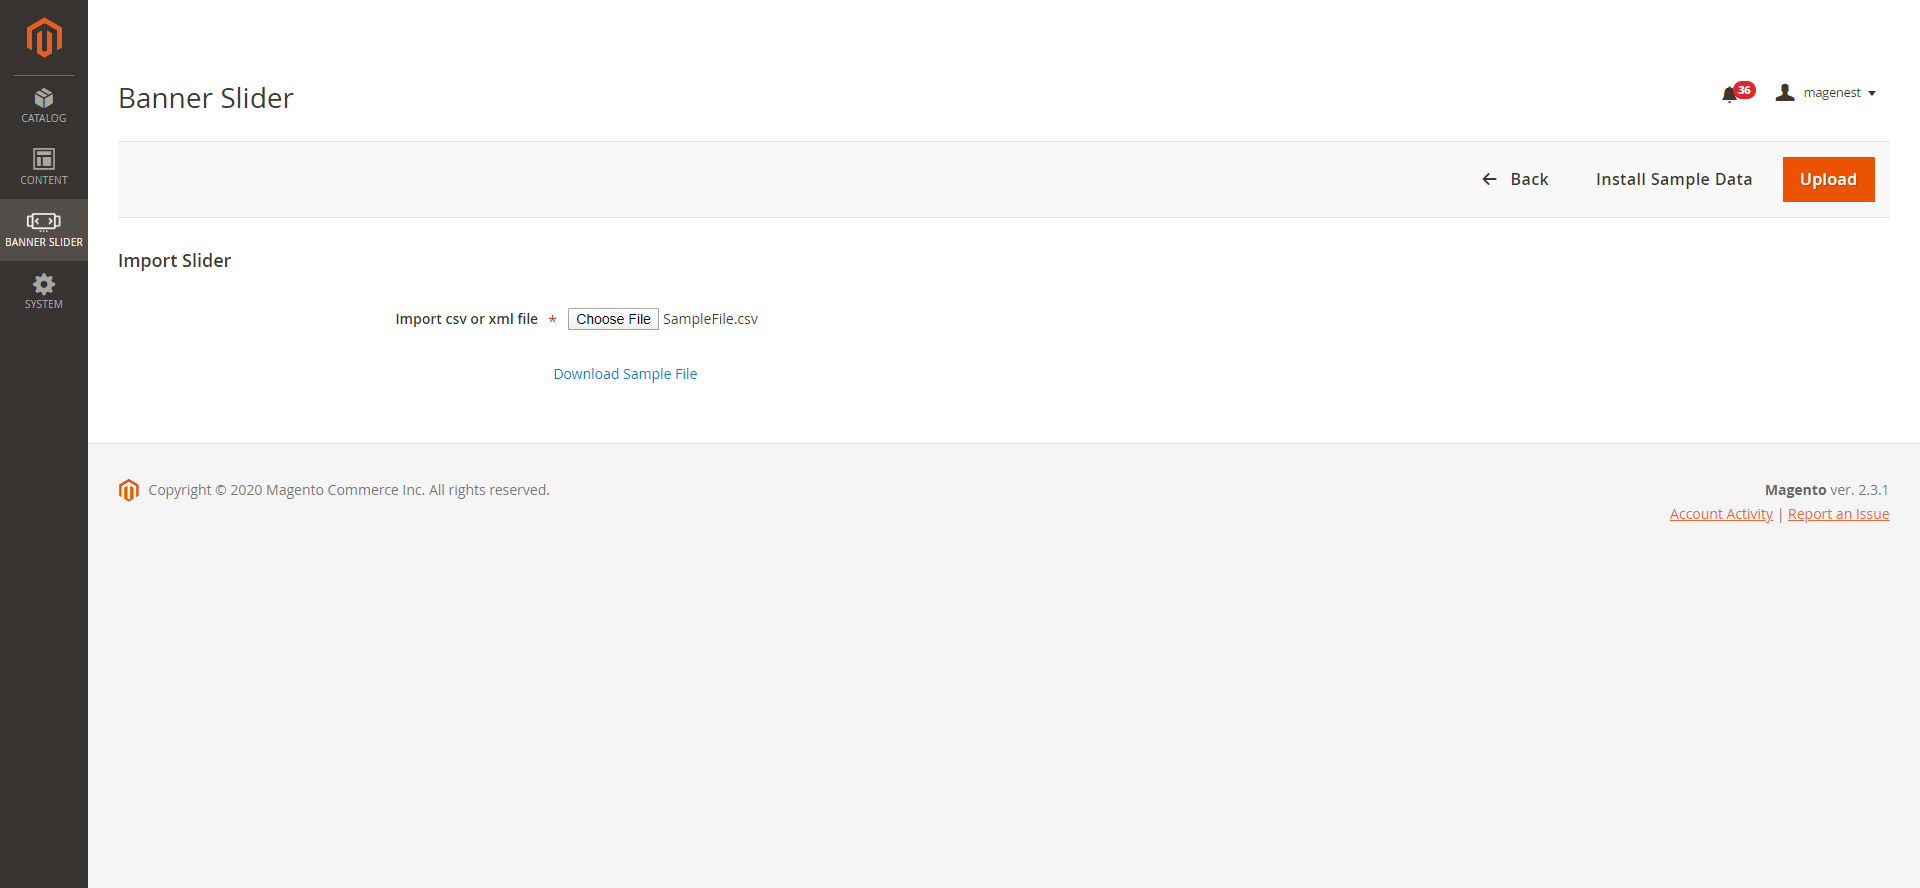
Click on the Import button to import a banner template
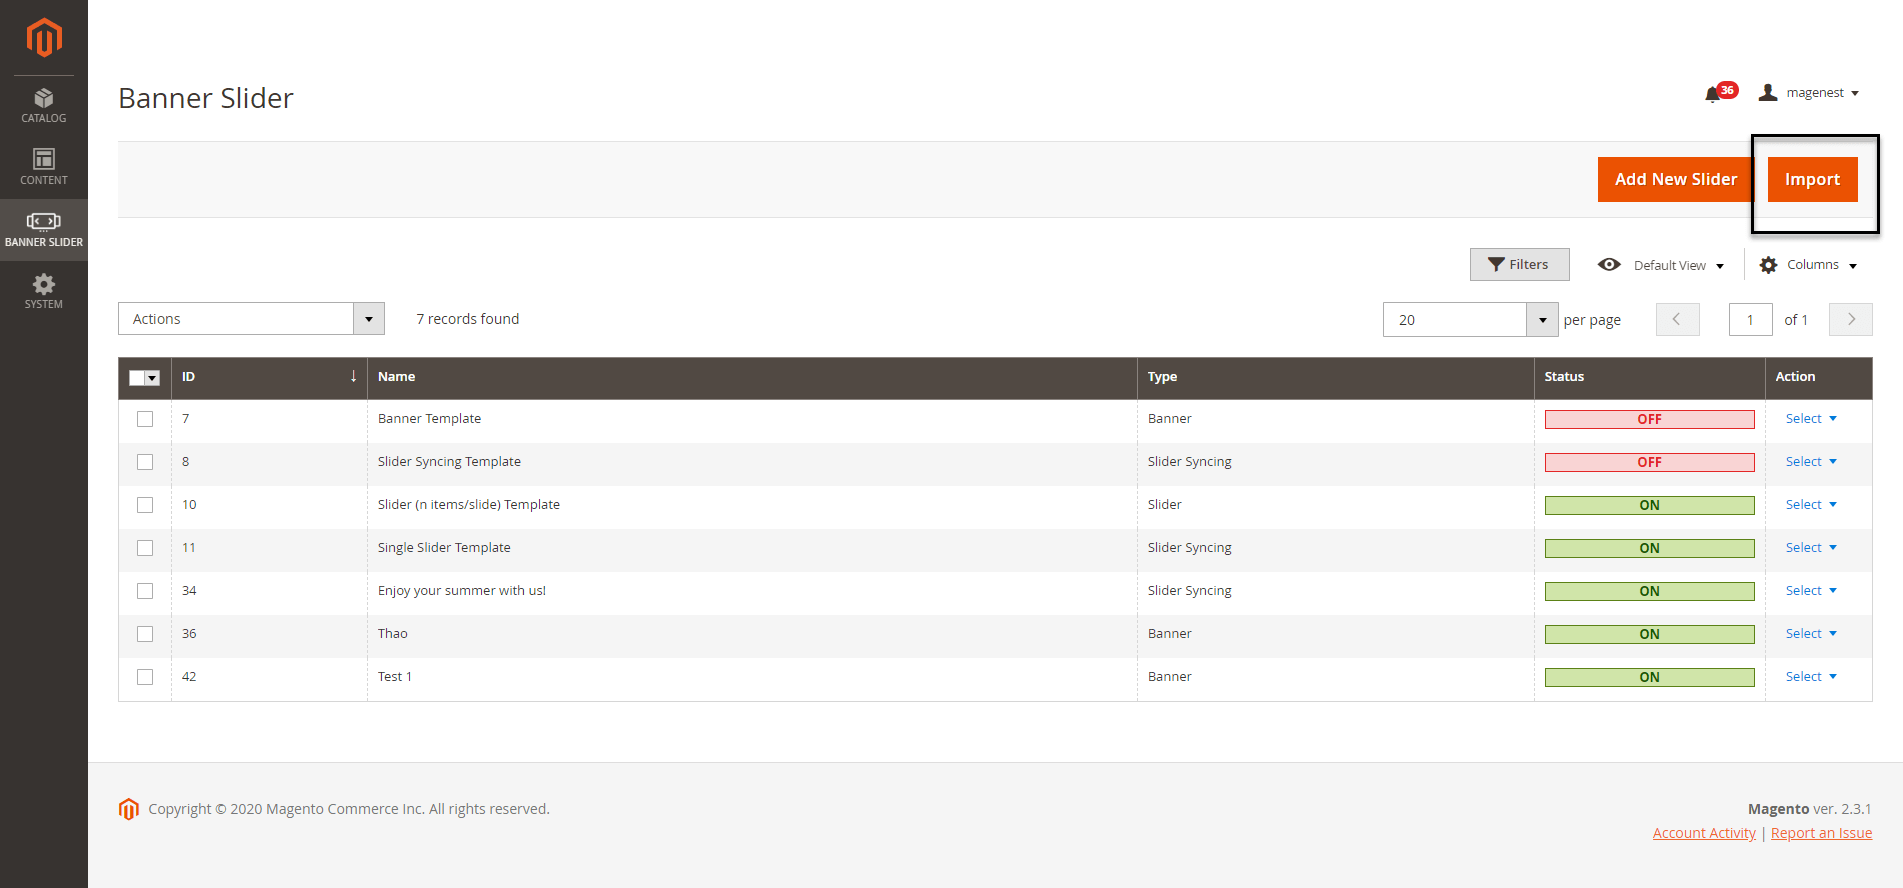
- On the Import page
If you
...
choose the Single Slider type:
There are some additional settings besides that in the banner setting.
Under the quick preview box, click on Add New Slider Item button to add a number of sliders that you expected. Then click on each Slider Item button on the left to configure for each slider.
- On Slider Configuration:

- Items/Slider: choose the number of slider items that will appear at the same time in a slide.
...
- Custom Class: Enter the name of the custom class that is defined on in the below section.
- Custom Css: define the custom Css to style the slider.
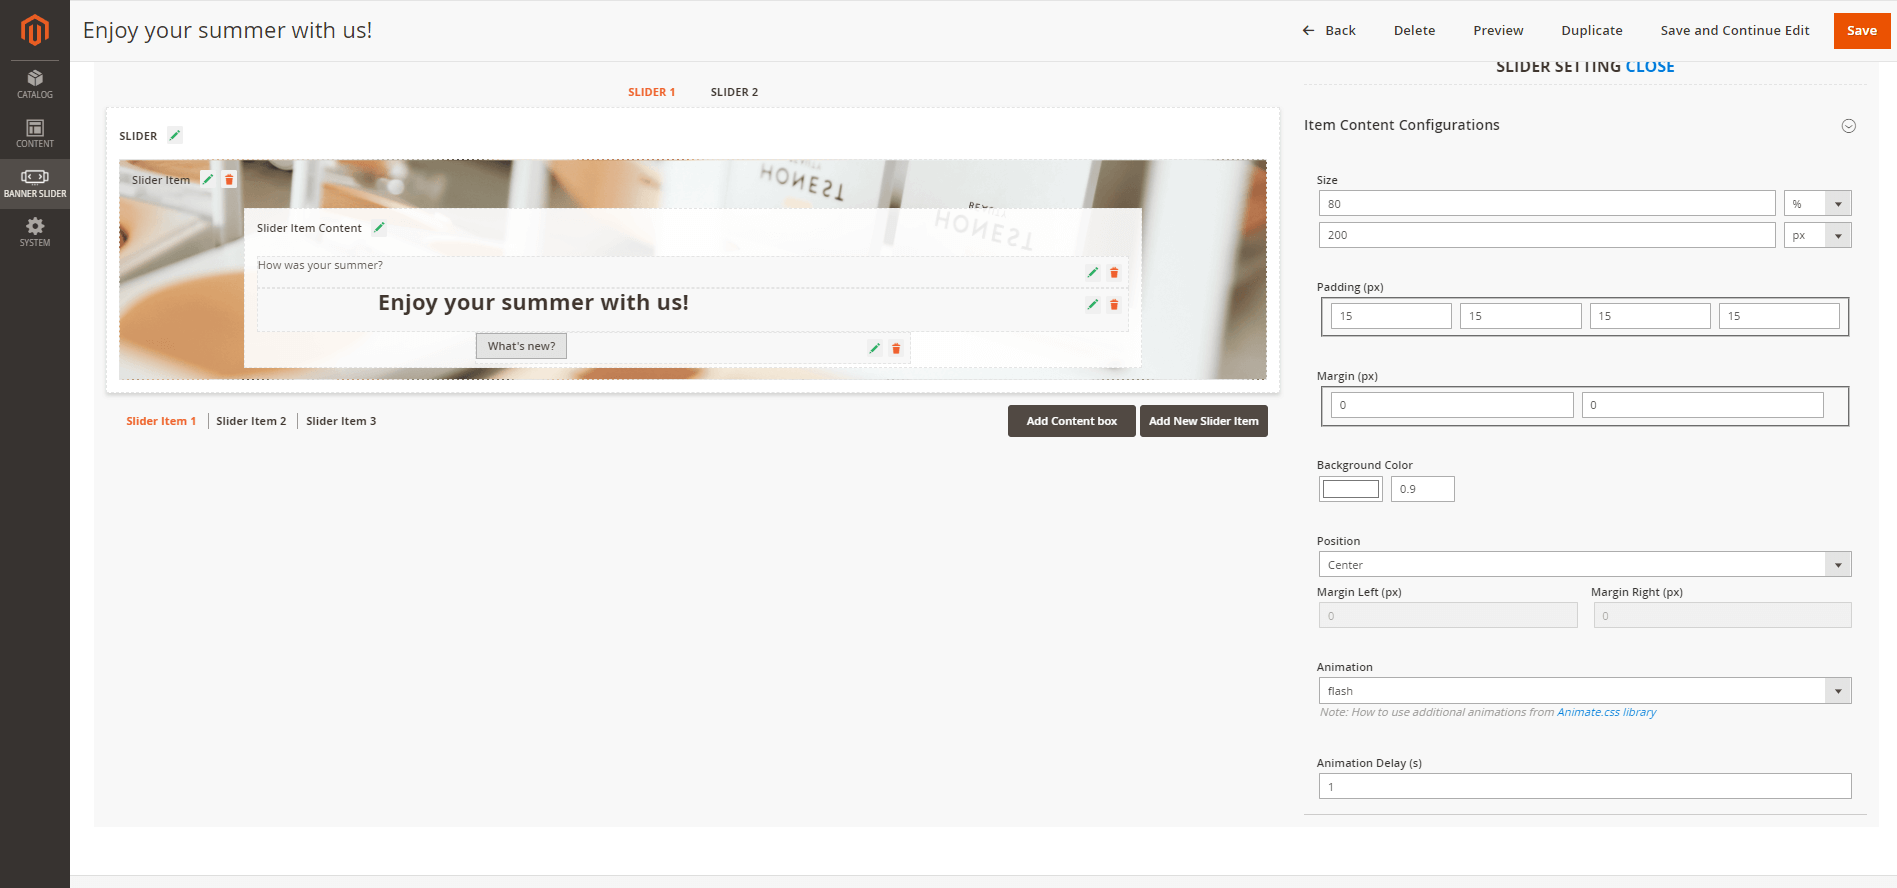
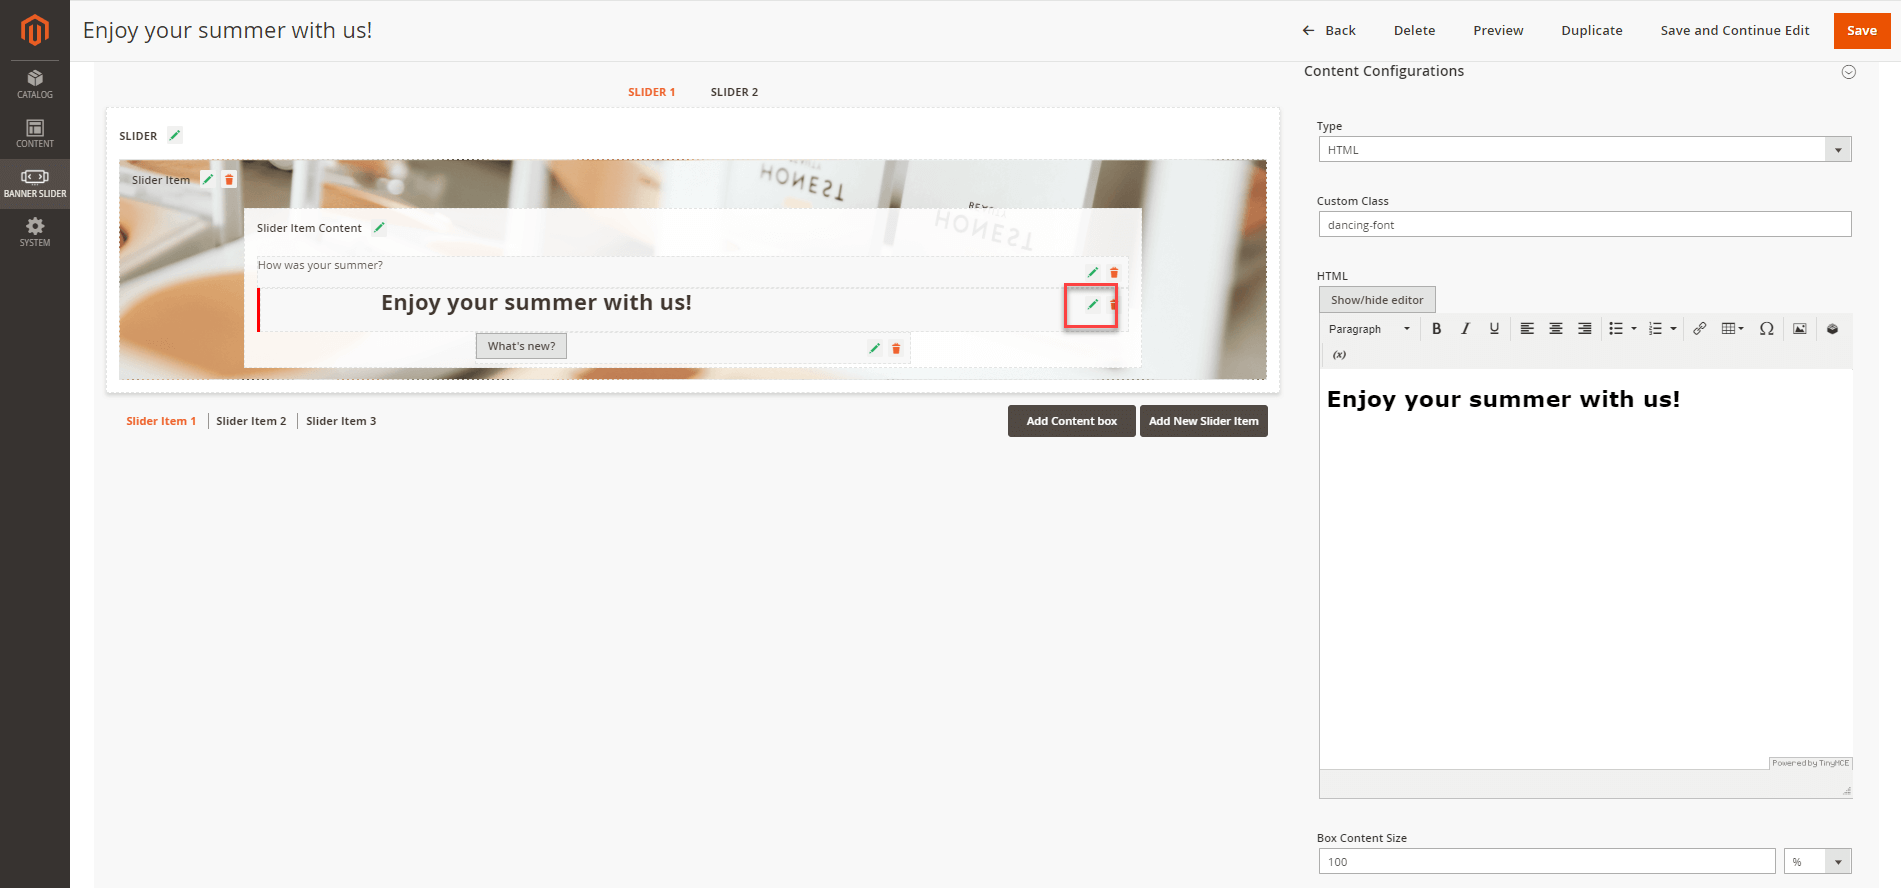
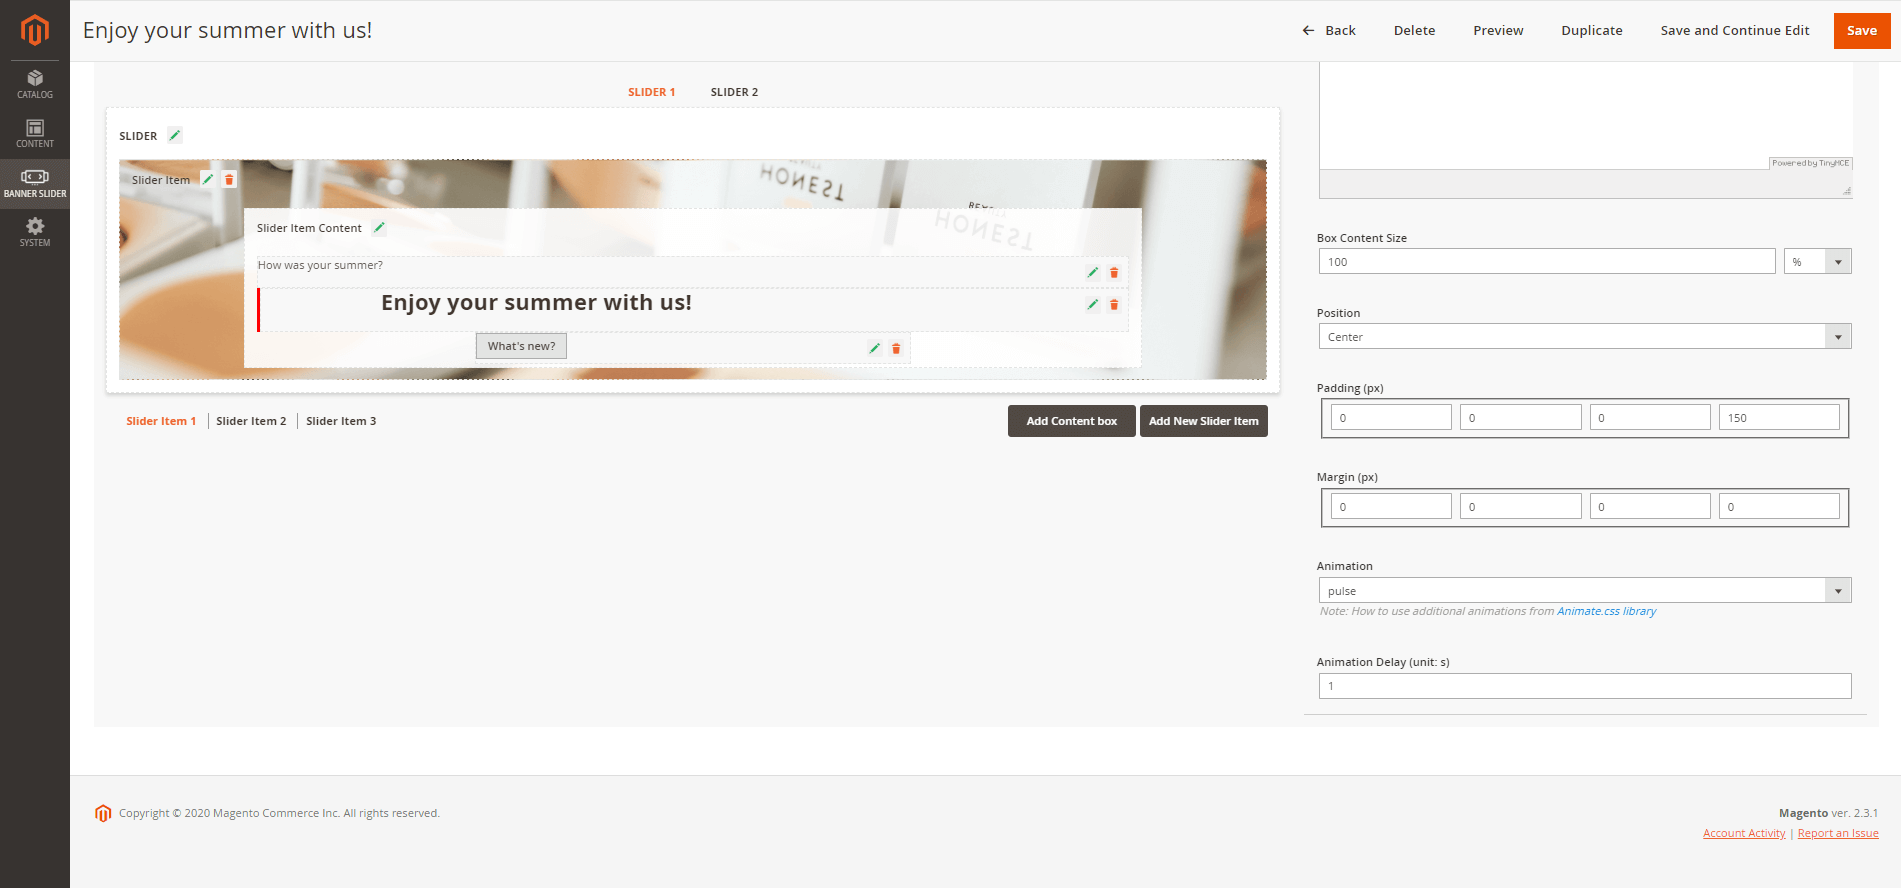
- On Item Configurations and Item Content Configurations, follow the instruction above for this part of Banner Settings.
If you choose 2 Slider - Slider Syncing type:
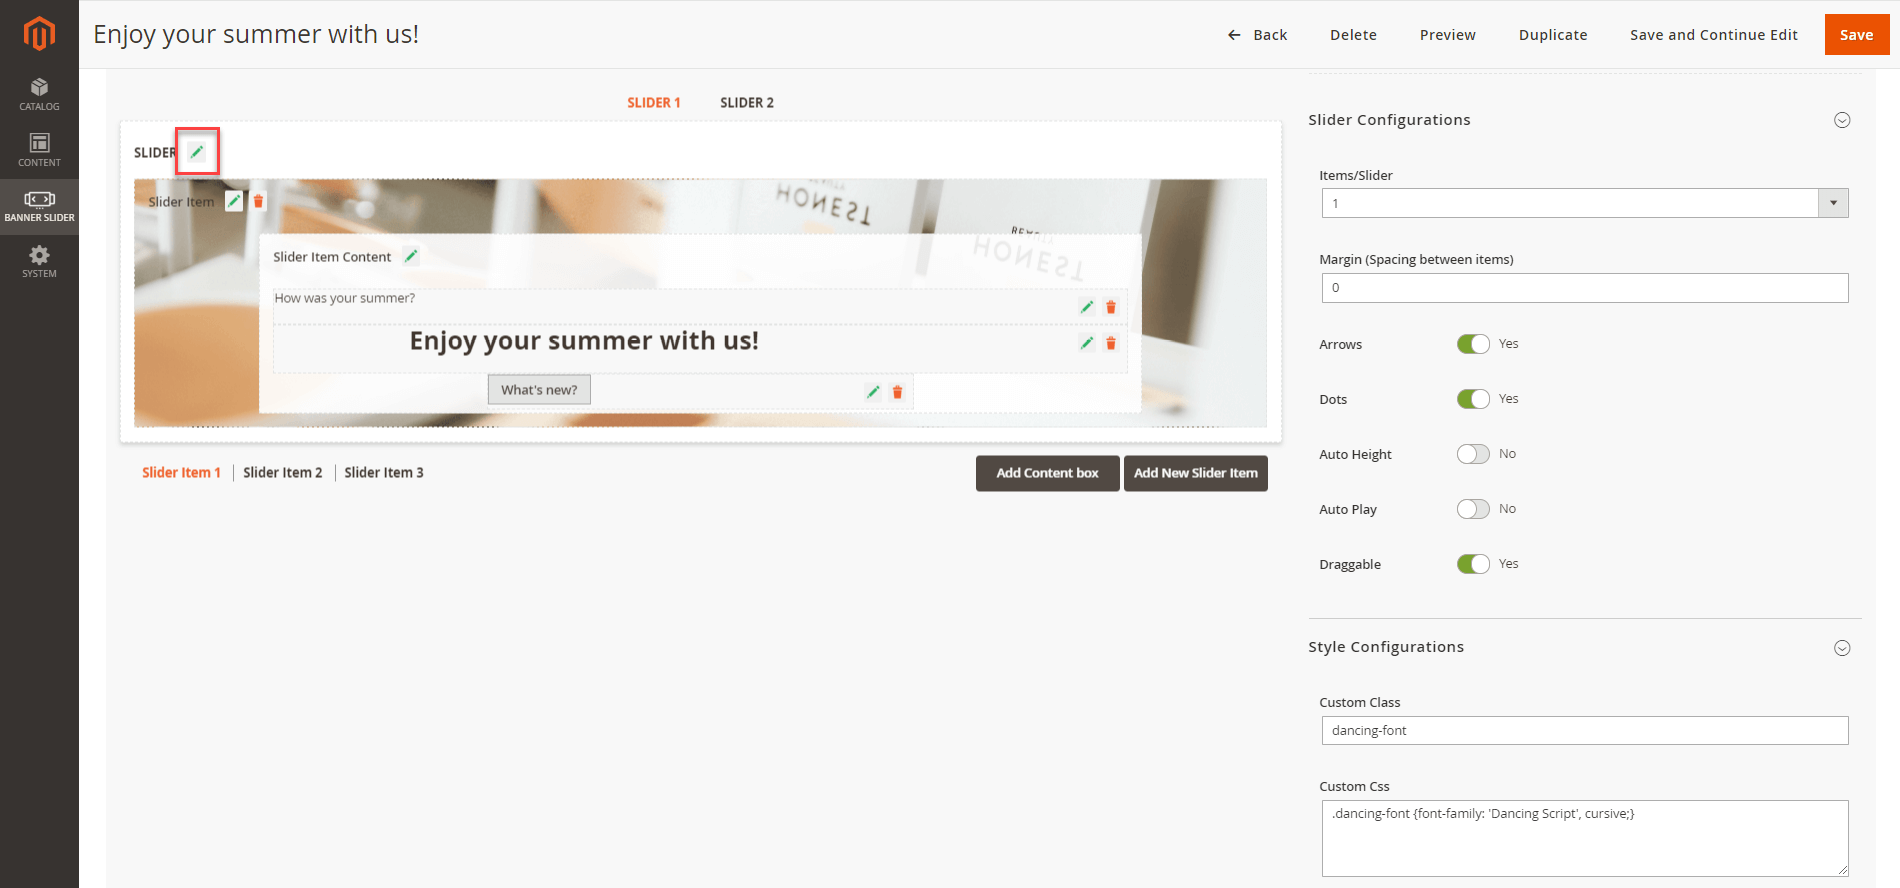

- In this option, there will be 2 default slider sliders created. These sliders will display be displayed on the front end at the same time and interactive interact with each other.
- On each slider configuration, click on Add New Slider Item button to create new slider items. Note that when a number of slider items created on one slider, the equal number of slider items will be generated automatically on the other slider.Then set the configuration for each slider and slider item by the same way with the instruction above.
Set the Slider Configurations following the instruction in the image
- Slider Item configuration
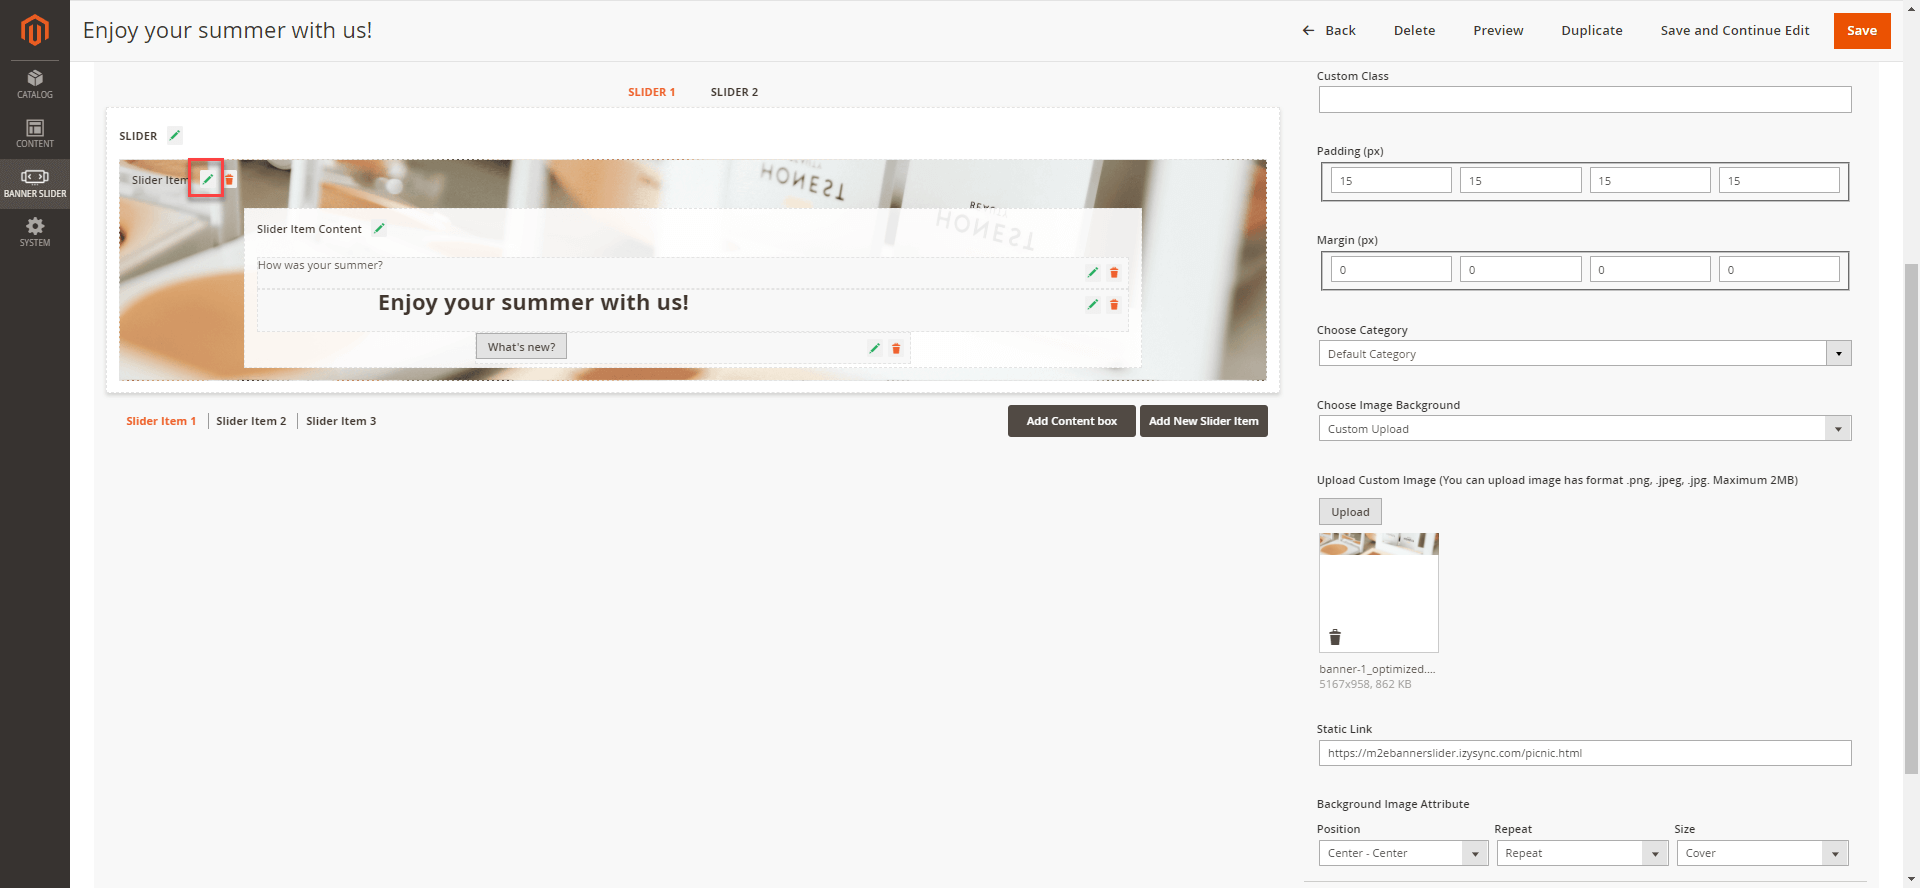
- Slider Item Content configuration
- Content configuration
![]() Note:
Note:
- There will be a number of slider items created automatically on one slider that is equal to the number of slider items added on the other slider.
- The item on one slider will display be displayed at the same time with the item that in the same order on the other slider. For example, the slider item 2 in slider 1 will display be displayed with the slider item 2 in the slider 2 at once.
On Slider Position:

- Design Theme: choose the theme for the new banner or slider. There are two default options: Magento Blank and Magento Luma.
- Assign to Store Views: choose the store view that the banner or slider will be displayed.
- Sort Order: Set the order for the new banner or slider. Note that it requires the integer to define the order.
- Page: select the pages on which the banner will appear.
- Container: select the position for the banner. There are 8 options for the banner position: Page Top, Page Header Container, Page Footer Container, Main Content Area, Main Content Aside, Main Content Button, Main Content Top, Main Content Container.
...
- .
To add a Banner/Slider Widget
![]() On the Admin sidebar, go to Content > Widgets > Add Widget.
On the Admin sidebar, go to Content > Widgets > Add Widget.
![]() On the Widget configuration page.
On the Widget configuration page.
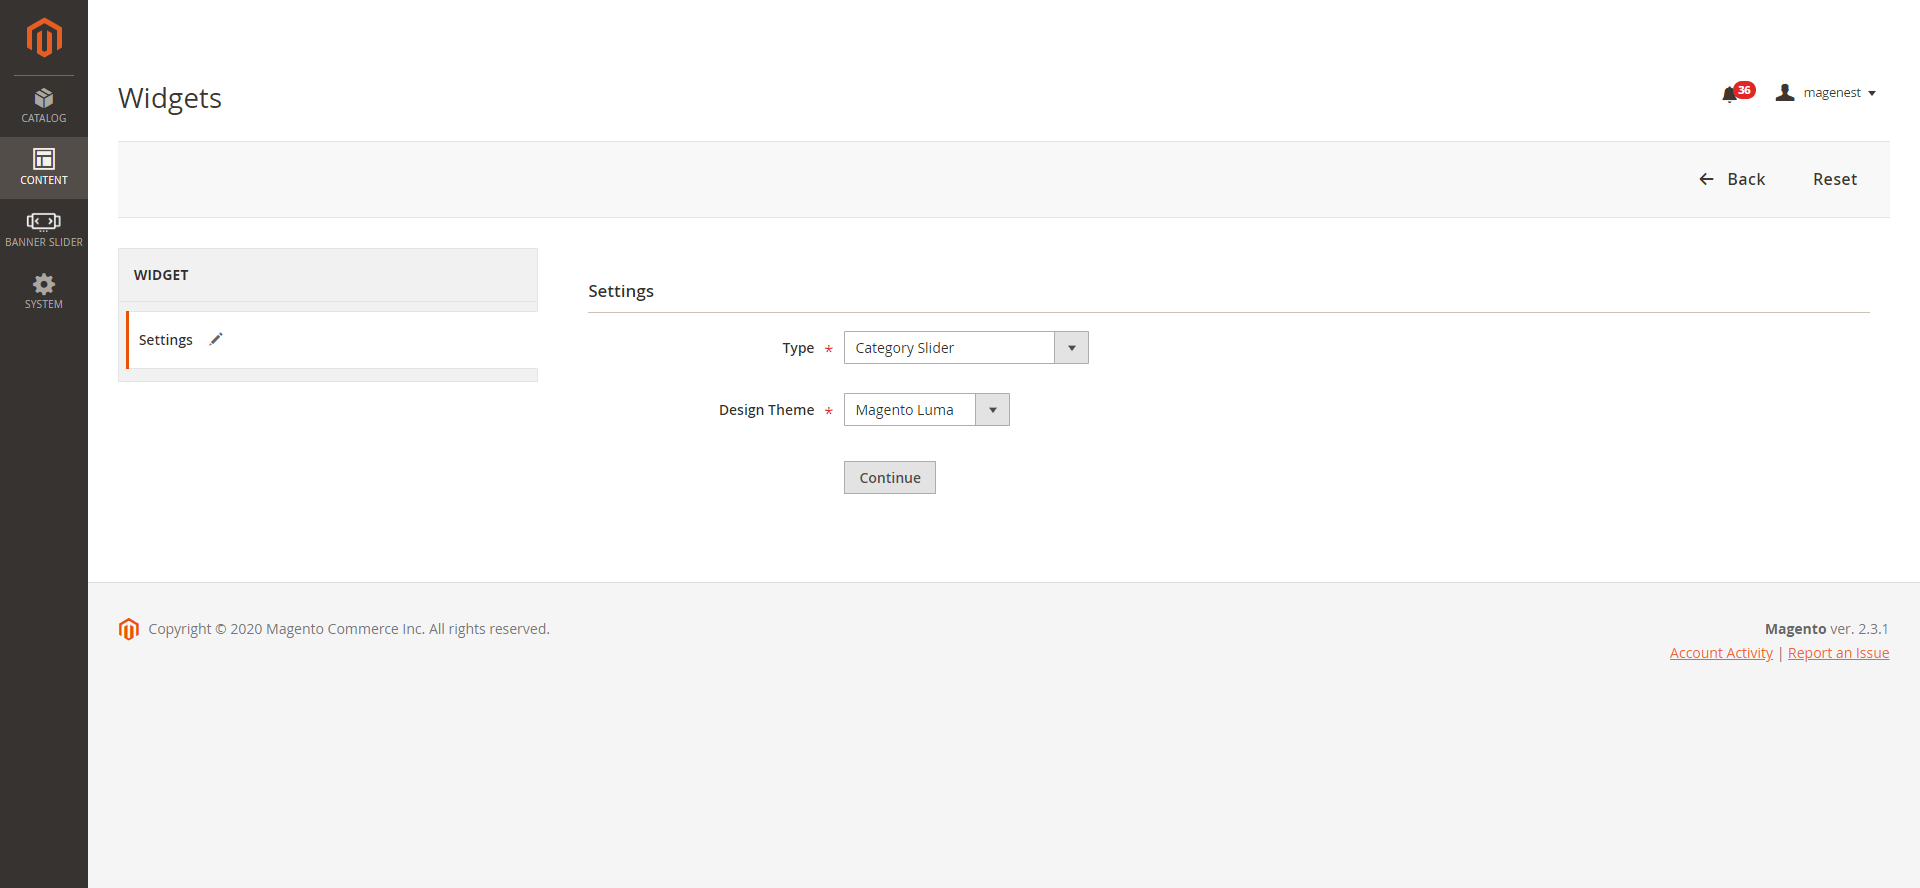
- Type: Category Slider
- Design theme: Magento Luma
- Then click on Continue
![]() On the Storefront Properties
On the Storefront Properties
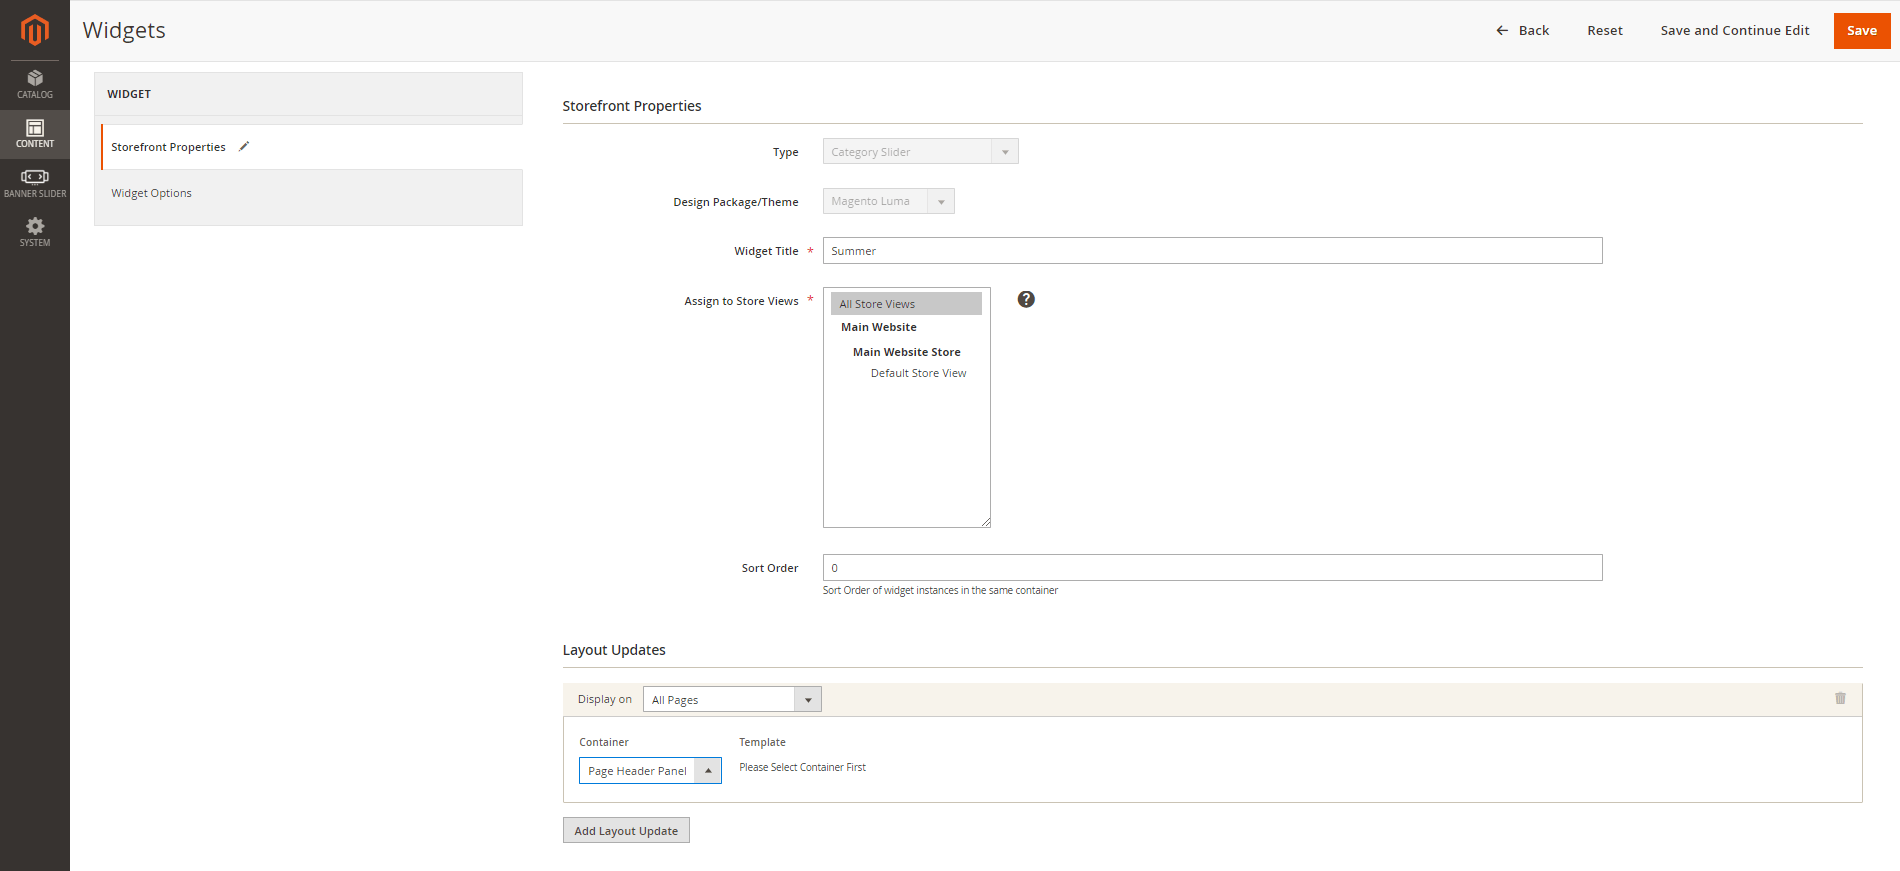
- Widget Title: Enter the name of the widget to be displayed on the backend
- Assign to Store View: All Store Views
- Sort Order: Select the order to display the banner/slider on the front end
- Layout Updates: Set up the banner/slider position
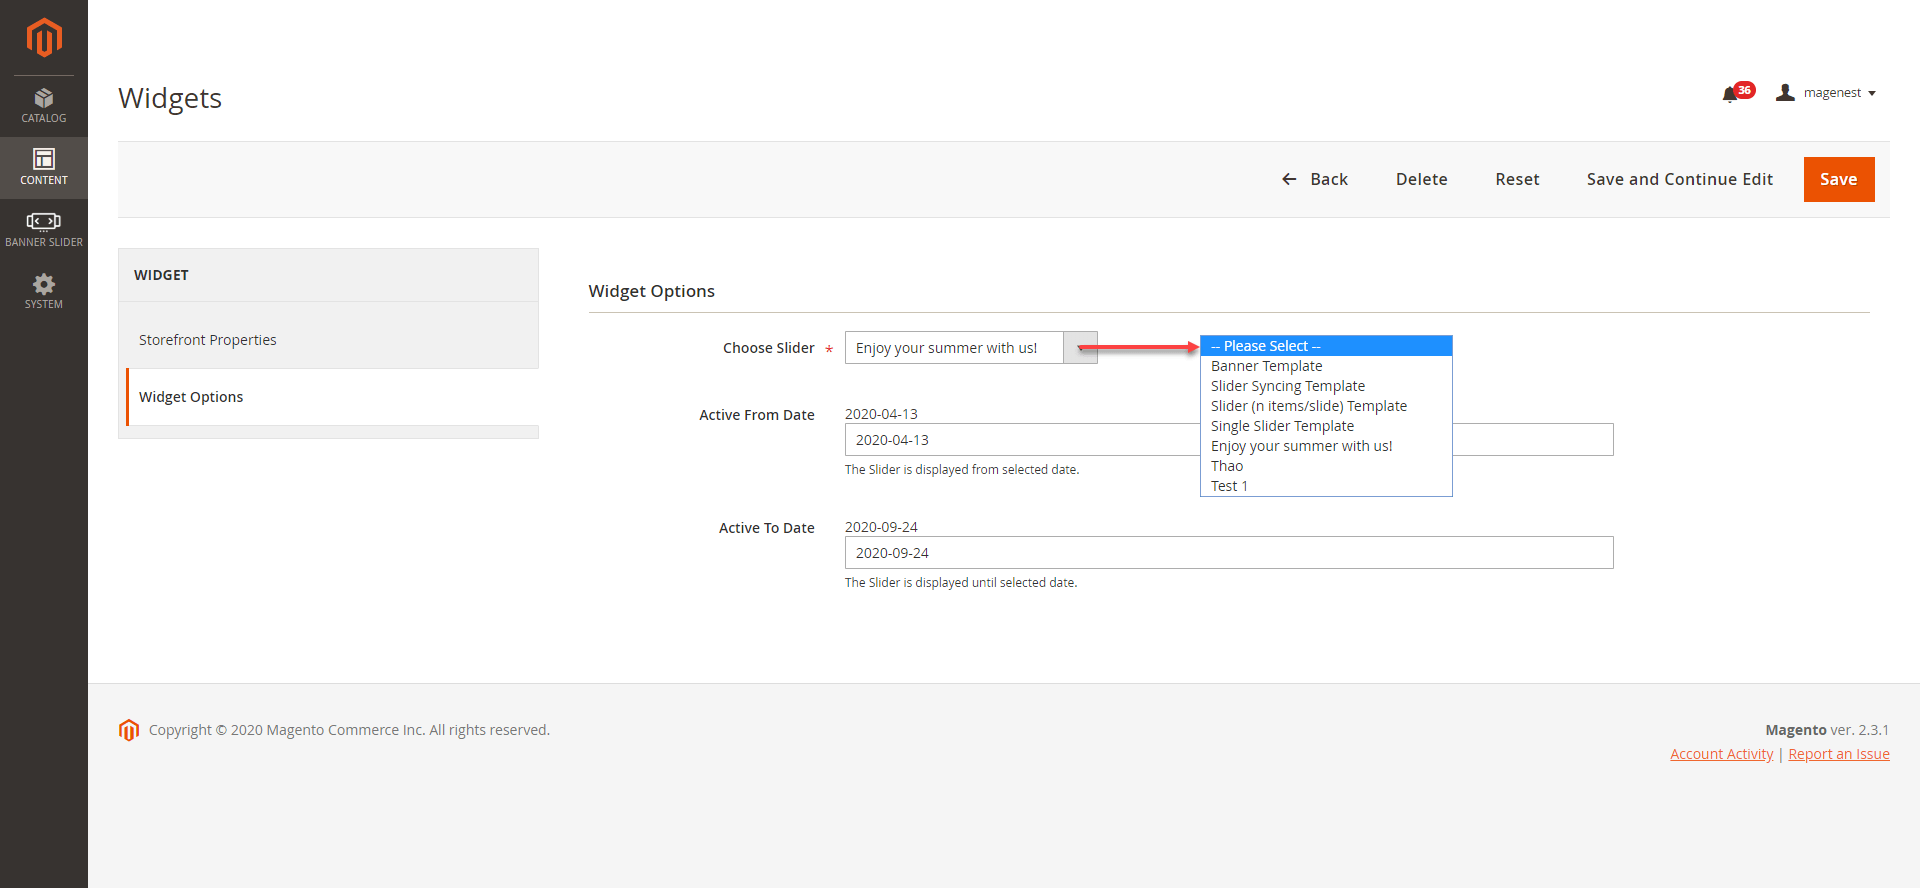
- Choose Slider: Select the banner/slider you want to add to the storefront
- Active From Date: Enter the day to activate the banner/slider. Format YYYY/MM/DD
- Active To Date: Enter the day to deactivate the banner/slider. Format YYYY/MM/DD
 Note: Active To Date value must be greater than or equal to Active From Date value and Active From Date value must be greater than or equal to the current date
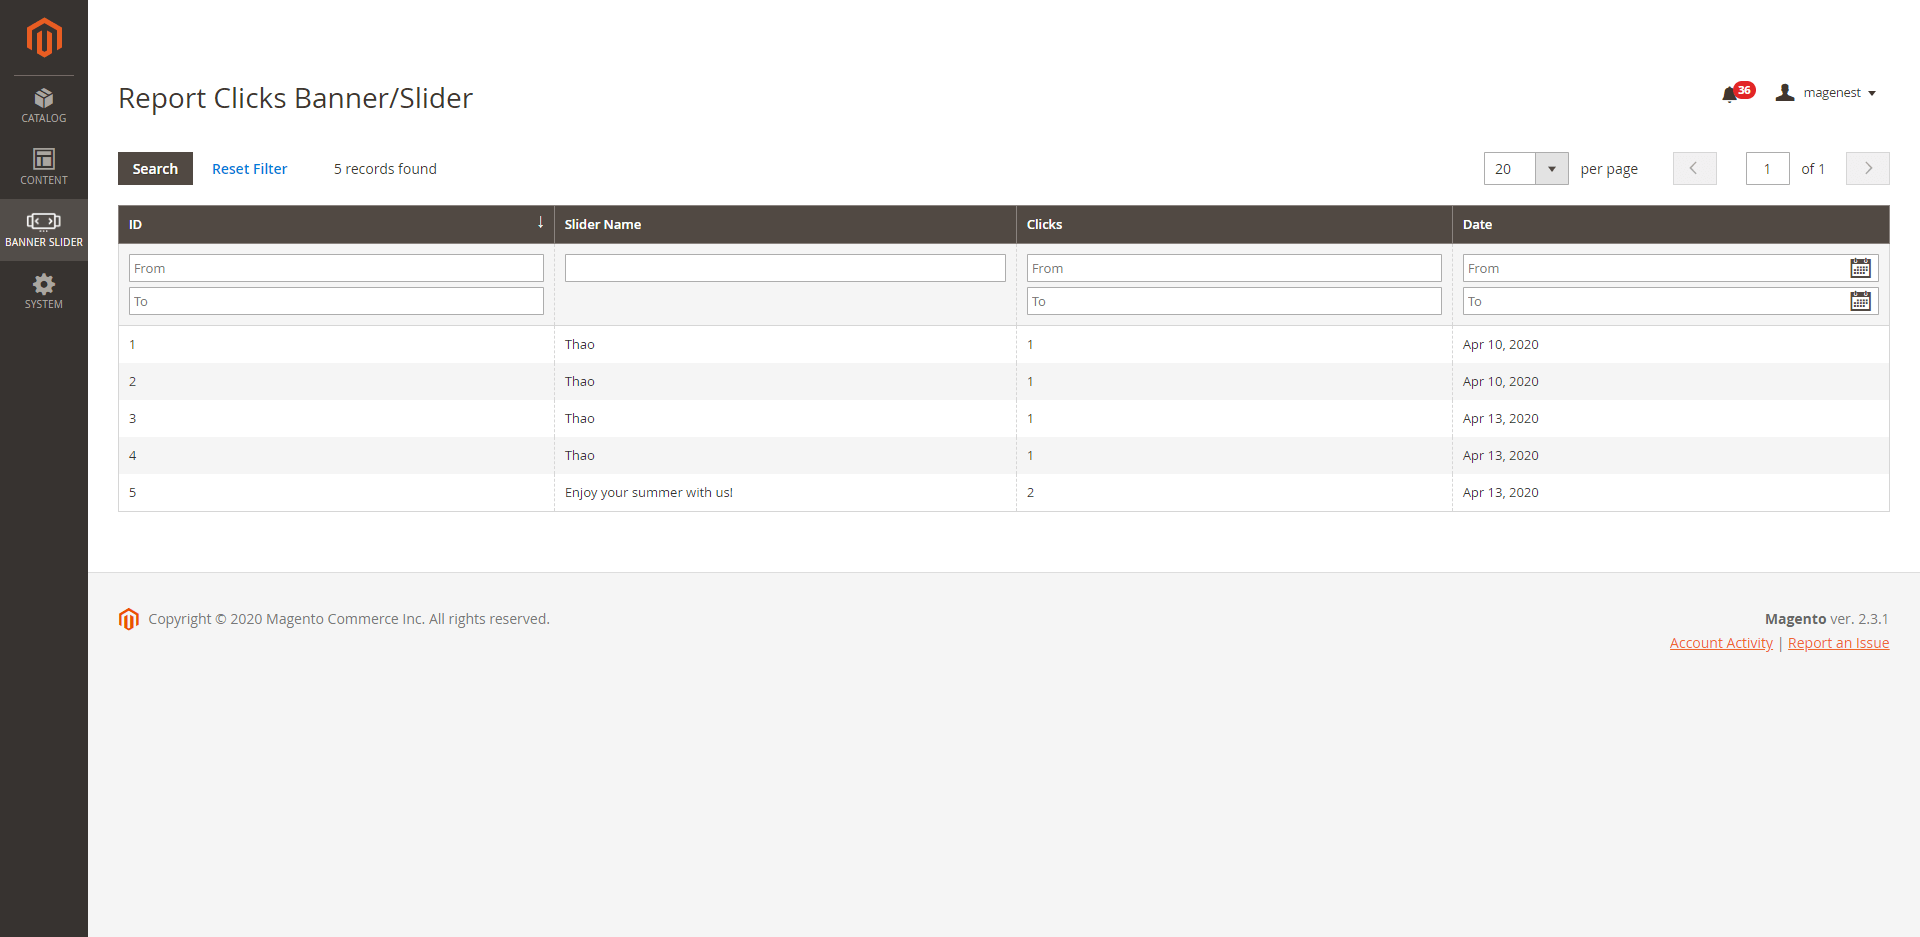
Report Clicks Banners/Sliders
![]() On the Admin Sidebar, go to Banner Slider > Reports Click Banners/Sliders
On the Admin Sidebar, go to Banner Slider > Reports Click Banners/Sliders

![]() On the Report page, admin can see the Slider Name, Clicks total and Click Date. One IP address can only counted as one click.
On the Report page, admin can see the Slider Name, Clicks total and Click Date. One IP address can only counted as one click.
...
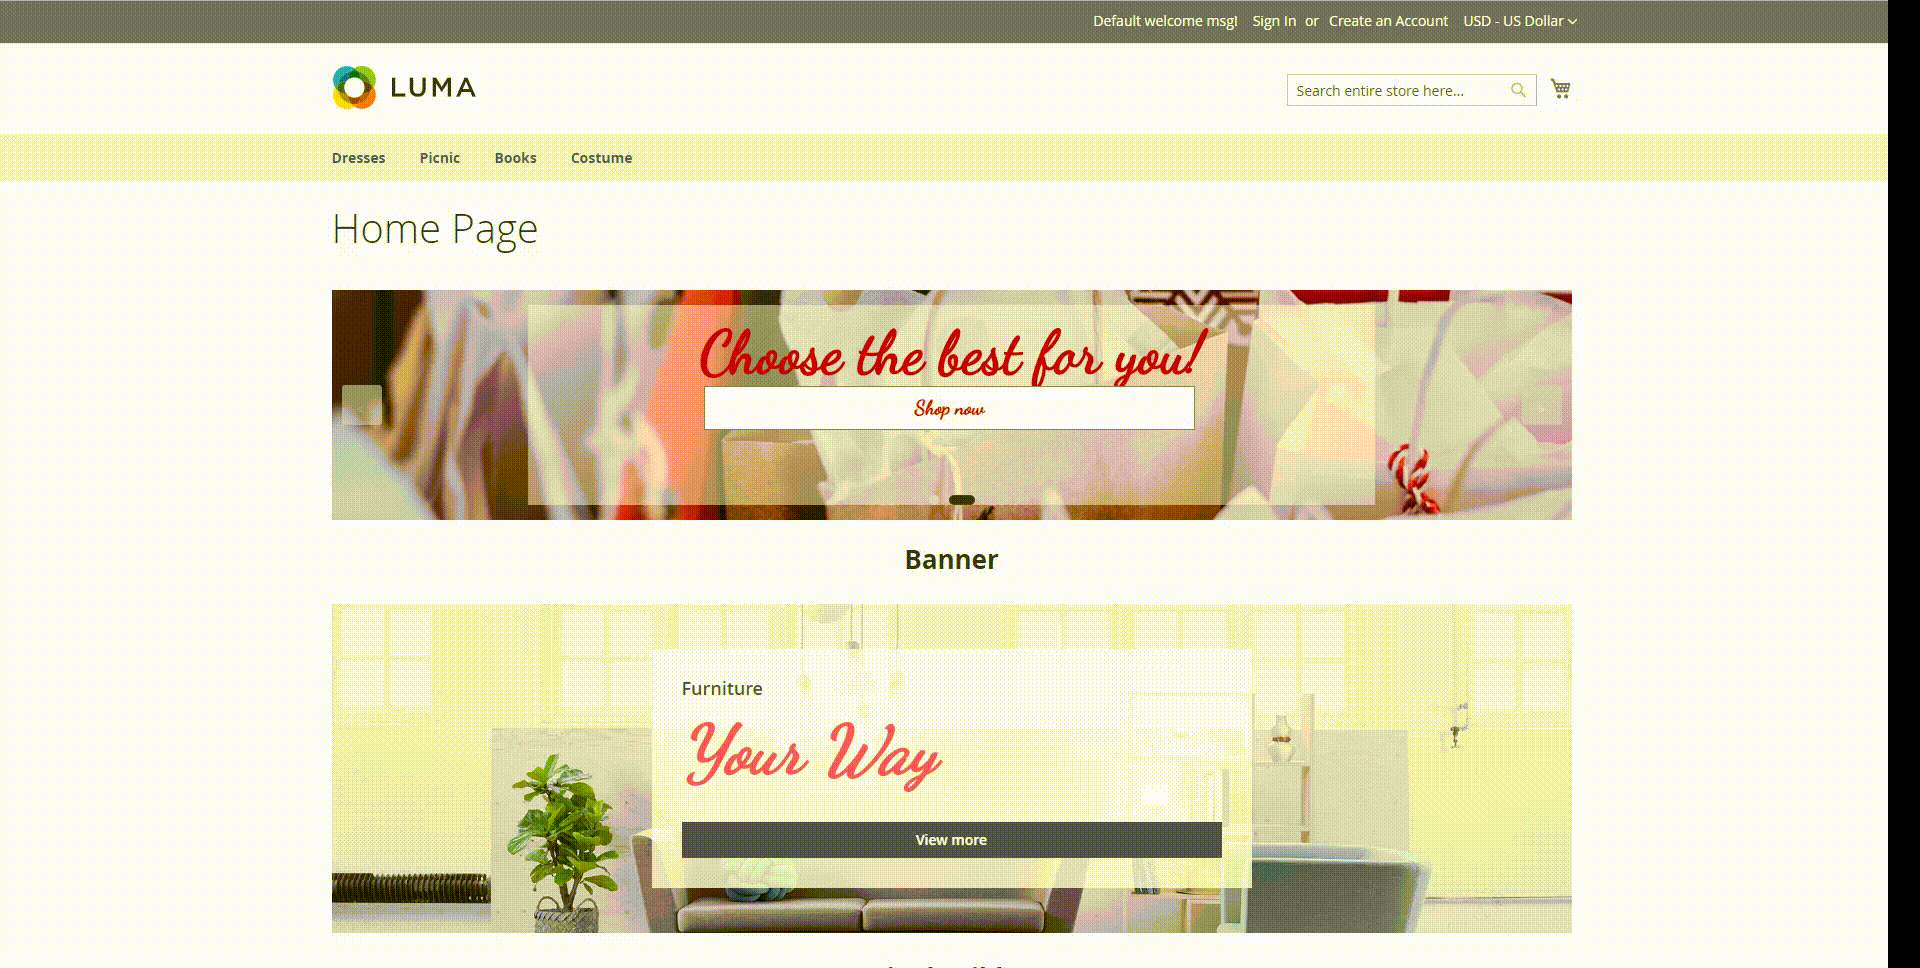
On Storefront
- Banner
- Single Slider

See more in here
...