Thank you for purchasing our extension. If you have any questions that are beyond the scope of this document, do not hesitate to leave us an email via our email address below.
Created: 27/04/2017 | By: Magenest
| Table of Contents |
|---|
Introduction
Image Gallery for Magento 2 by Magenest is an extension that allows owners to add more images configuration, manage images into various galleries and groups according to their requirements.....
![]()
For more details, live-demo and user reviews, please visit:
Features
Feature For Admin:
-Admin can add or manage images into various gallery.
-Admin can add new images, delete, change status, use filter.
- Manage gallery, manage Images
-Gallery setting
Feature For Customer:
-View Galleries.
-View Images.
System Requirements
Your store should be running on Magento Community Edition version 2.2.x, 2.3.x.
Configuration
Gallery Settings.
Firstly, you need to set the the configurationto use Image Gallery extension.
Go to backend of Magento 2 > Images Gallery >Gallery Settings, this is the place where you define the size image.


How To Add/Manage Images
Admin can add/manage the images under Images Gallery > Add/ Manage Images. Admin can also delete or change the status of the image.

After click on “Add Image” below page will appear. Here admin can enter image information and save, upload image.

How To Add/Manage Gallery
This module also provides the feature for admin to add/manage gallery under Images Gallery > Add/Manage Gallery.
Admin can also edit the existing gallery by clicking “Edit”. Here admin can edit Gallery and Gallery Images both

After clicking on Add Gallery below page will appear which contains two tabs in the left section.
Gallery
In this section, you need to enter your gallery title and select status for the gallery.

Gallery Image
Here you need to select the images and thumbnail image for your particular gallery.

Images Gallery Displayed on Front-End
After inserting all required details and title your gallery looks like this screenshot. On clicking particular gallery you can see all the images of your gallery. If you click on any image below, you can see that image wants to see

Configuration
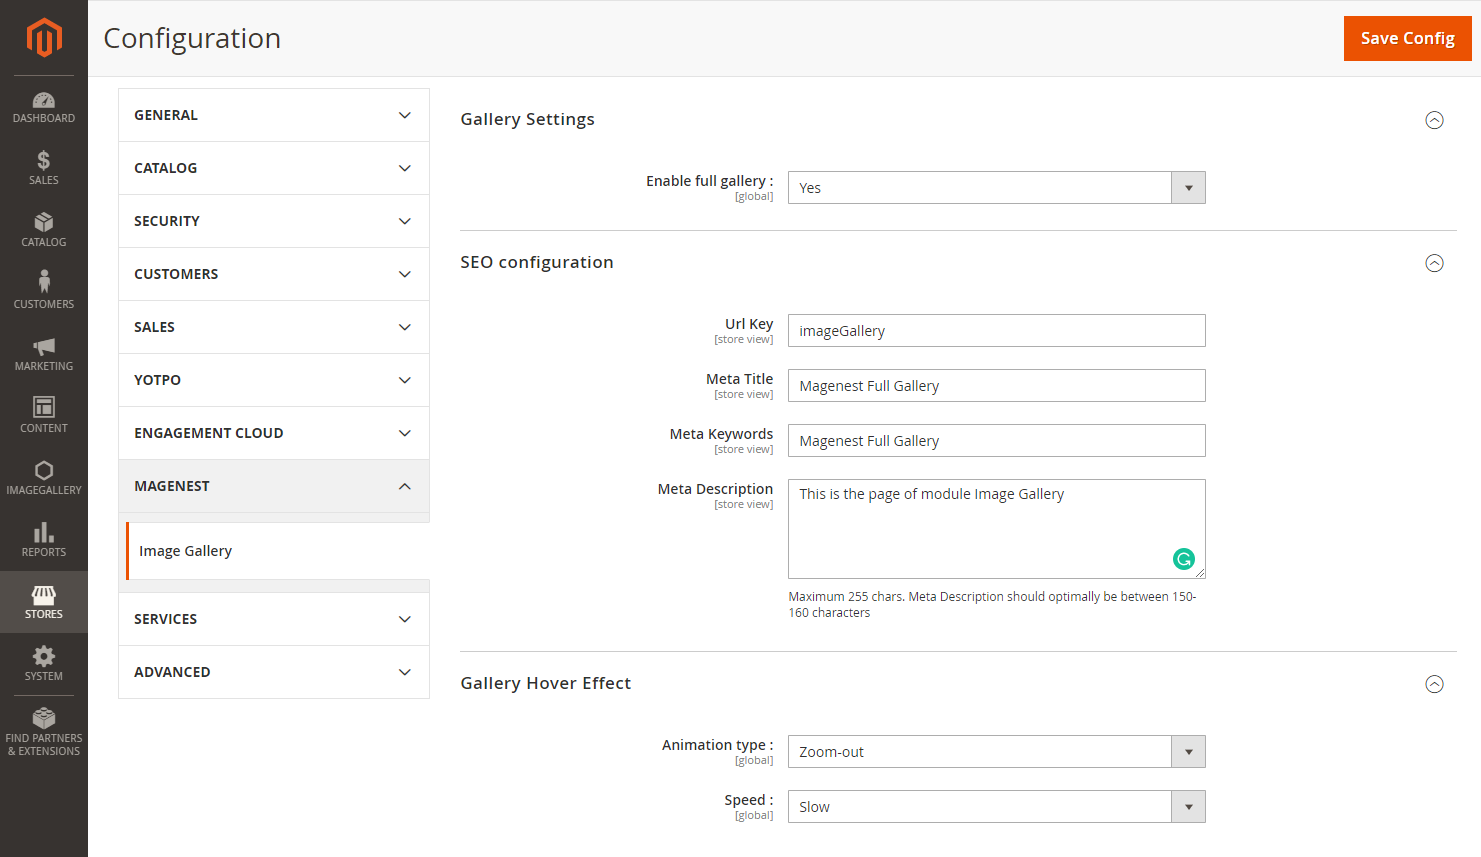
![]() On the admin sidebar, select Image Gallery > Gallery Setting, go to the Configuration page.
On the admin sidebar, select Image Gallery > Gallery Setting, go to the Configuration page.
![]() Gallery Settings:
Gallery Settings:
Enable full gallery: choose Yes to show a full images gallery on the store-front.
![]() SEO Configuration:
SEO Configuration:
Enter the URL Key, Meta Title, Meta Keywords and Meta Description for marketing purpose.
![]() Gallery Hover Effect: set the animation playing when users hover over an image on the full gallery
Gallery Hover Effect: set the animation playing when users hover over an image on the full gallery
- Animation type: select the hovering animation.
- Speed: select the animation speed.
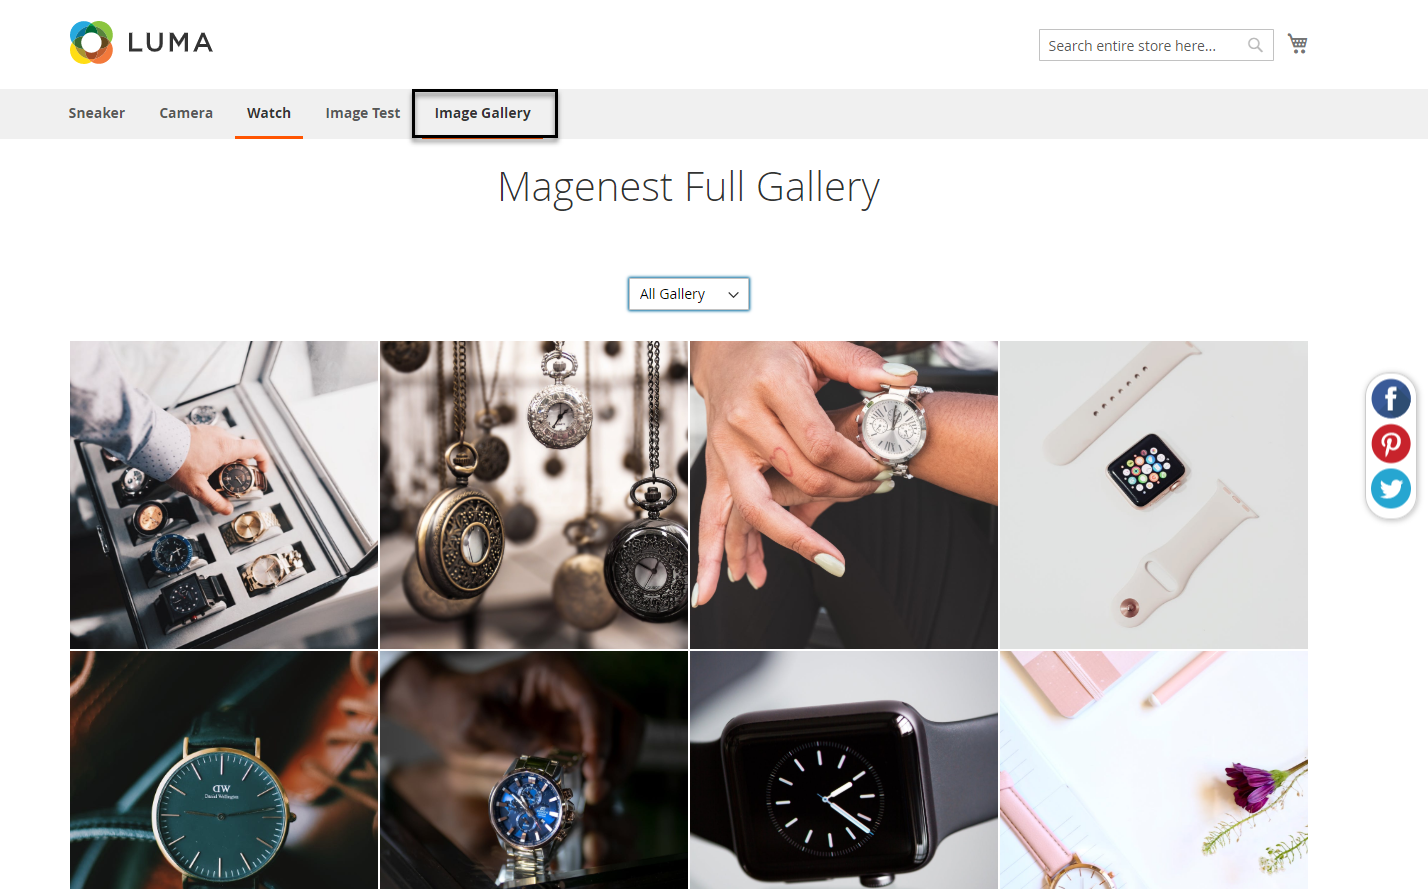
Full gallery at the front-end
Add images for the gallery
Before setting for the gallery, admin needs to add images first.
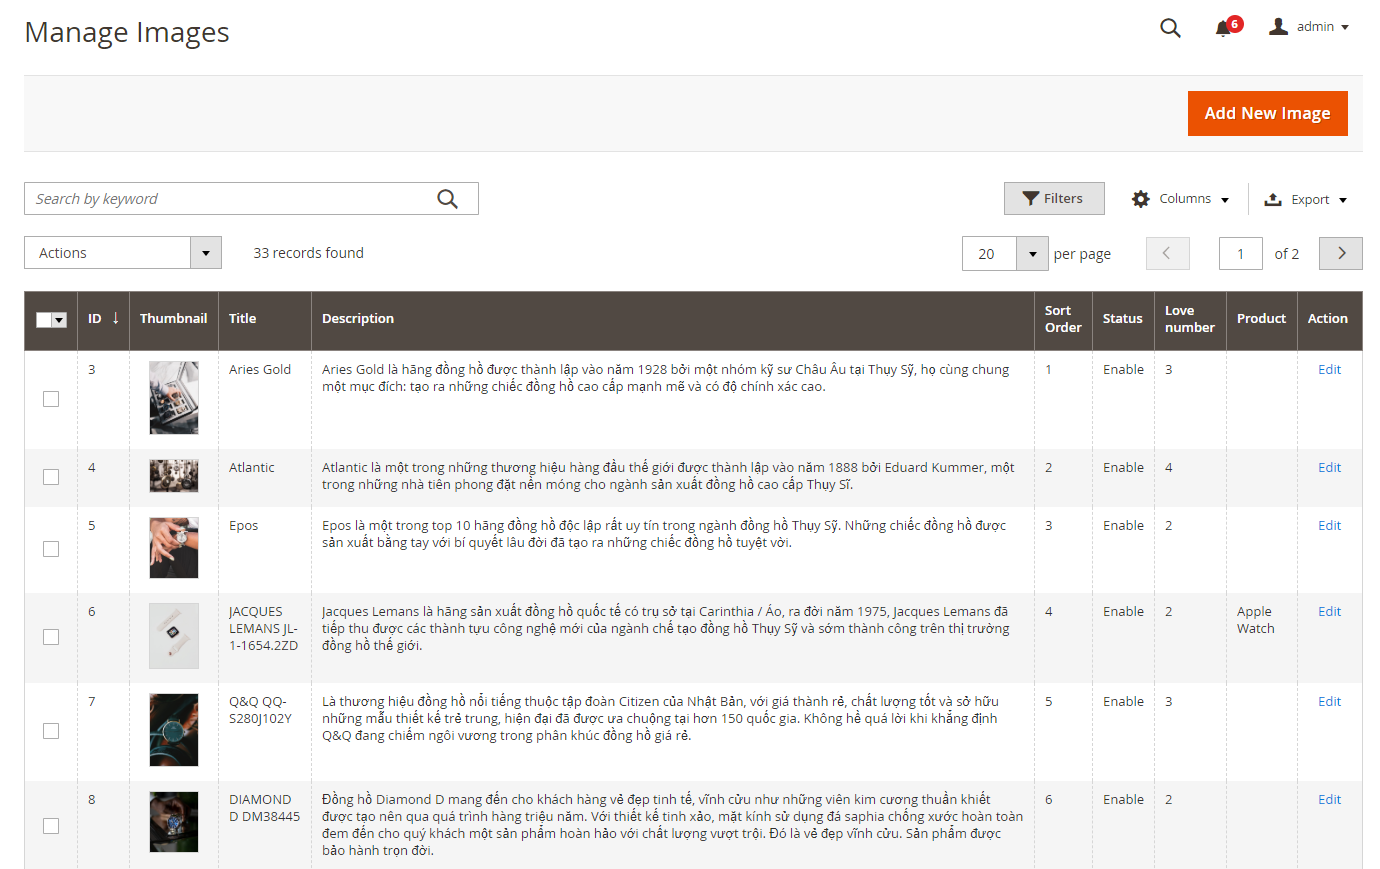
![]() On the admin sidebar, select Image Gallery > Manage Images.
On the admin sidebar, select Image Gallery > Manage Images.
![]() On Manage Images page, click on Add New Image button to upload images to the full gallery.
On Manage Images page, click on Add New Image button to upload images to the full gallery.
![]() On the New Image page:
On the New Image page:
- Under General Information tab:
- Image Title: enter a title for the new image.
- Description: fill in this field with the image description.
- Image: upload image.
- Sort Order: set the order for the image on the full gallery.
- Status: choose Enable to show the image at the gallery.
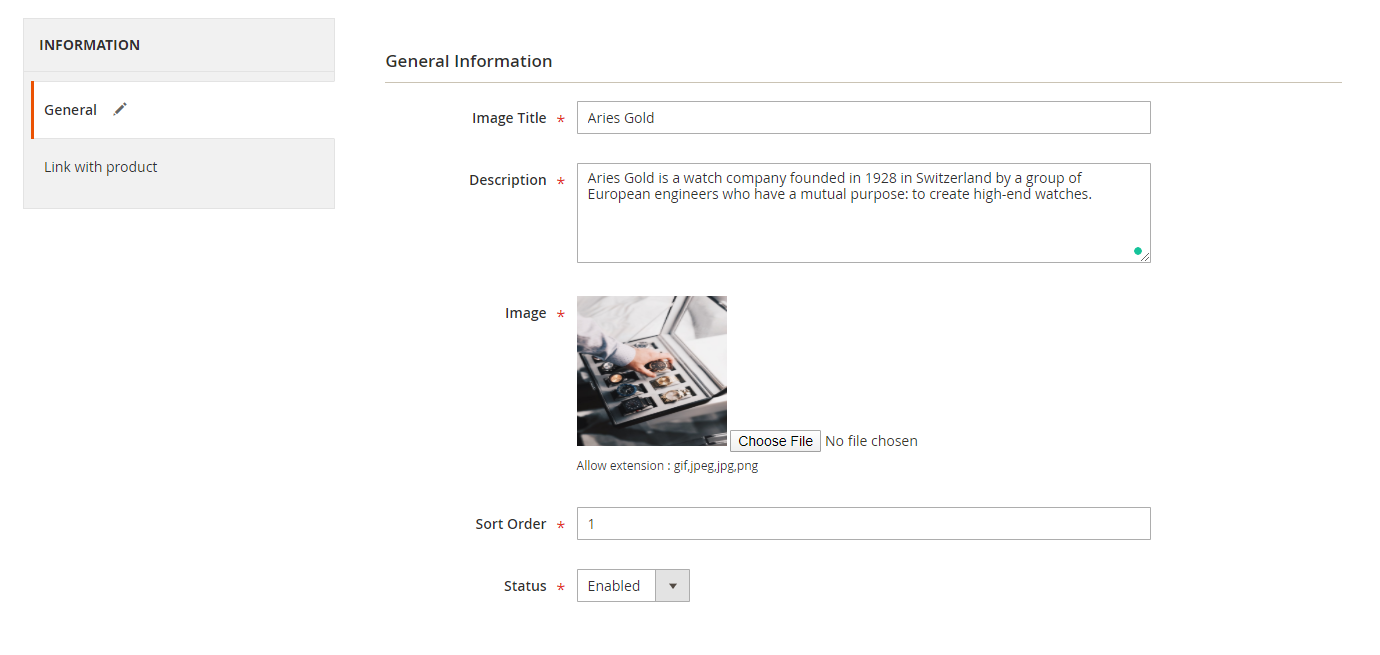
- Under Link with product tab:
- Select the a product to link with the image.
- Use the search tool to find a proper image.
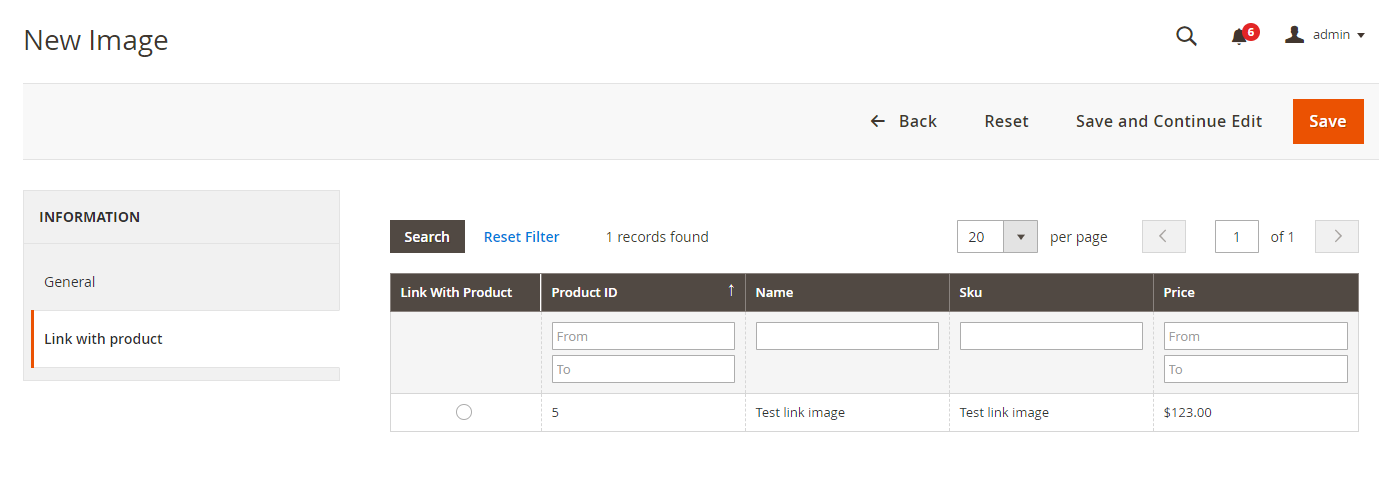

The link to product is shown at the product details pop-up
![]() After finishing, click Save button to save the image.
After finishing, click Save button to save the image.
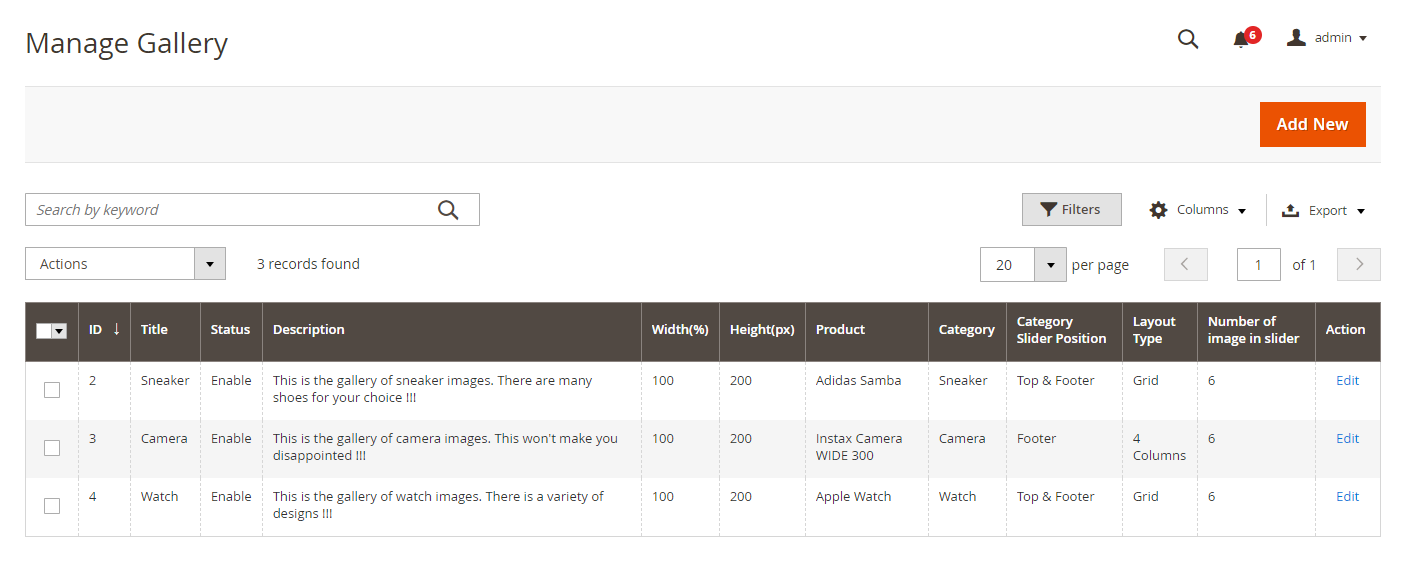
Manage Gallery
Admin can create specific galleries and assign them to be shown at the proper page.
![]() On the admin sidebar, select Image Gallery > Manage Gallery, go to Manage Gallery page, click on Add New button to create a new gallery.
On the admin sidebar, select Image Gallery > Manage Gallery, go to Manage Gallery page, click on Add New button to create a new gallery.
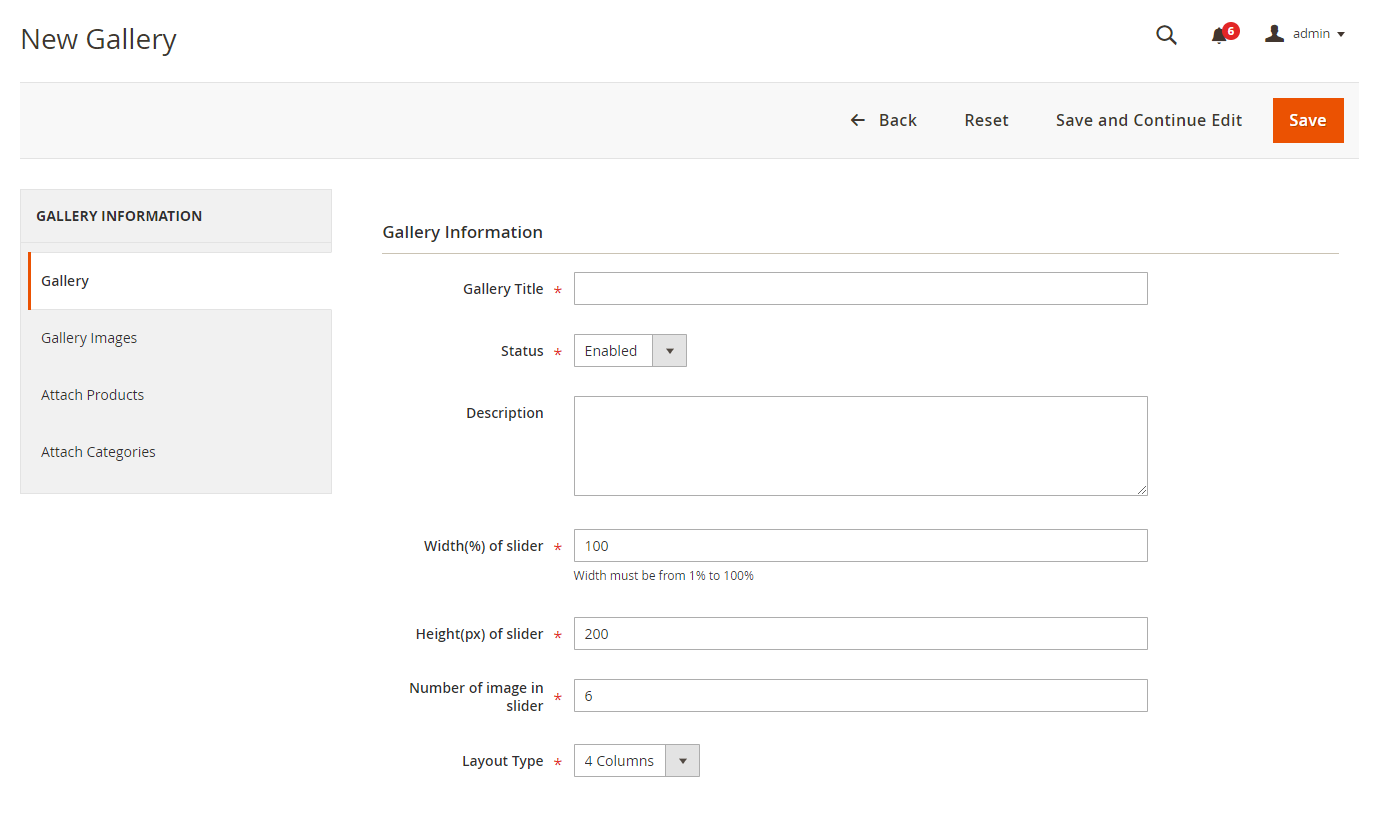
![]() On new Gallery page:
On new Gallery page:
- Gallery Information
- Gallery Title: set a title for the new gallery.
- Status: enable the gallery at the front-end.
- Description: fill with the gallery description.
- Width(%) of slider: set the width for the gallery slider, which is shown at the product page or category page.
- Height(px) of slider: set the width for the gallery slider, which is shown at the product page or category page.
- Number of image in slider: set the number of images on the gallery slider.
- Layout Type: choose the layout for the gallery. There are two options: 4 Columns and Grid.
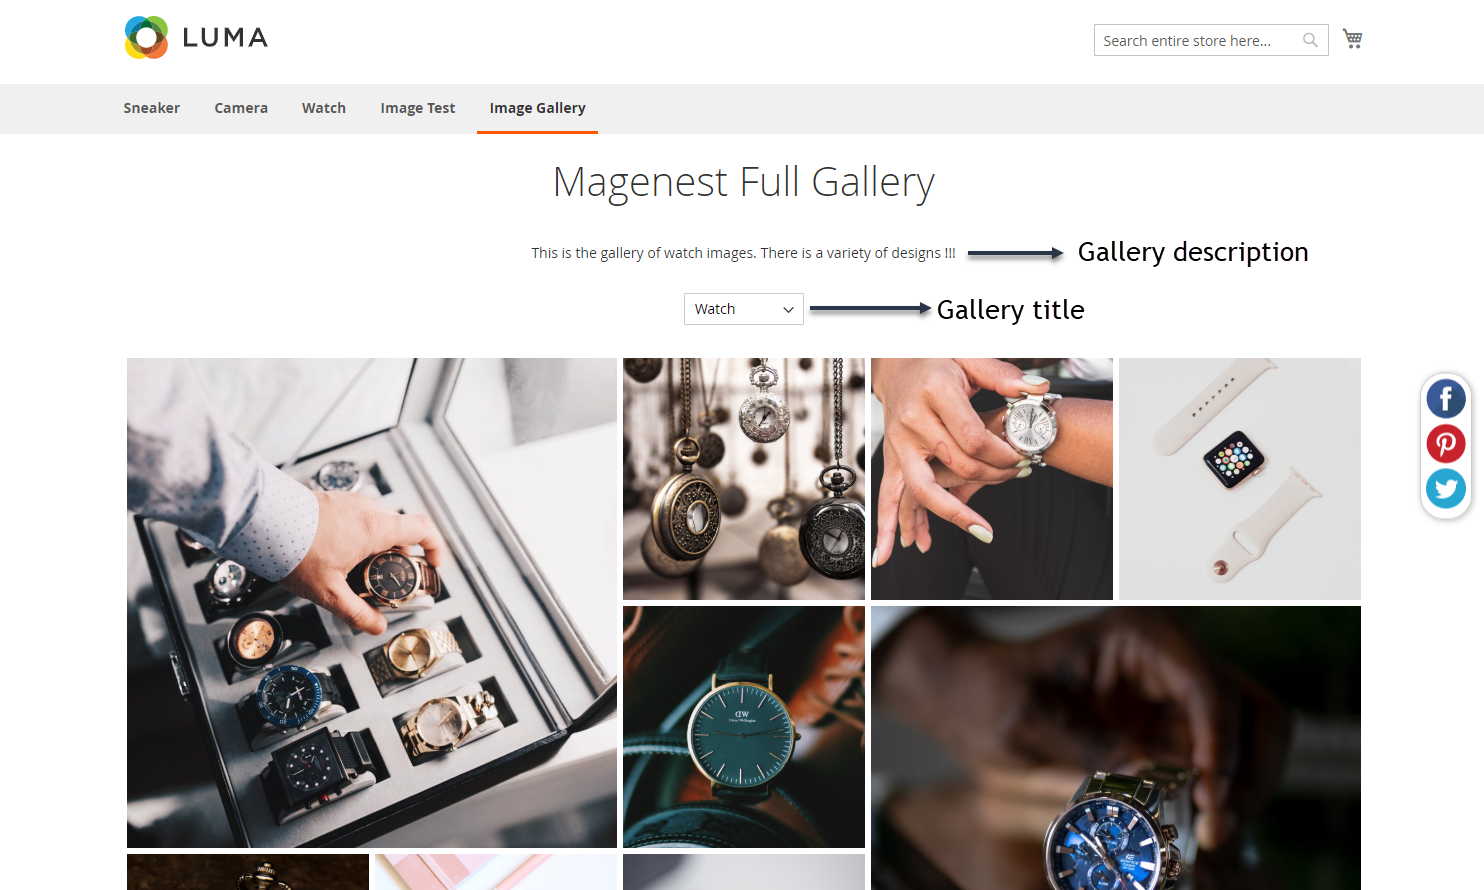
Gallery description and title
- Gallery Image: search for images and mark the tick box to select the images for the gallery.

- Attach Product: select a product so that the gallery will be shown as slider at that product page.
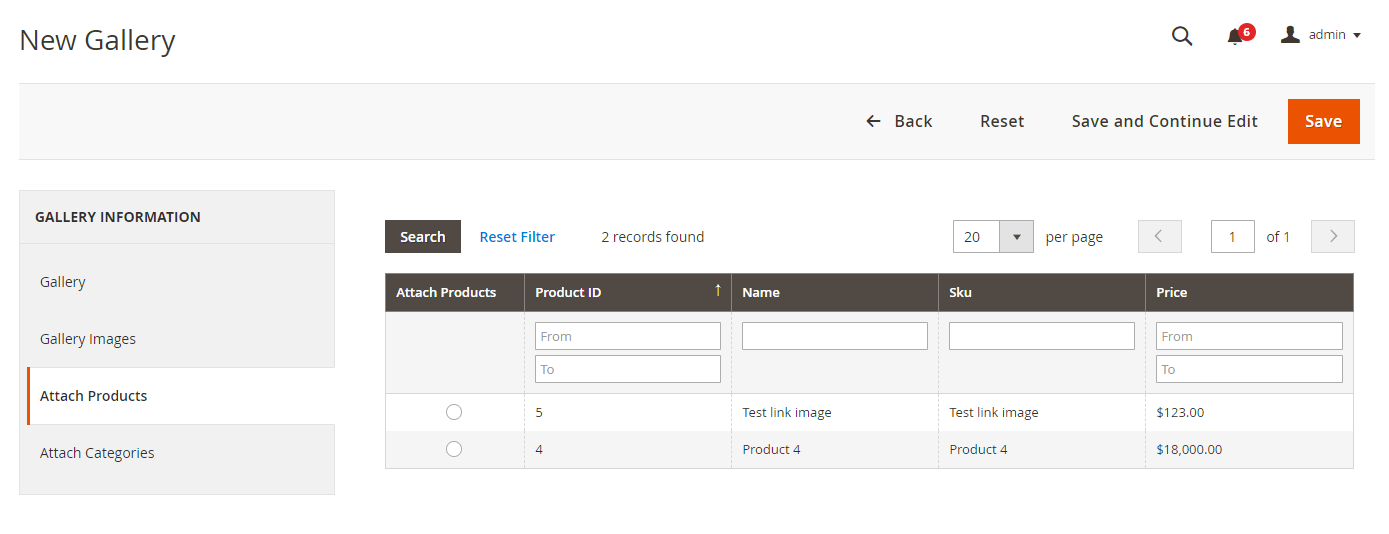

Slider at product page
- Attach Category:
- Attach category: select a category on the drop-down list so that the gallery will be shown as slider at that category page.
- Category Slider Position: select the position for the slider at category page.
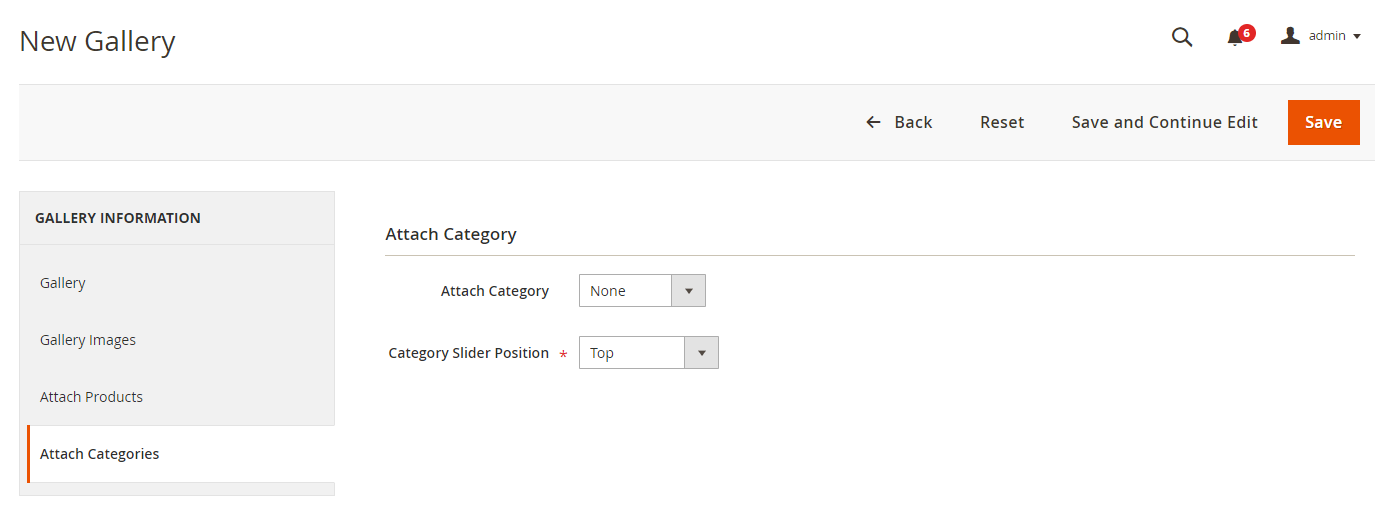
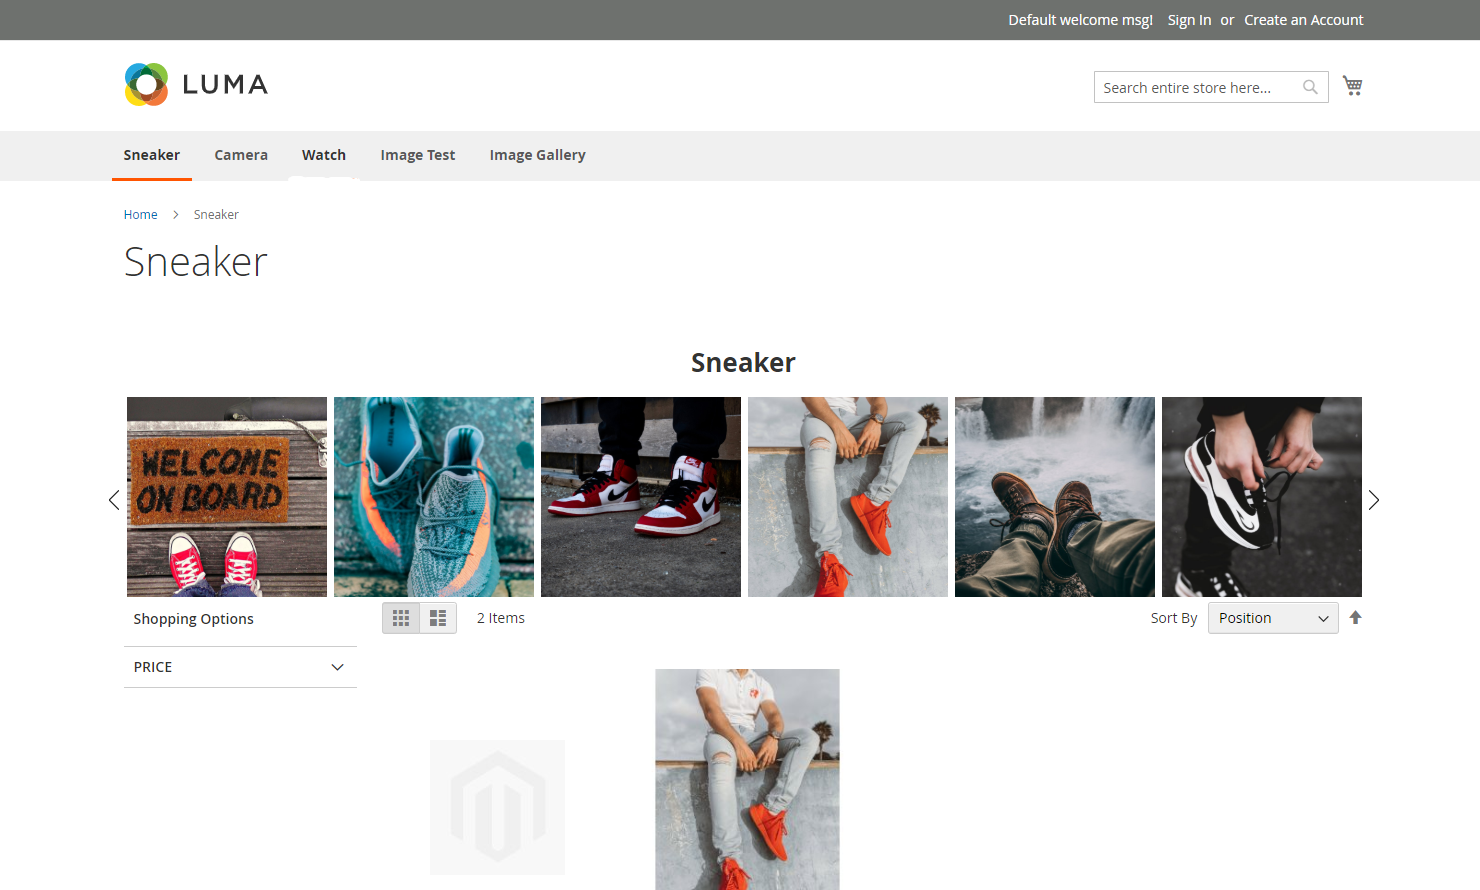
Slider at category page
Main Function
Once again, thank you for purchasing our extension. If you have any questions relating to this extension, please do not hesitate to contact us for support.
Update
- When a new update is available, we will provide you with a new package containing our updated extension.
- You will have to delete the module directory and repeat the installing steps above.
Support
- We will reply to support requests after 2 business days.
- We will offer lifetime free update and 6 months free support for all of our paid products. Support includes answering questions related to our products, bug/error fixing to make sure our products fit well in your site exactly like our demo.
- Support DOES NOT include other series such as customizing our products, installation and uninstallation service.
Once again, thank you for purchasing our extension. If you have any questions relating to this extension, please do not hesitate to contact us for support.