Thank you for purchasing our extension. If you have any questions that are beyond the scope of this document, please feel free to contact us, we will be happy to assist
Created: 2226/0604/2016 2019 | By: Magenest | Email: [email protected] | Shop By Brand: Ajax Search http://servicedesk.izysync.com/servicedesk/customer/portal/21149
| Table of Contents |
|---|
...
Introduction
![]()
Shop By Brand extension Ajax Search for Magento 2 is a powerful tool to boost sales by allowing customers to choose products from brands they want to buyprovides customers with a better navigation experience by showing suggestions as soon as the customers begin typing on the search box. Suggested search results come with rich preview and links to product pages.
Extension's page: Shop By BrandAjax Search
Key Features
- Easily create the new brand, including: brand name, logo, banner, slogan and more
- Allow admin to add products when creating the new brand
- Allow admin to add an existing product into a brand
- Allow admin to show product with the brand name
- The dashboard displays the percentage of brands (using pie chart) that contain the product
The dashboard displays total order of brands, contribution of each brand (calculation based on product price).
Allow admin to show brand icon in product list
- Allow admin to show featured product and featured brand
Allow customers to search for the brand
System Requirements
For Admins:
Set the number of characters required to render a suggestion.
Set a delay time before rendering suggestions
Set the layout of the drop-down list with two options: vertical or horizontal.
Set the position and width of the suggestion box.
Add and set the color of the header, footer, and title.
Manage the number of displayable products.
Display product price, image or description upon suggestion.
For customers:
Search for products easily with the details in the suggestion box
Quickly access to products, pages from the suggestions in the drop-down list.
System Requirements
Your store must be running on:
Magento Open Source 2.1.x, 2.2.x, 2.3.x
Magento Commerce 2.1.x, 2.2.x, 2.3 Your store should be running on Magento 2 Edition version 2.1.x., 2.2.x
Video
| Widget Connector | ||||||
|---|---|---|---|---|---|---|
|
...
Configuration
Set configuration
Go to Stores > Configuration > Shop By Brand to configure.
![]() In general:
In general:
- Add Brands page Link to Main Menu: to add brand drop down list on Main Menu bar
- Menu Title: The Title of the Brand menu on Main Menu bar, if you leave this blank, it will shows the default title (Brands)
![]() Brand Detail Page
Brand Detail Page
- Display Featured Products: Enable the featured products to display for each brand
- Title featured products: The title displayed for Feature products section
- Display Featured Brands: To enable the popular brands to display on Brands page
- Title featured brand: The title of the popular brands section
- Display brands list: Show brand list in alphabet order

![]() Product Detail:
Product Detail:
You have 4 options for display mode:
- No: Disable this option
- Show brand name
- Show brand icon
- Show brand name and icon
![]() Product Listing
Product Listing
Display Icon Brand in Product List: To show brand icon in each product on product listing page
![]() All Brand Page Setup
All Brand Page Setup
- URL Key: URL of Brands page
- Title: Title displayed on Brand Page
- Meta keywords
- Meta description
Main Functions
Backend
- Dashboard
Go to Shop By Brand > Dashboard, admin can view the charts reporting the percentage of each brand in store (pie chart) and the total order of the brands in store (bar chart)

- Create a new group
In admin panel, go to Shop By Brand > Manage Groups
Click on Add new group button to create a brand attribute.

In the New group page, fill in the brand attribute title and choose Enable.
Then click on Save Group to create the new brand attribute.

The brand attributes created will be displayed on the front end as follows

Create a new brand
Go to Shop By Brand > Manage Brands
You can add new brand by clicking on Add New Brand button, or import the brand list by clicking on Import.

- Add New Brand button
There are 4 tabs: General, Images, Products, Brand Page
![]() General:
General:
- Title: The brand name
- Status: Enable brand rule
- Featured: Enable showing the featured products of the brand
- Store Views: Choose All Store Views or a certain store that you want.
- Group: Choose one or more brand groups/attributes

![]() Images: Admin can upload logo of the brand on Brand Page, and in Brand Detail, as well as Banner displayed on Brand Page
Images: Admin can upload logo of the brand on Brand Page, and in Brand Detail, as well as Banner displayed on Brand Page

![]() Products:
Products:
To add the products to the brand, you select the products in the grid table then click on Add Product button.

![]() Brand Page: You can update the brand information in this tab, including the title, URL, slogan, description, meta keywords, meta description.
Brand Page: You can update the brand information in this tab, including the title, URL, slogan, description, meta keywords, meta description.

Please Save button to create new brand.
2. Import brand list
When clicking on Import button, you will be directed to a page where you can upload the brand list using csv or xml file.
You can download the sample file here SampleFile.csv

Add products into the brand
There are 2 ways to add a product into a brand: adding when the brand is created (see in Create a new brand section), adding in each product setting.

To add the products in the product setting, you can go to Products > Catalog then choose the product.
In the product info page, scroll down to Brand Product tab, you can choose the brand from Product Brand.

Create the widget displays brand list
Go to Content > Pages, choose to edit the page you want to show the widget. For example, here we choose the Home Page.
In the Content section, click on Insert Widget button

Choose the Widget Type as List Brand

Frontend
Brand Listing Page
Customers only click on Brand on menu bar to view all of brands or choose a brand from the drop-down list.

Click on Brands, it will direct customer to the Brand page
The brands can be group by brand attributes (Kid's, Men's, Women's)
The popular brands (Featured brands) will be shown with logos and names.
All of the brands will be displayed in Alphabet order.

Brand detailed page

Product details page
When customers buy a product, at this product details page will be shown the brand name if this product belongs to any brands.

Show widget on any page
The brand list widget will be shown according to the sort order number.
On the Admin sidebar, tap Magenest Search. Then under Magenest, choose Search Configuration.
There are three configuration sections: General Configuration, Product Setting, Header and Footer Setting.
![]() General Configuration
General Configuration
Enable Ajax search: Choose Yes to enable Ajax Search.
Number of results: Enter the integer as the number of results that will show up on the suggestion.
Note: Maximum number of results is 20.
Minimum Characters Before Suggestion: Set the number of characters typed on the search bar that triggers the results to appear.
Delay: Enter the number that is the time for the search results to show up after searchers input text on the search box. Unit: second.
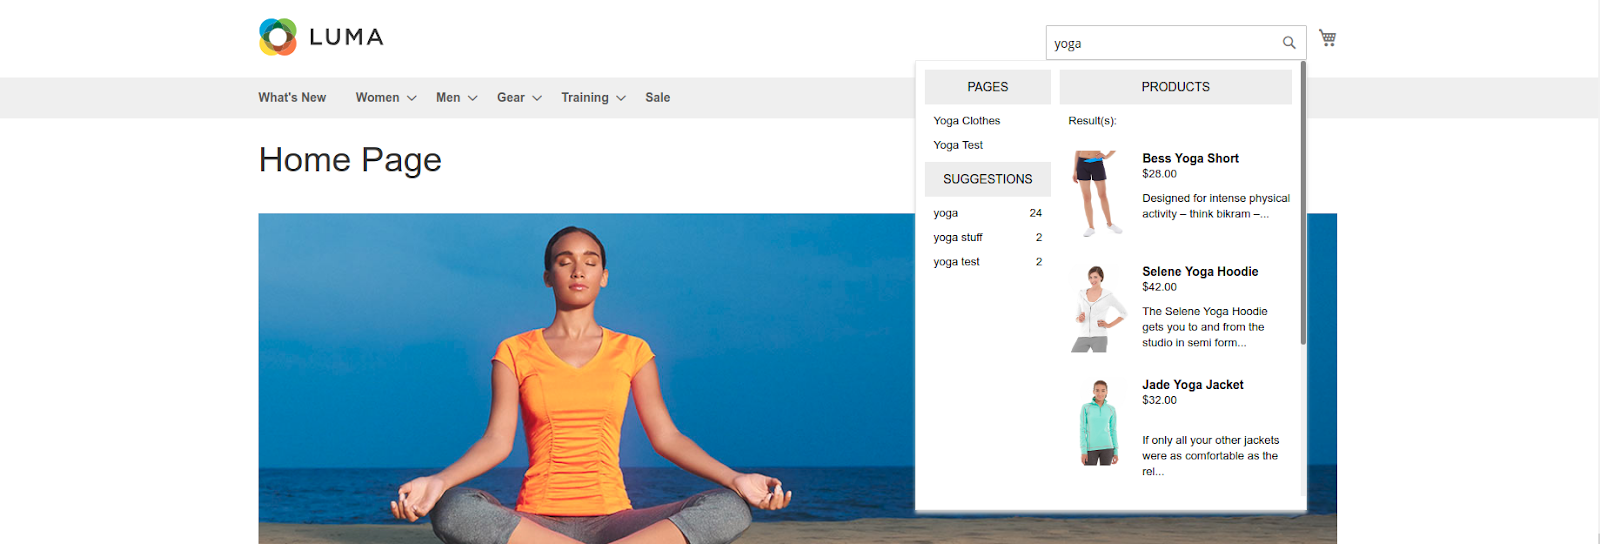
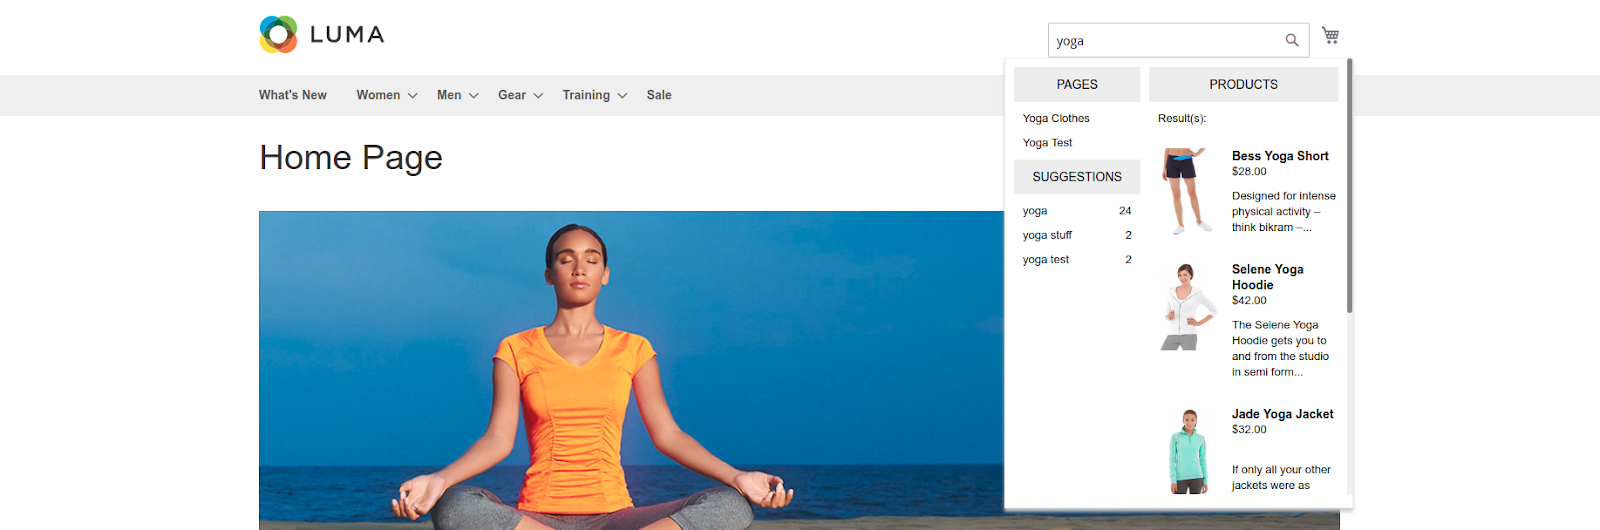
Display Suggestion: There are two types of layout: Vertical and Horizontal.
Vertical Layout
Horizontal Layout
Suggest Box Width: Set the width and position of drop-down list by choosing among 3 options: 150% left, 250% left and Center
E.g: Suggest box width in 150% left.

Suggest box width in 250% left.

Suggest box width in Center.
Sort Suggestion based on: define the order of the displayed suggestion with 3 options: Most Viewed, Name, Price.
Title Background Color: Set the color for the background of the title by using the color palette or entering the color code manually.
In case a background color is not set, the default color #eeeeee will be set automatically.
Title text color: Select the color for the title text by using the color palette or entering the color code manually.
If a title color is not selected, the default color will be set as #000000.

On each section below, choose Yes or No to set the details displayed with the product.
Display Price: If Yes, the product’s price will show up in the suggestion box.
Display Product Image: If Yes, the product’s image will show up in the suggestion box.
Display Product Description: If Yes, the product will appear with the description in the suggestion box.
![]() Header And Footer Setting
Header And Footer Setting
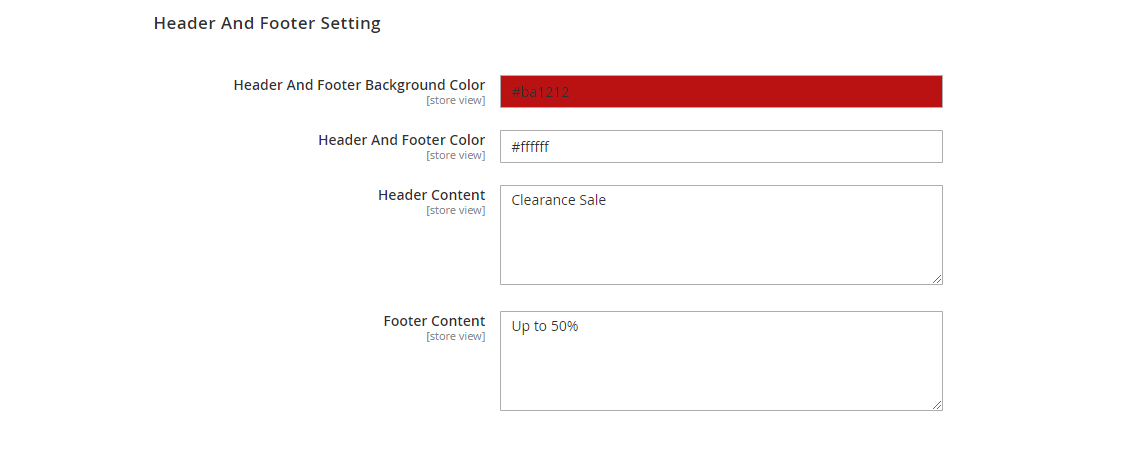
Header And Footer Background Color: set the color for header and footer’s background by using the color palette or entering the color code manually.
Default color will be set as #000000 if this section is left.
Header And Footer Color: set the color for header and footer text by using the color palette or entering the color code manually.
If header and footer color is not selected, the default colors will be set as #FFFFFF.
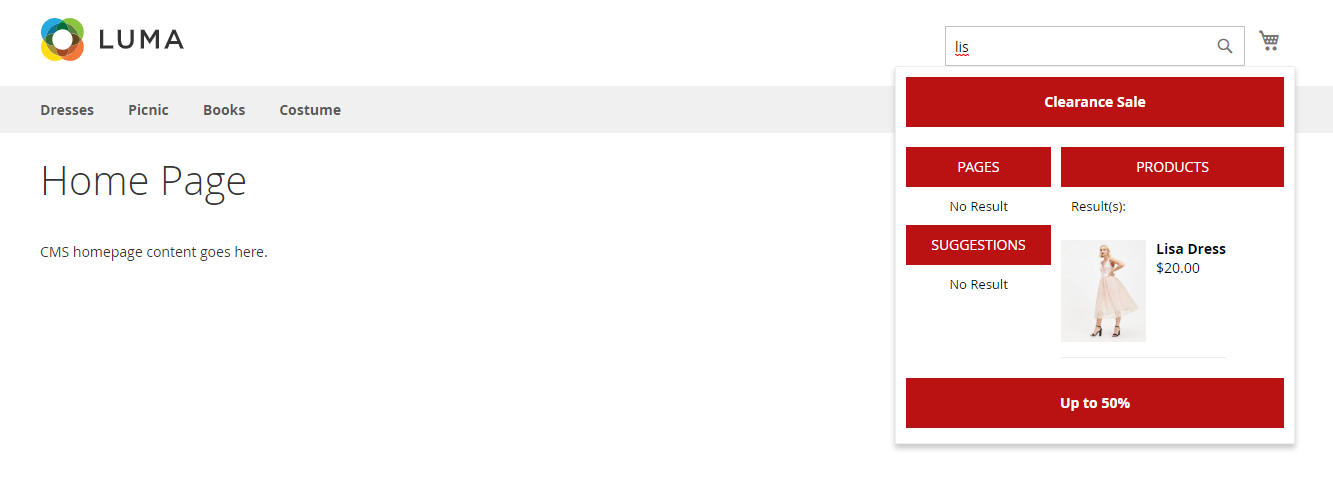
Header Content: Input the text for the header of the suggestion box.
Footer Content: Input the text for the footer of the suggestion box.
The appearance of Header and Footer on Frontend.
...
Update
- When a bug fix or new feature is released, we will provide you with the updated package.
- All you need to do is repeating the above installing steps and uploading the package onto your store. The code will automatically override.
- Flush the configure cache. Your store and newly installed module should be working as expected.
Support
- We will reply to support request within 2 business days.
- We will offer lifetime free update and 6 months free support for all of our paid products. Support includes answering questions related to our products, bug/error fixing to make sure our products fit well in your site exactly like our demo.
- Support DOES NOT include other series such as customizing our products, installation and uninstallation service.