...
We created Multiple Vendors tab which allows admin easily to control all vendors in their store.
 Admin will set some email template as they wish in order to communicate with vendors of their main store.


The following is the great features that this extension brings for admin.
...
Admin can manage the list vendors and the information vendor such as ID, Name Vendor, Email Vendor, Shop Url and so on.


Click Edit button if admin wants to view or implements any changes about the information vendors.
Furthermore, admin will also set the vendor approval for all vendors.


- Manage Products
Admin will manage all products which are sold in their store along with the corresponding vendor ID. This will help to control product an easy way.

- Manage Commission
At Manage Commission tab, admin can control all commission related each vendor.

- Manage Feedback
Admin will view all of feedback and set the feedback approval


Admin also need to set the feedback approval which allows customer's feedback to be shown on My feedback tab of the owner store.
Enabled: Displayed. Disabled: Not be displayed. |  |
|---|
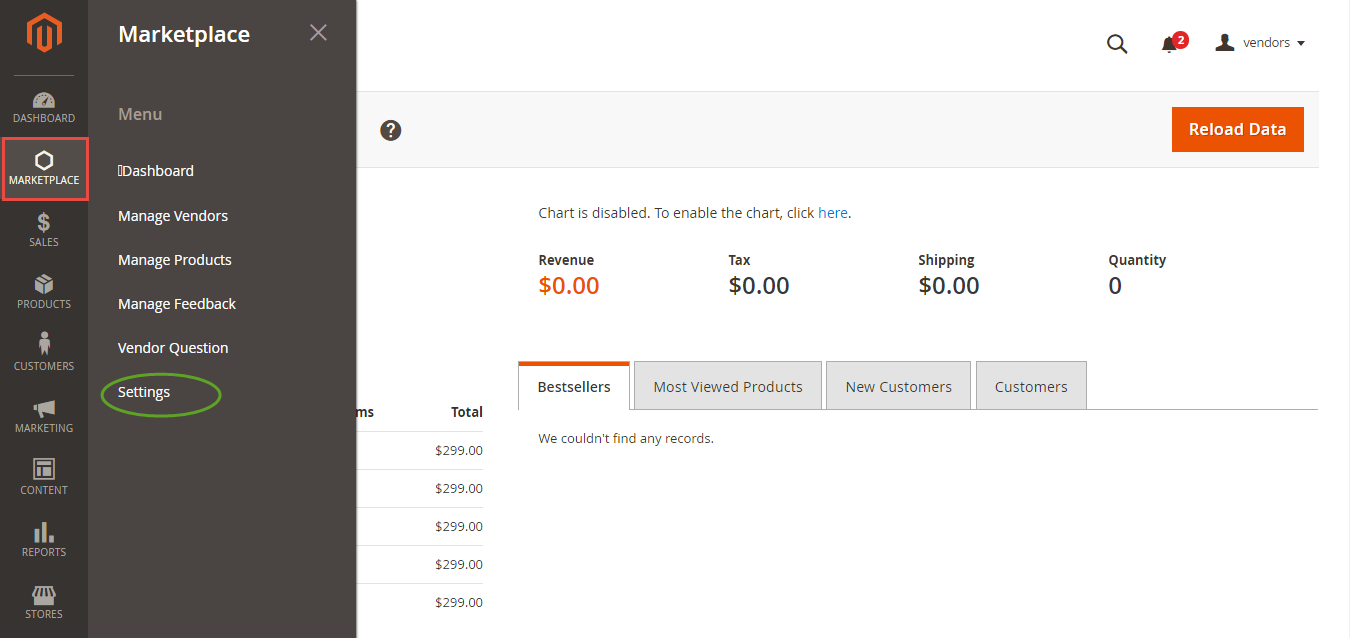
- Manage Vendor TransactionsVendor Question
Admin wiil manage all of information related transaction history by clicking on Multiple Vendors > Vendors TransactionQuestion
![]()
Admin will set some email template as they wish in order to communicate with vendors of their main store
To view details and set status of a transaction between the owner store and vendors, you only click on lines which you want to consider. Then, Edit Transaction screen will be shown.

There are four options for admin in order to select, consist of: Pending, Paid, Rejected and Failed.
- Set email templates
. 
For Vendor
- Set Vendor Profile Create a new vendor
When customers create a new vendor account, they will be needed the approval of the admin to become an official vendor.


Then, customer will set their profile by clicking on My Account > Vendor Profile.
Seller Details

Click Save Seller Information button to save the information entered.
Shop Details

Click Save Shop Information button to save the information entered.
Payment Information

Click Save Payment button to save the information entered.
- Add New Products
- View Marketplace Dashboard
- Add New Products
After customer entered all of the information related the store. They need to add product into add product into their store by clicking on My Account > New Product.
Currently, we provide two product types for customers so that they can select, includes includes: Simple Simple Product and Virtual Product. Vendors will manage all of the product in their store at here.


Click on Add New Product button, the Add New Product screen will be shown.

Please click on Save Product button to save information entered.
Seller Details
Click Save Seller Information button to save the information entered.
Shop Details

Click Save Shop Information button to save the information entered.
- View Market Place
To view Market Place, customers only click on Marketplace.


Then, customer can can select the store which they want.

- Manage the product list
Vendors will manage all of the product in their store at here.

- Manage order history


Click View button if customer want to view details.
- Manage Feeback
Vendors will manage all of the customer‘s customer about products in their store at My Feedback tab.

- View Marketplace Dashboard
Vendors can view monthly sales table

Vendors can view a year sales table

- Transaction Management
To implement a withdrawal request for the ower store, vendors only click on Transaction List tab. Then, they need to enter some information, consist of: amount, details of the withdrawal request and click on Submit button.


The owner store will be received a withdrawal request and process them.
...