...
- If compilation mode in your Magento is enabled in your Magento store, you have to turn it off, otherwise your store and admin site would be inaccessible after installing the extension.
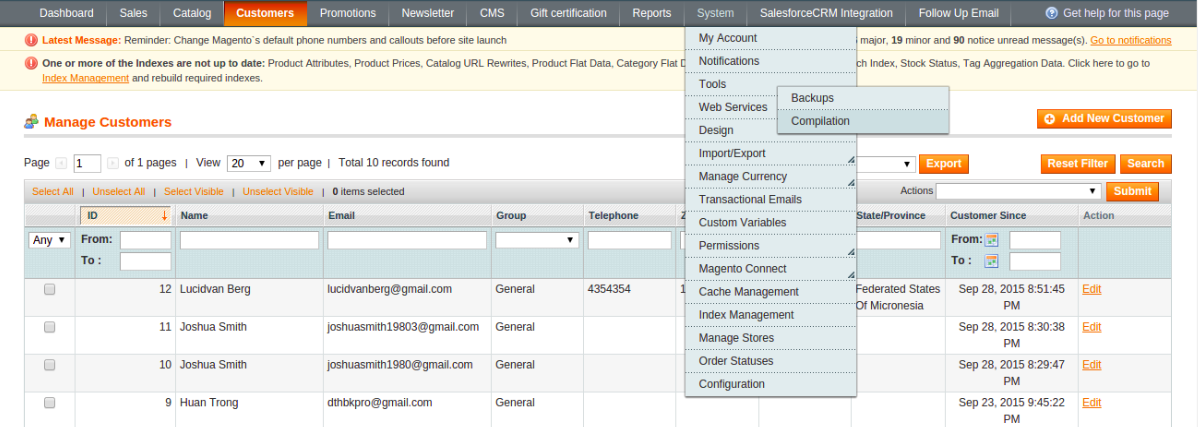
- To disable Magento Compilation, go to System–>Tools–>Compilation.
- Also, make sure you have backed up your Magento files and databases in case things go rogue.
Turn on cache
- It is highly recommended that your configuration cache is turned on to prevent early installation, as it could be a reason for errors.
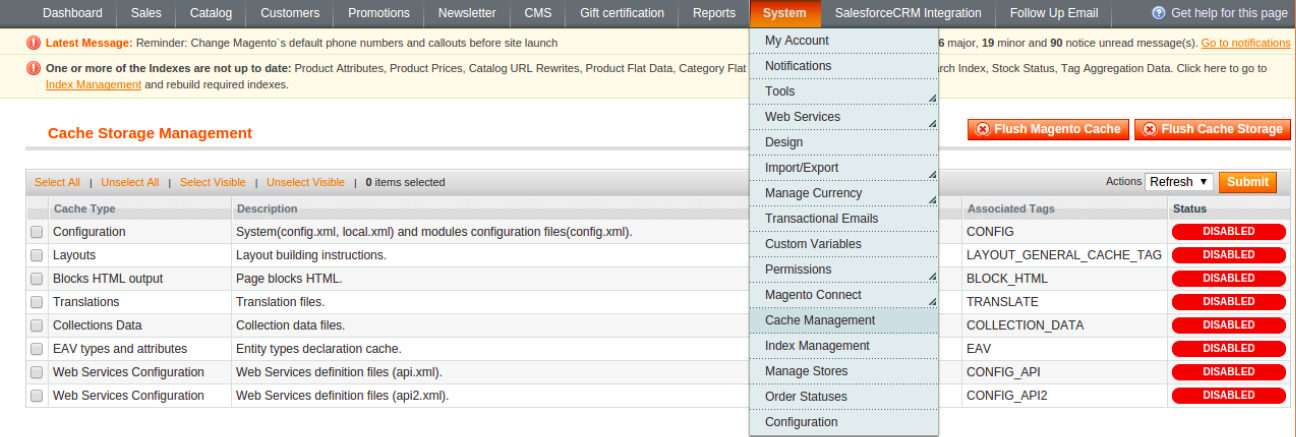
- Go to System –> Cache Management
- Switch Action to Enable and hit Submit.
...
- After successful purchase, we will provide you with the extension's zip file. Unzip the extension into a directory of your choice
- We recommend using FileZilla for uploading the files. Enter your store's Host IP, User name and Password, then hit Quickconnect
- To quickly install the extension, navigate both your local and remote site to app, right click on it in your local site and hit Upload
...
- Sign in Salesforce CRM and go to Set up option in dashboard.
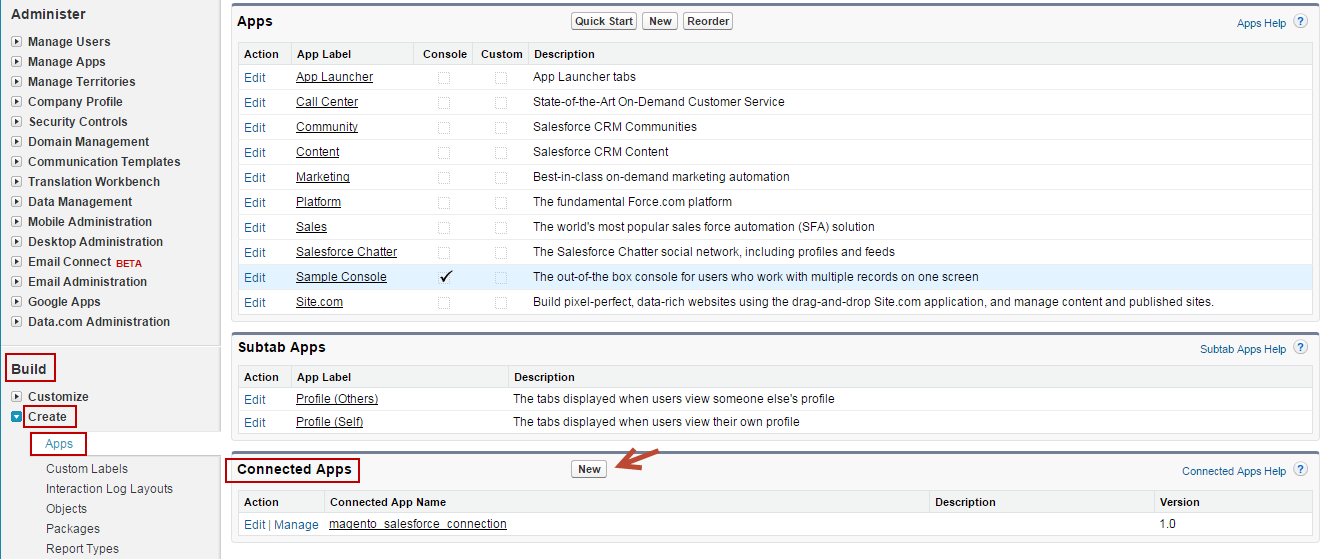
* In your Salesforce Dashboard, go to **Built / Create / Apps**. Press **New** button in **Connected App** to create a new connected app
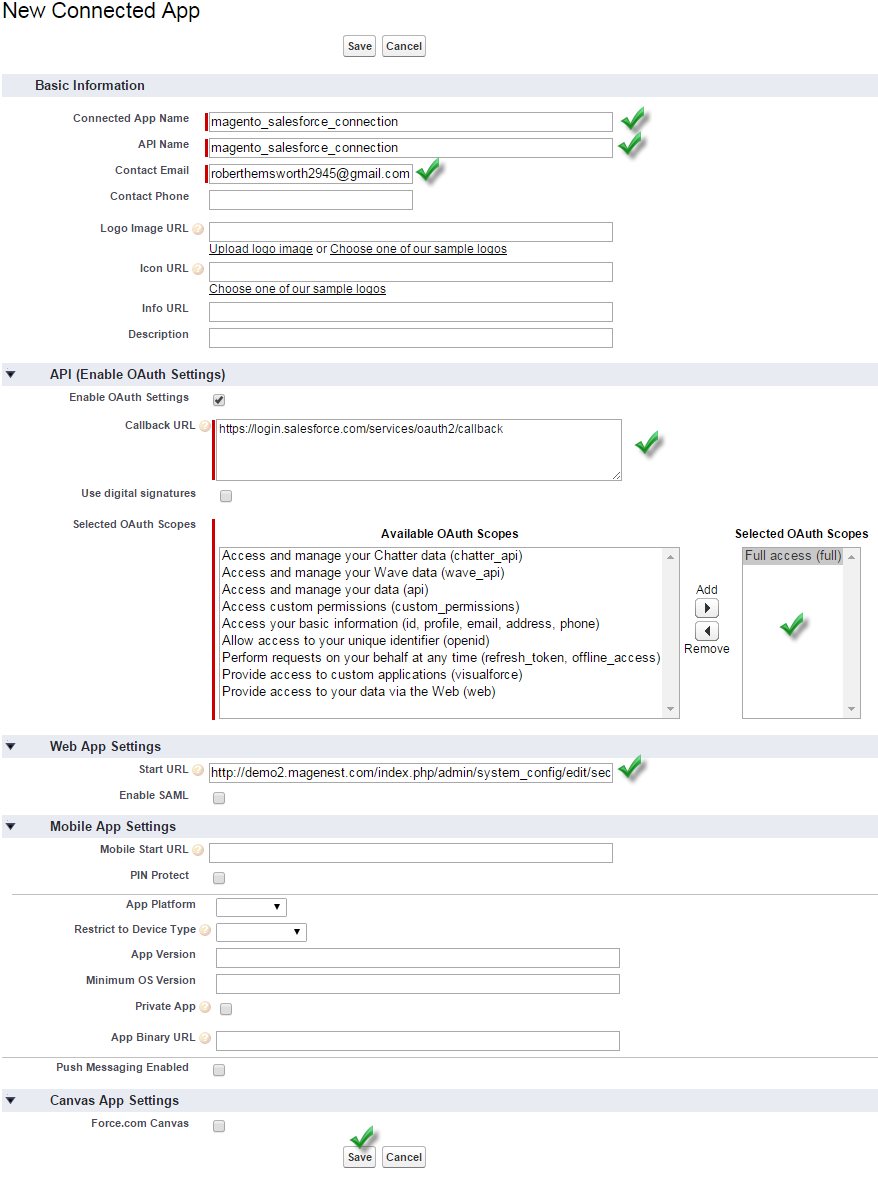
- Enter information in the required fields:
- Connected App Name: name for your connected app
- API Name: data from this field will be auto synced from Connected App Name
- Contact Email: your Salesforce email
- Check Enable OAuth Settings box
- Fill Callback URL: see example: https://yourwebsite/RestTest/oauth/_callback
- Selected OAuth Scopes : select Full Access option and click Add button
- Hit Save button when you are done
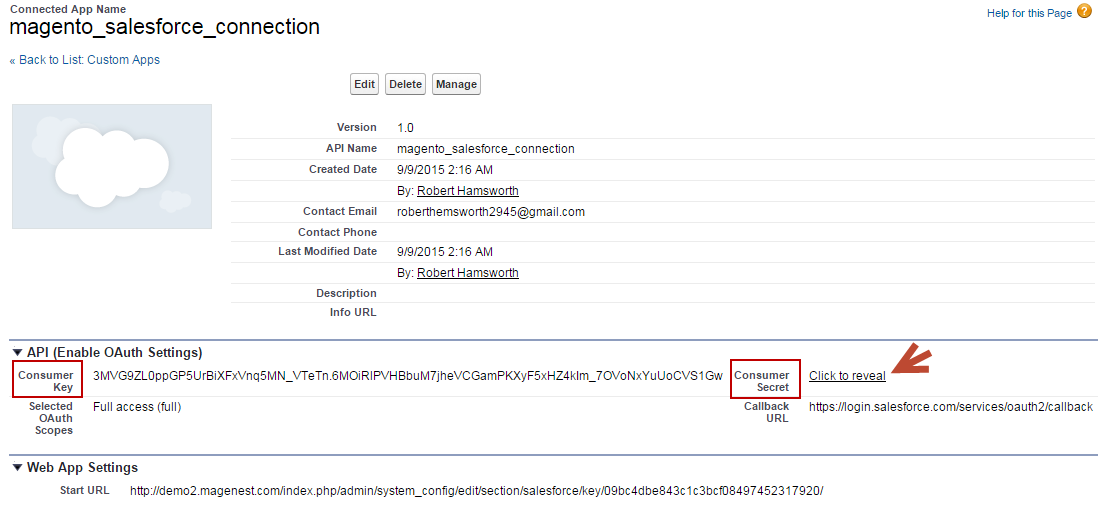
- After finish, the connected app will displayed like this
Get Consumer Key (Client ID) and Consumer Secret (Client Secret) by connected app
...
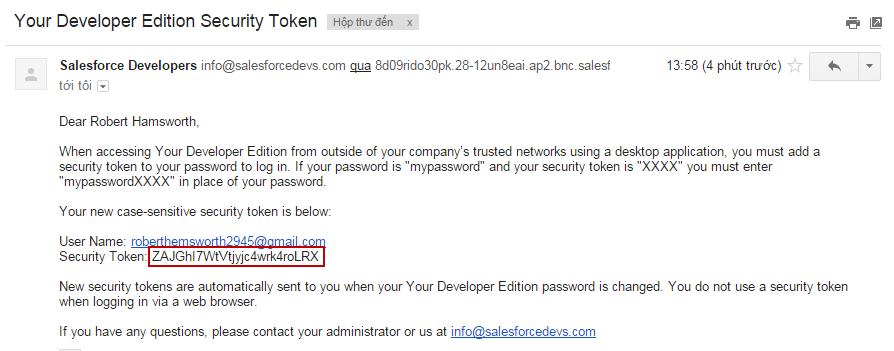
- In order to get Security Token, go to My Setting / Personal / Reset My Security Token
Press Reset Security Token button, the security token will send to your email
Set up the Salesforce account to integrate with Magento
...
- First, log in backend Magento
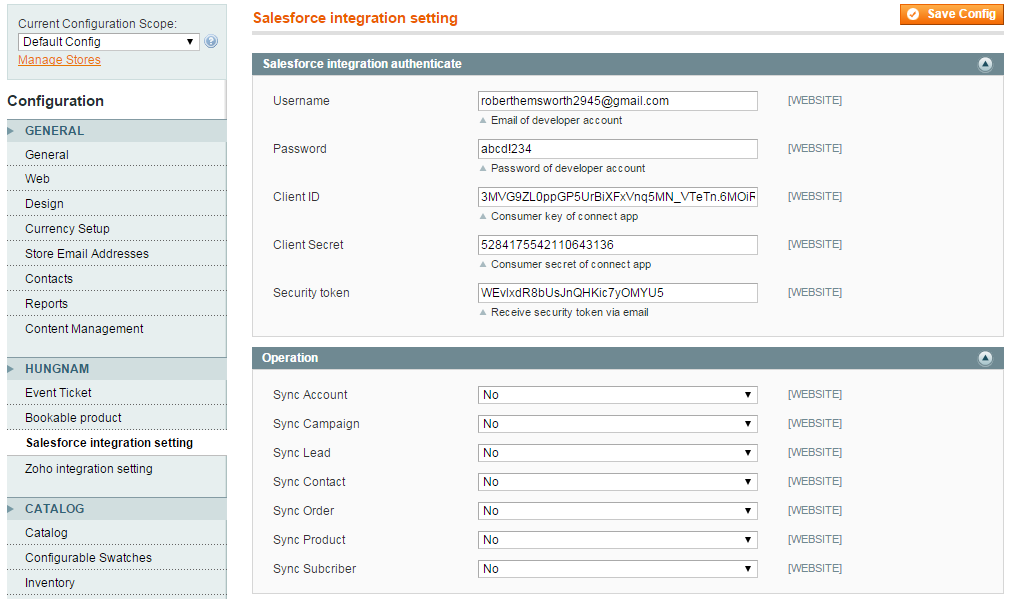
- Go to System → Configuration → Salesforce intergration setting
- Username: Your Salesforce login email
- Password: Your Salesforce password
- Client ID: 'Consumer Key' search in Setup →Create →App →Connected Apps in Salesforce.
- Client Secret: 'Consumer Secret' search in Setup →Create →App →Connected Appsin Salesforce.
- Security token : Receive via email register. Get from My Settings → Personal → Reset My Security Token
Hit Save config, your data configuration is ready to use
...
- You can choose which data you want to sync from Magento to Salesforce
- Click on Salesforce Integration tab –> Field Mapping
- You can edit, export to CSV, change status or delete mappings.
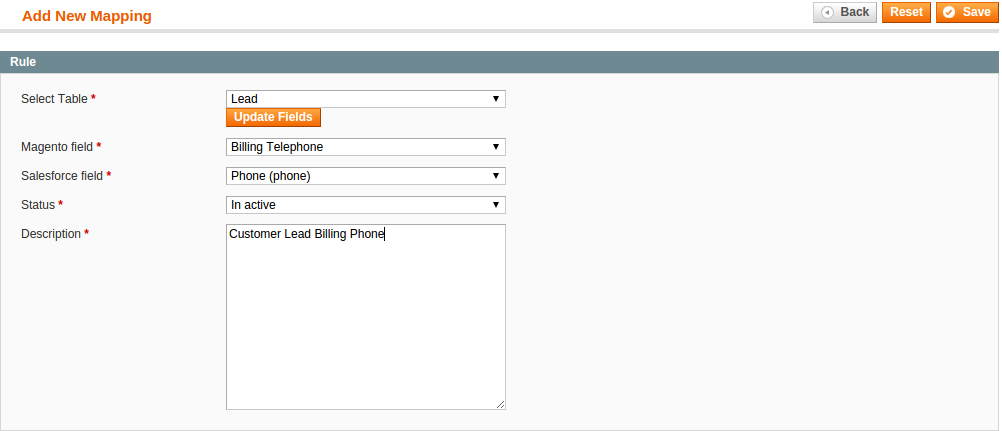
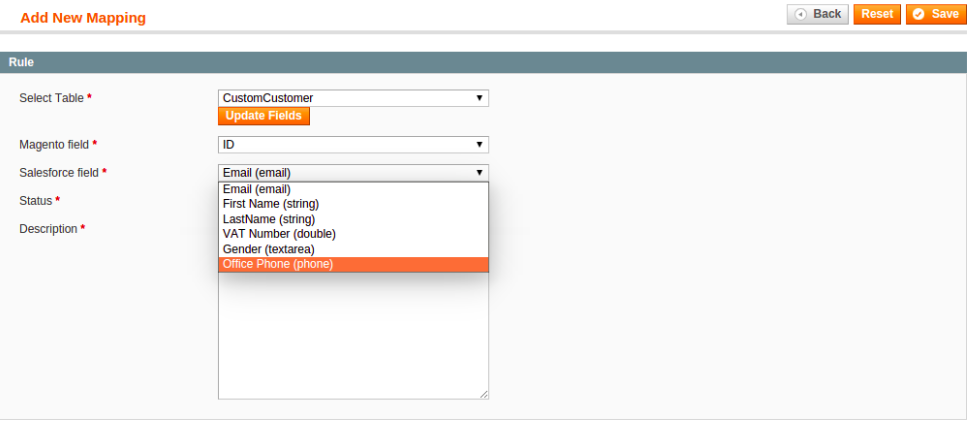
- To add new mapping, Click on Add, Add New Mapping window will be immediately loaded
- Select Table: select table for new mapping
- Salesforce field: choose Salesforce field
- Magento field: Magento field's name
- Status: default status is Active
- Description: Description for this new mapping
When done, hit Save, your mapping will be included in the next sync.
...
2. When a customer edits his account, his information will be synced in Saleforce's Contacts
...
3. When a customer places an order, his information will be synced in Salesforce's Accounts and Orders
4. When store admin launch a new promotion, a corresponding new campaign will be added in to Salesforce
...
5. When a new product is added or an existing one is edited, a record will be added in Salesforce's Products
...
Advanced Functions with Custom Objects
...
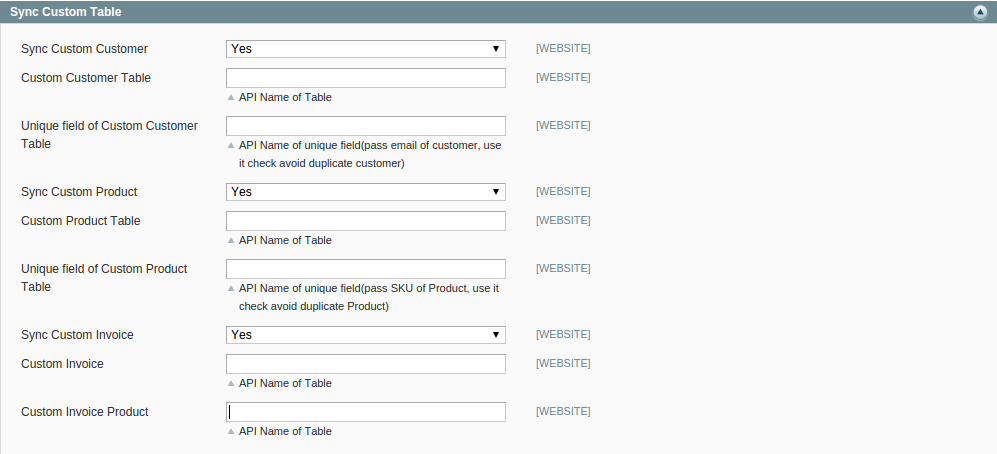
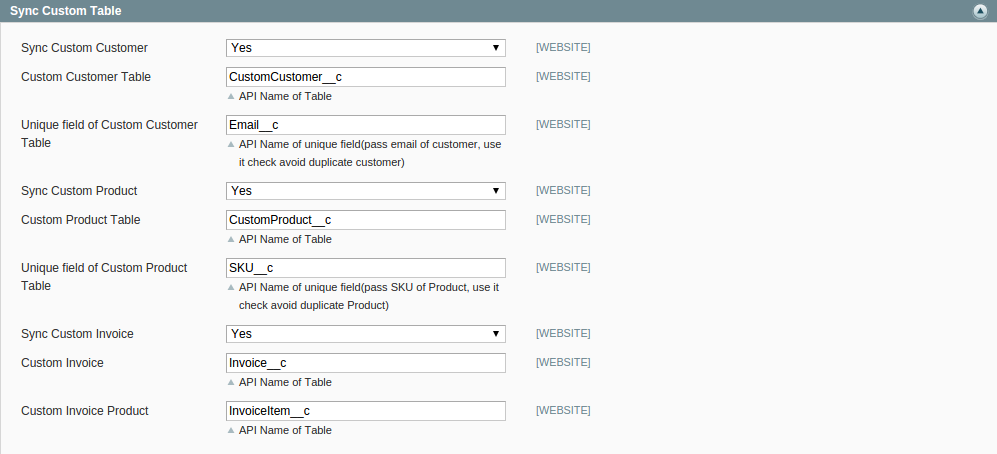
- In Magento admin site, go to SalesforceCRM Integration –> Configuration and scroll down, you will see some options in Sync Custom Table.
- Sync Custom Customer: this sync option is on by default.
- Custom Customer Table: this is the API Name of the Custom Table in Salesforce.
- Unique field of Custom Customer Table: this is the API Name of an unique field in Custom Customer Table.
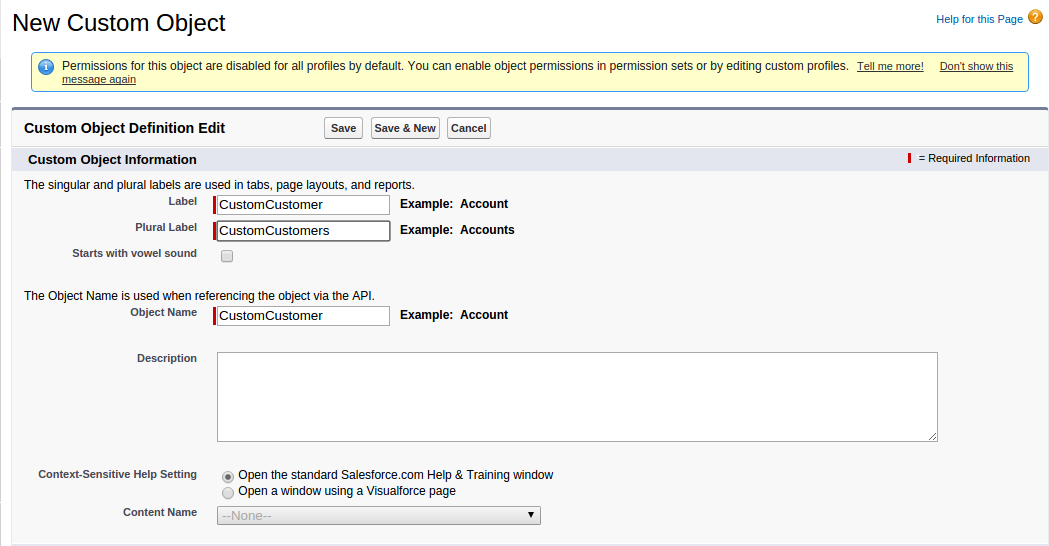
- The other 2 tables' options have the same function as above. To add a new Custom Object, go to Setup. In the Build console, expand Create and click on Objects, the Custom Objects window will popup. Click on New Custom Object to get started.
- Fill in the following fields
- Label: Name of your Custom Object
- Plural Label: Name of your Custom Object in plural form
- Object Name: This name will be auto-filled once Label is filled
- Description: Describe your Custom Object
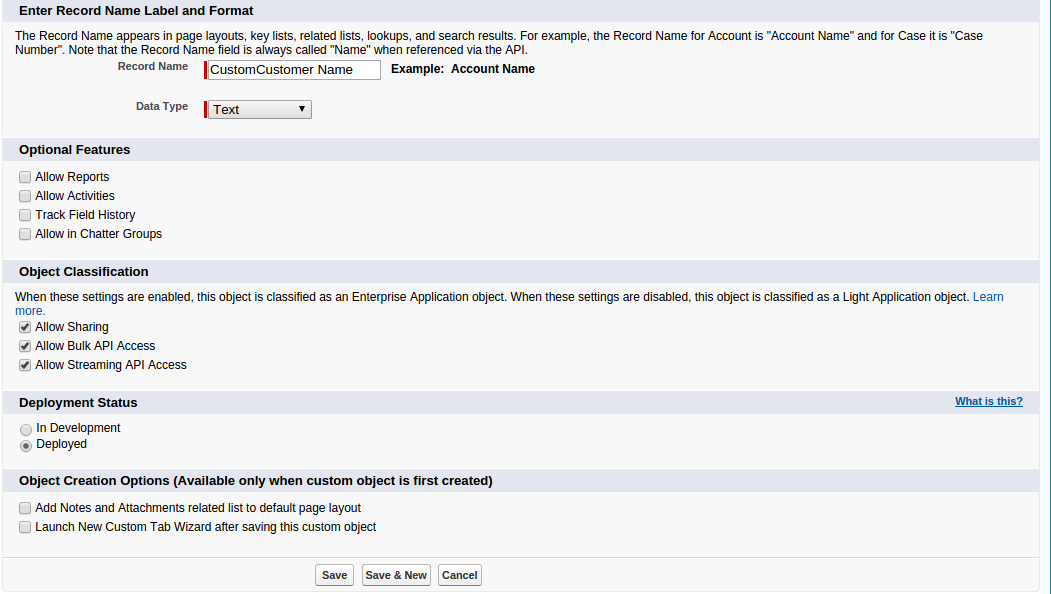
- Record Name and Data Type: This will also be auto-filled.
- Hit Save when done, your new Custom Object is now successfully created.
Creating a Custom Field
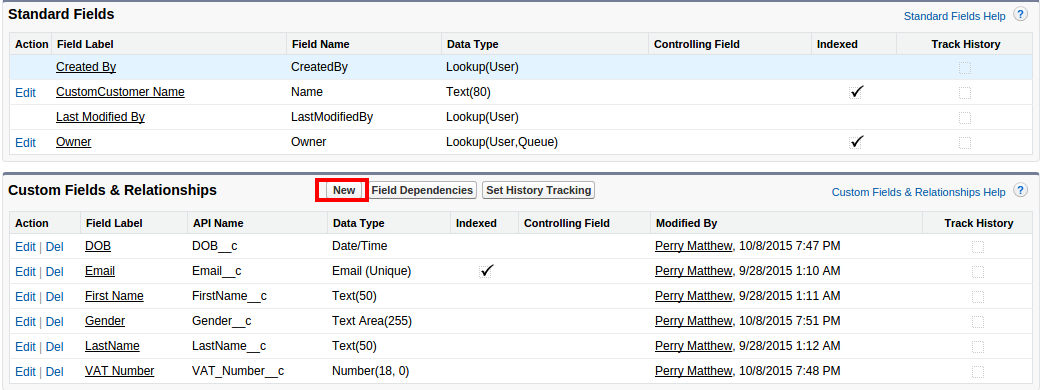
- To add or edit custom fields, go to Setup. In the Build console, expand Create and click on Objects, the Custom Objects window will popup.
- Click on the table that you want to edit, in here we will take Custom Customer for instance, add click on New to start adding new field.
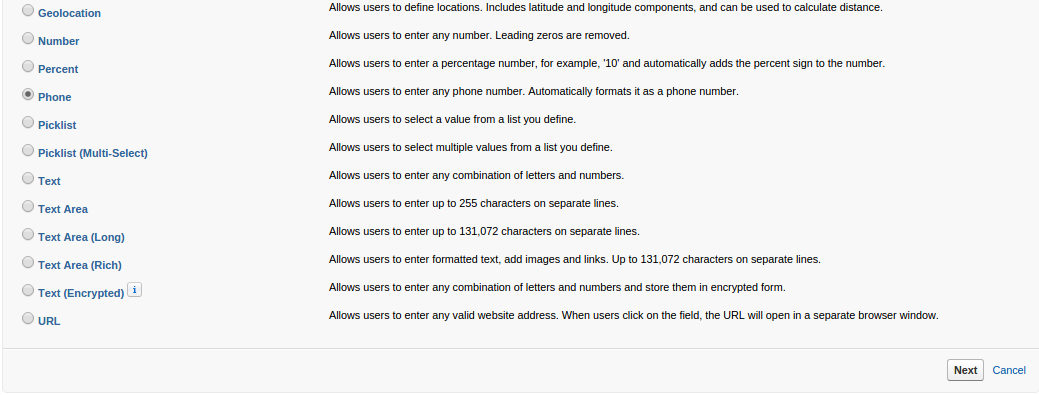
- You will see a long list of options for your new field, choose one of your need, then click on Next.
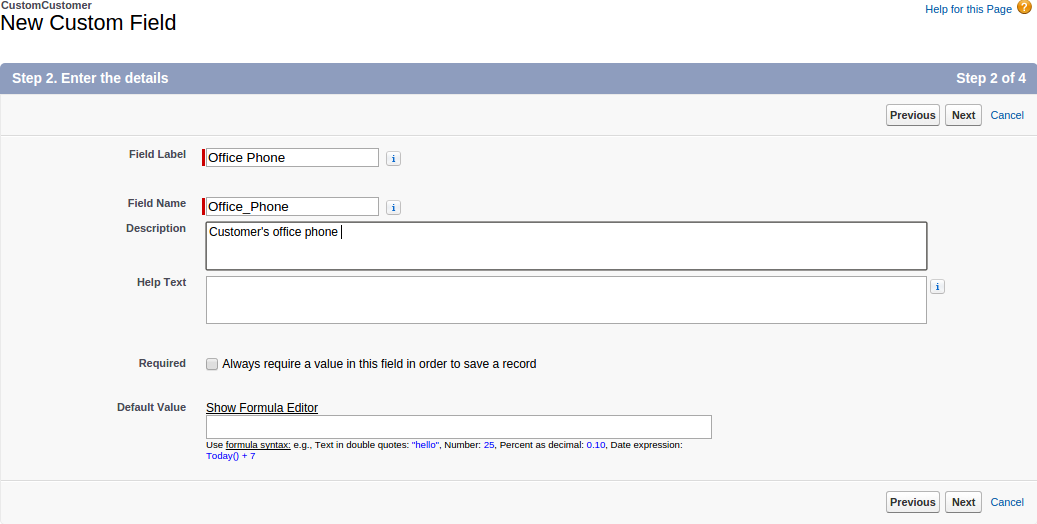
- Next, you need to fill in a few details for your new Custom Field
- Field Label: Name for your new Custom Field.
- Field Name: This will be auto-filled after you filled in Field Label.
- Description: more detail description about the field.
- Help Text: this text will appear when user hover mouse on the field's icon.
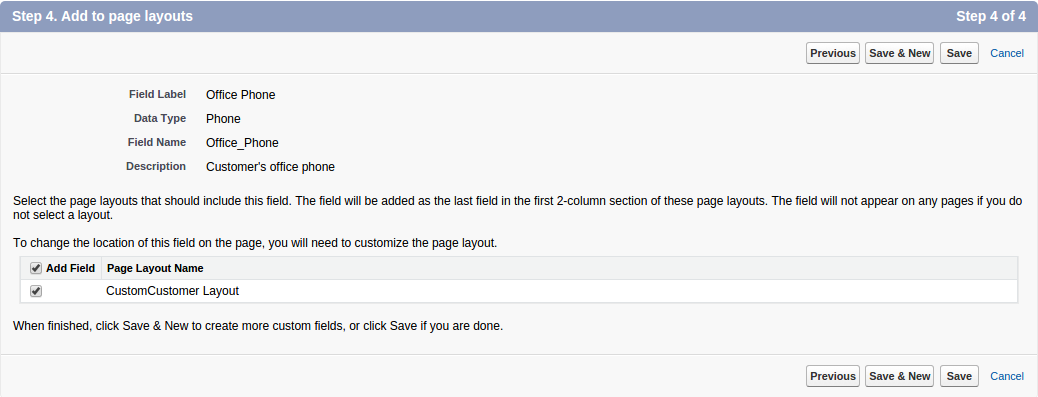
- Hit Next to continue, you will see a list of checkboxes for security purpose, leave them and move on.
- When done, hit Save. Your field is successfully created.
Configuring for Custom Tables
- Things get a bit more tricky when it comes to this part, as you have to create an unique field for each table. In here we have created a Custom Customer Table with the default API name CustomCustomerc and an unique field Emailc.
- When you are done with creating, go to Salesforce's Configuration Site in Magento and fill in the needed information.
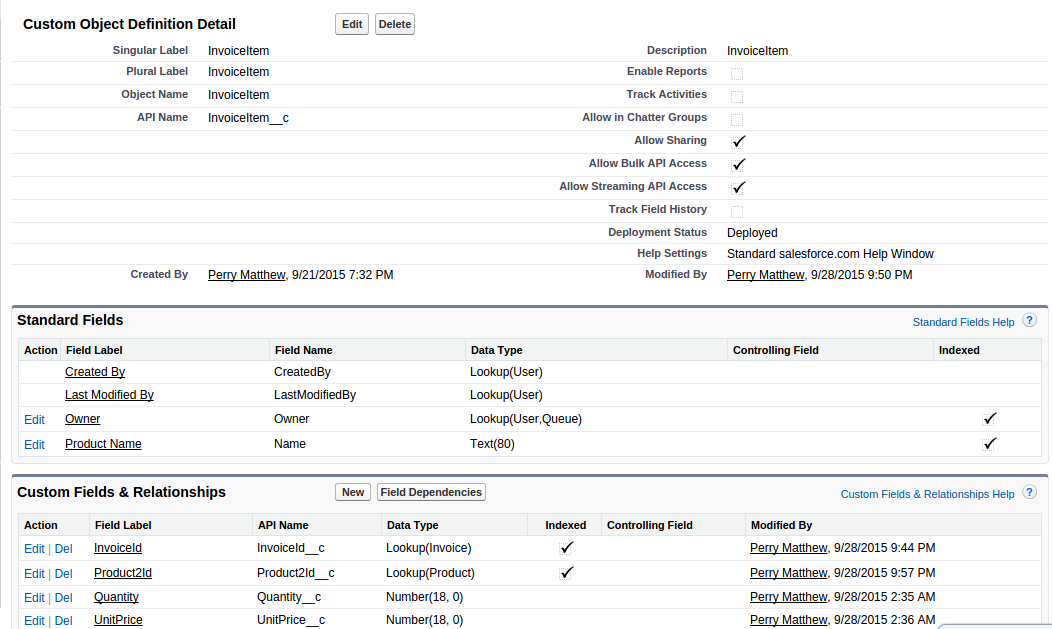
- One small remind, you also have to create a table called InvoiceItem with the following config
- One last step, in Magento, hit SalesforceCRM Integration –> Retrieve Field, your new Custom Table and fields are ready to use
B) Custom Tables Syncing
...
2. When a new product is added or existing one is edited, a new record will be added into Custom Products
...
3. When a new invoice is sent by store admin, a new record is added in Salesforce's Invoices and Invoice Item
...
4. When a product is deleted from Magento, it will also be deleted from Salesforce's Products and Custom Products
...
- Magenest offers the response time can be up to 3-5 days.
- We offers lifetime support free for all of our paid products. Support includes answering questions related to our products, bug/error fixing to make sure our products work well in your site exactly like our demo.
- Support DOES NOT include other services as customize our product to fit your own needs, installation service, uninstallation service. We ONLY support you with exist features of module
Once again, thank you for purchasing our extension. If you have any questions relating to this extension, please do not hesitate to contact us for support.

