Thank you for purchasing our extension. If you have any questions that are beyond the scope of this document, please feel free to contact us via [email protected]
Updated: 22/10/2018 | By: Magenest | Support Portal: http://servicedesk.izysync.com/servicedesk/customer/portal/7
![]()
Event Tickets by Magenest is the ultimate extension for E-commerce websites that allows merchants to create and manage events and tickets. Merchants can create multiple custom ticket options such as VIP, adults, children,… each with customized template to best fit the event's context. The extension can also send reminder emails so that your customer won't miss the event.
For more details, live-demo and user reviews, please visit: Event Ticket
For admin
For customers
Your store should be running on
Magento Open Source 2.1.x or 2.2.x .
Magento Commerce 2.1.x or 2.2.x
In the back end, go to Stores > Configuration > Magenest > Event Ticket.
General:
Email:
The extension added a new product type called Event Ticket Product into the system, so you need to add a new Event Ticket Product type to get started.

In each product details, there is an Event Ticket settings
Tickets Setup
You can enable to apply the locations/schedules to all the ticket options.
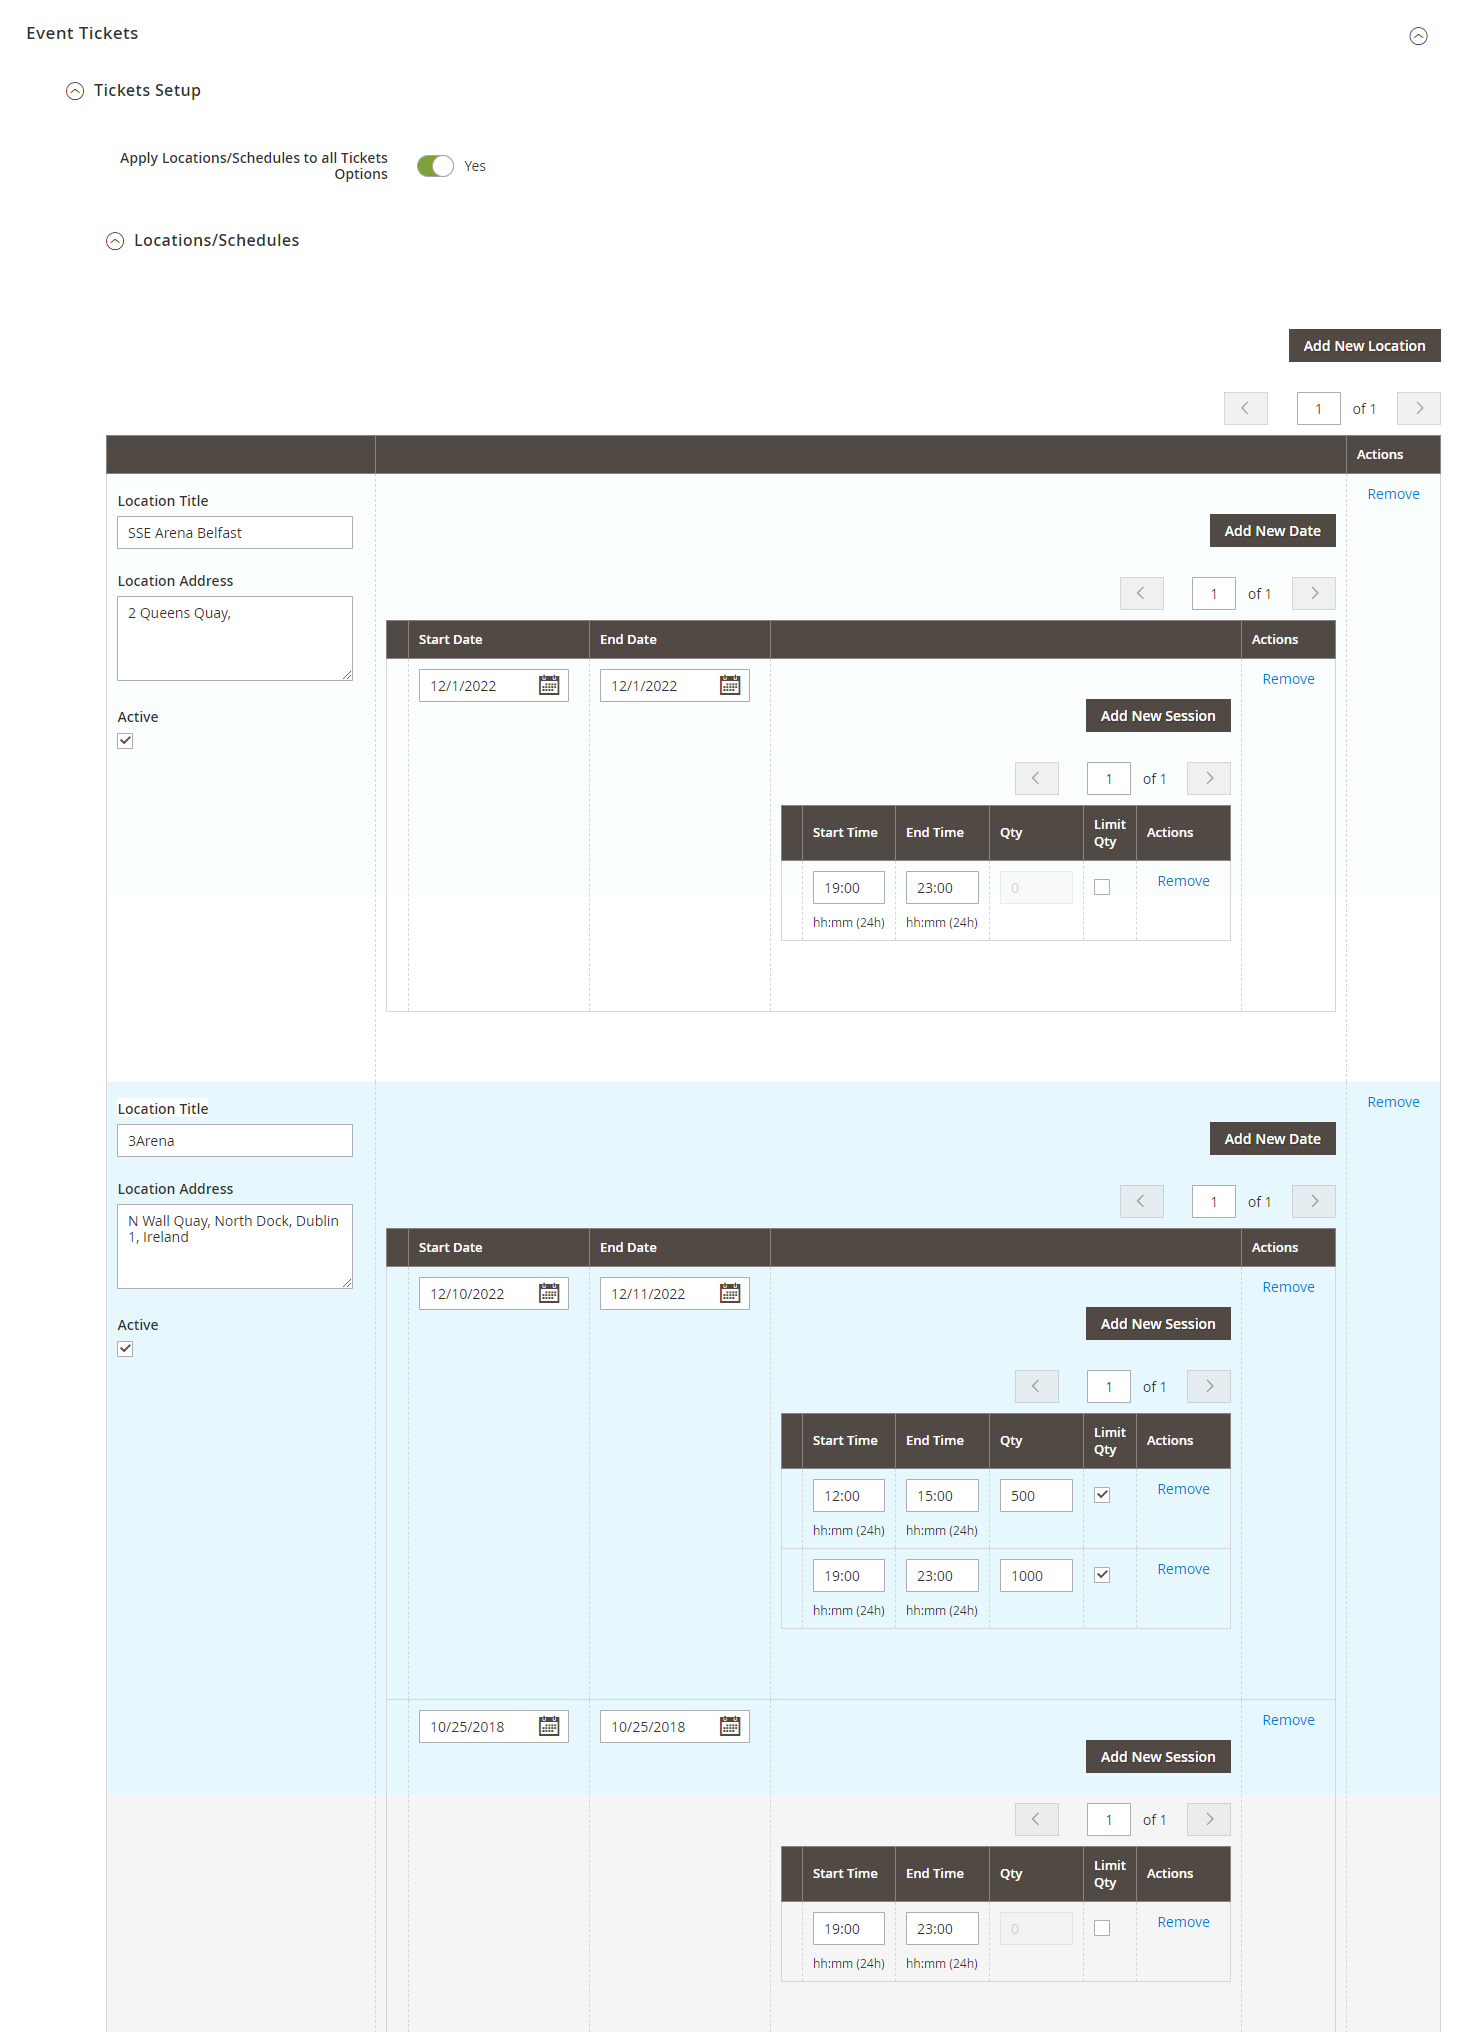
 .
. Settings Ticket
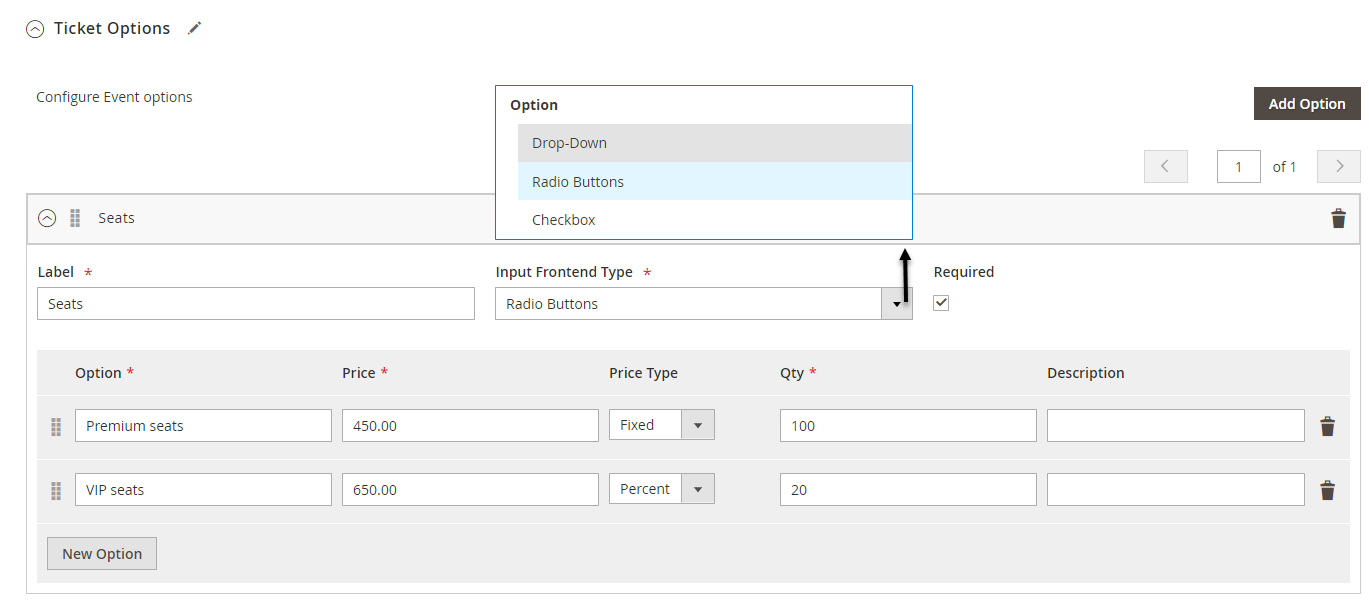
Event Options
Through this section, you can set up various ticket types and options.
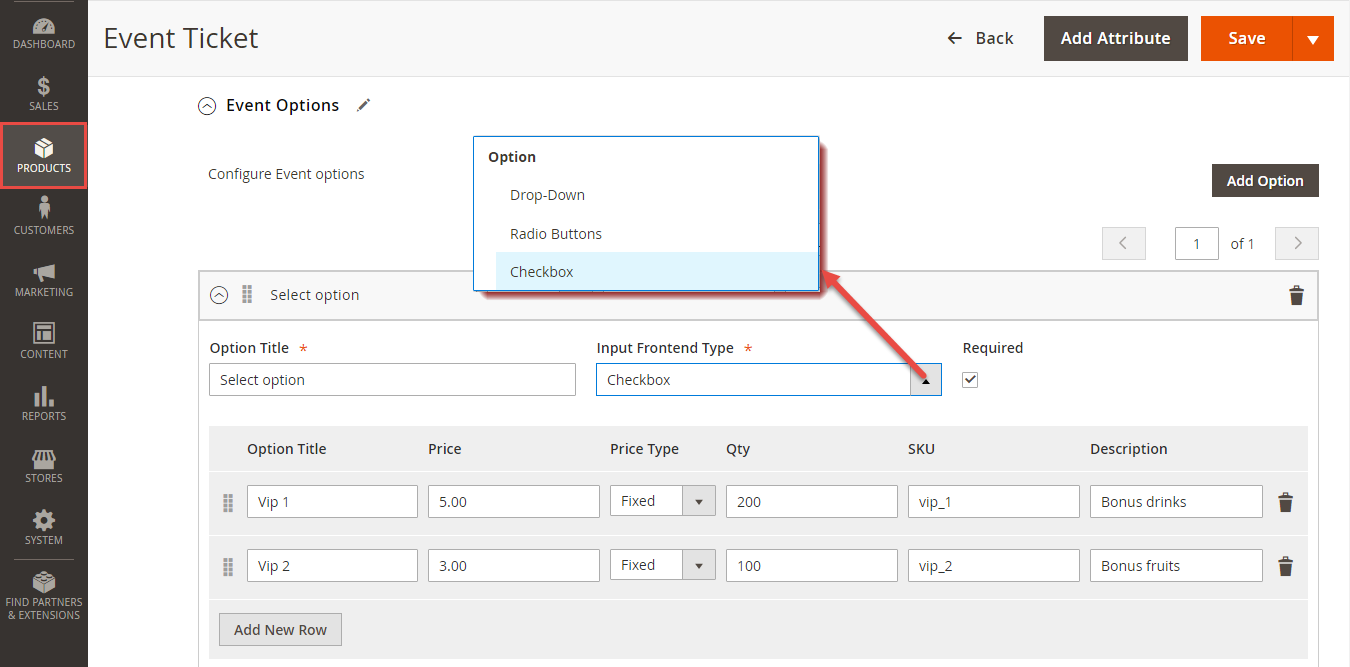
A given ticket type has the below options:
PDF Template
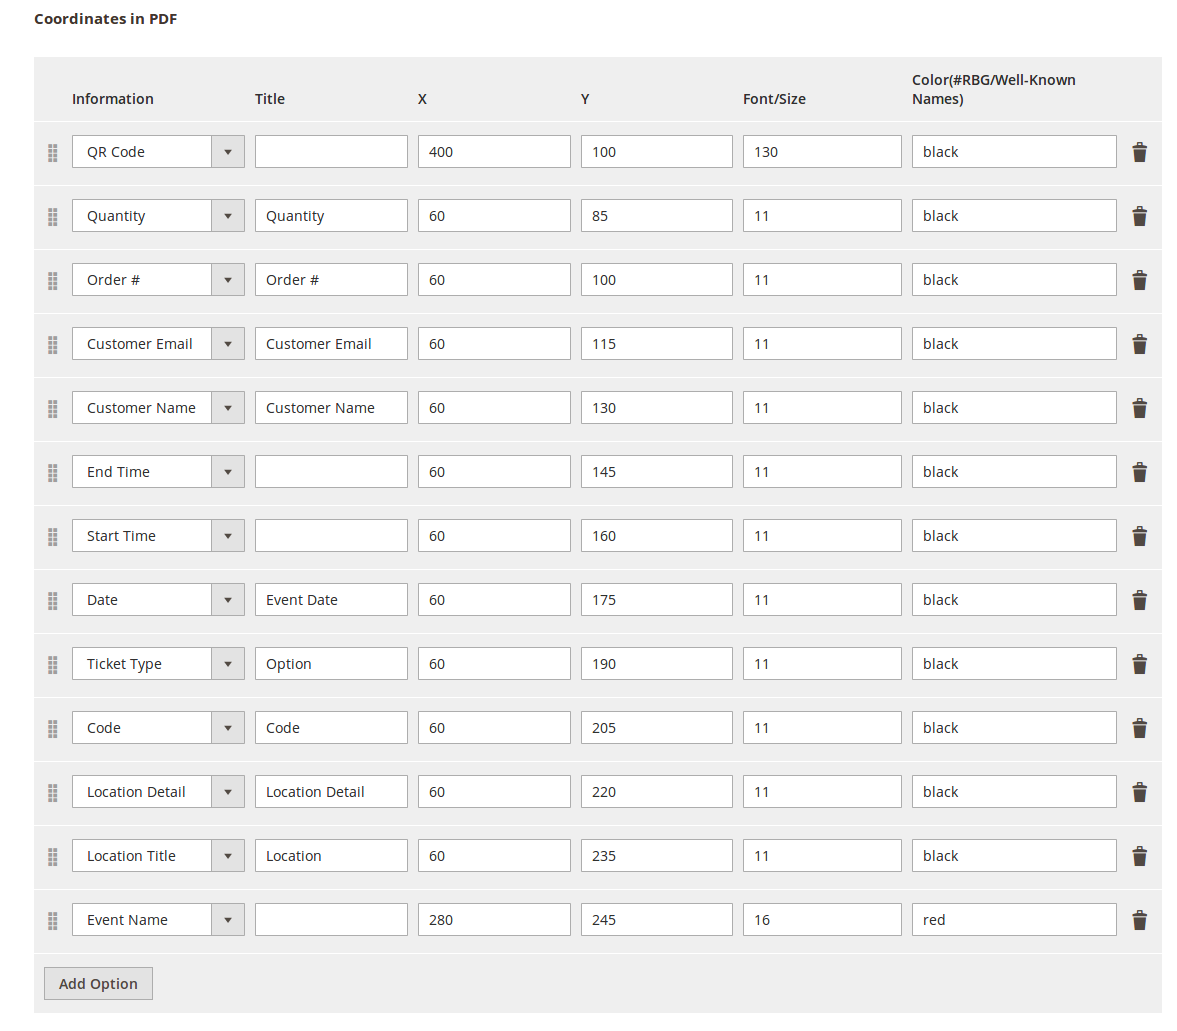
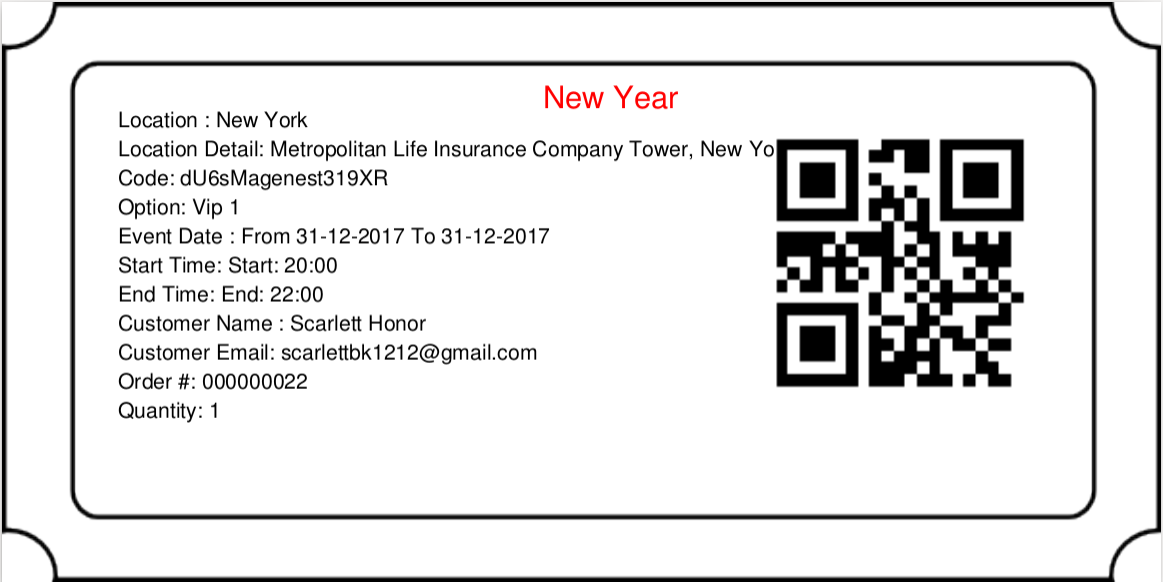
PDF Template allows you to create your PDF Ticket with background, width, height, and coordinates in PDF.
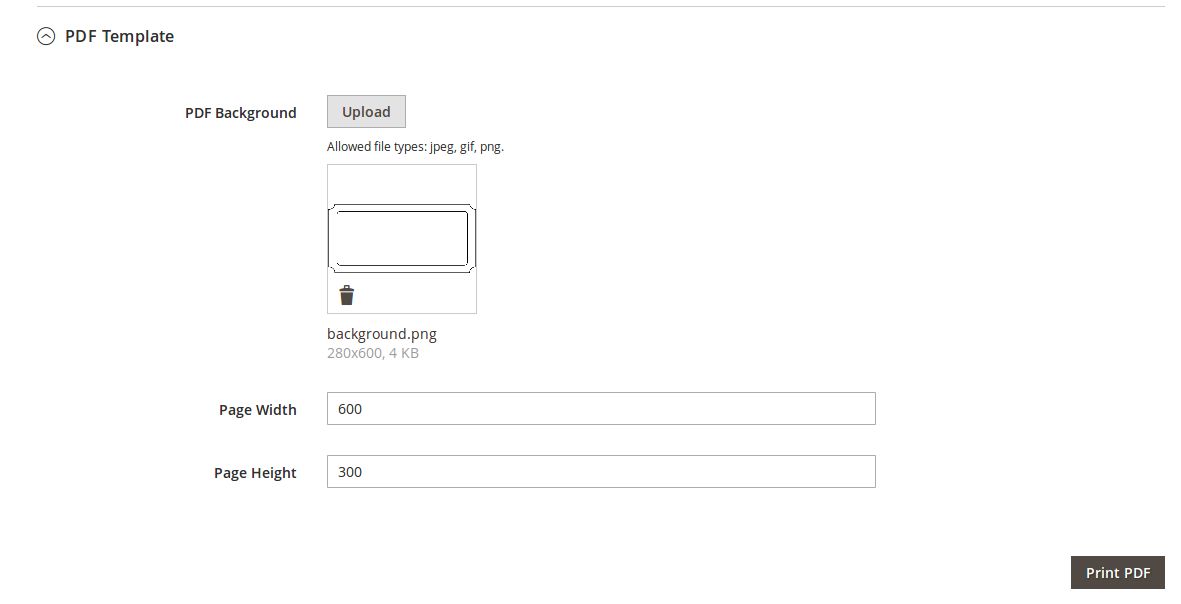
Print PDF: click on Print PDF button to print PDF ticket
Email Template:
Admins can choose Default Email Template or you can customize email for your store based on the email template below:

Below is the email template:
{{template config_path="design/email/header_template"}}
<p>{{trans "Welcome to %store_name." store_name=$store.getFrontendName()}}</p>
<ul>
 <li><strong>{{trans "Event Name: "}}</strong> <em> {{var title}}</em></li>
 <li><strong>{{trans "Customer Name: "}}</strong> {{var customer_name}}</li>
 <li><strong>{{trans "My Code: "}}</strong> {{var ticket_code}}</li>
 <li><strong>{{trans "Location Title: "}}</strong> {{var location_title}}</li>
 <li><strong>{{trans "Location Detail: "}}</strong> {{var location_detail}}</li>
 <li><strong>{{trans "Date: "}}</strong> {{var date}}</li>
 <li><strong>{{trans "Time: "}}</strong> {{var time}}</li>
 <li><strong>{{trans "Quantity: "}}</strong> {{var qty}}</li>
 <li><strong>{{trans "Option: "}}</strong> {{var option_type}}</li>
</ul>
{{template config_path="design/email/footer_template"}} |
You can use MB-Ruler software to measure distances and angles on your ticket. This application is free download.
We have a video tutorial helping you in this section:
Information
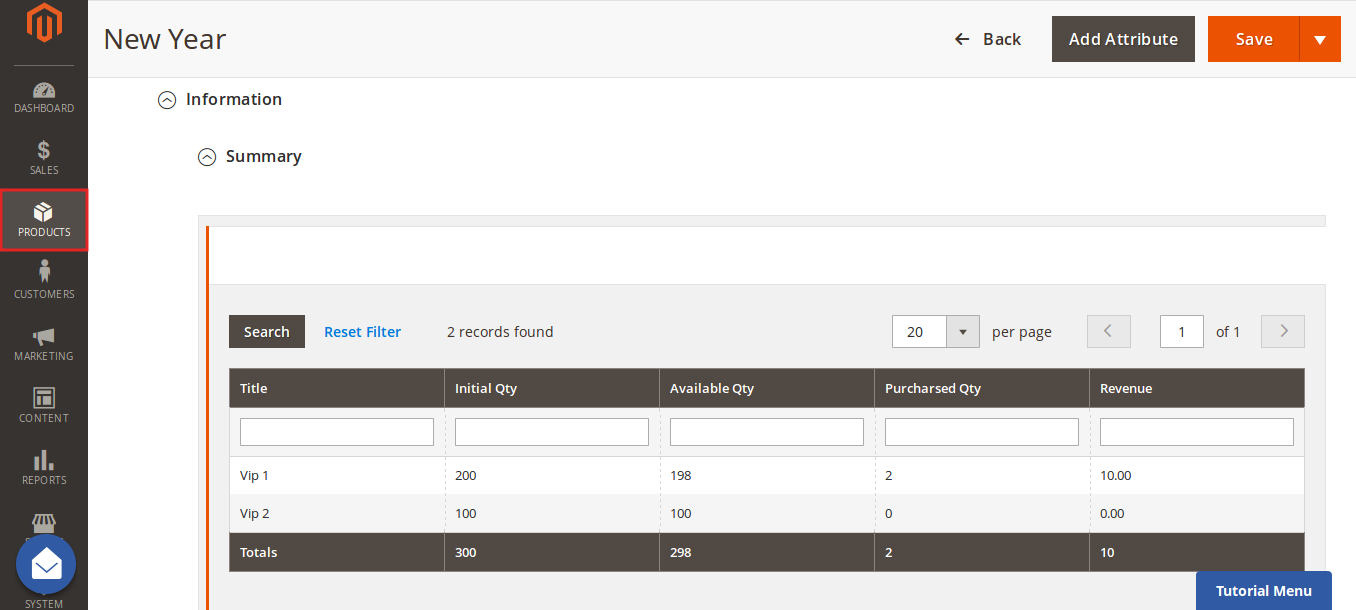
This is the list of ticket options, with Purchased quantity, Available quantity and revenue for each type, as shown.
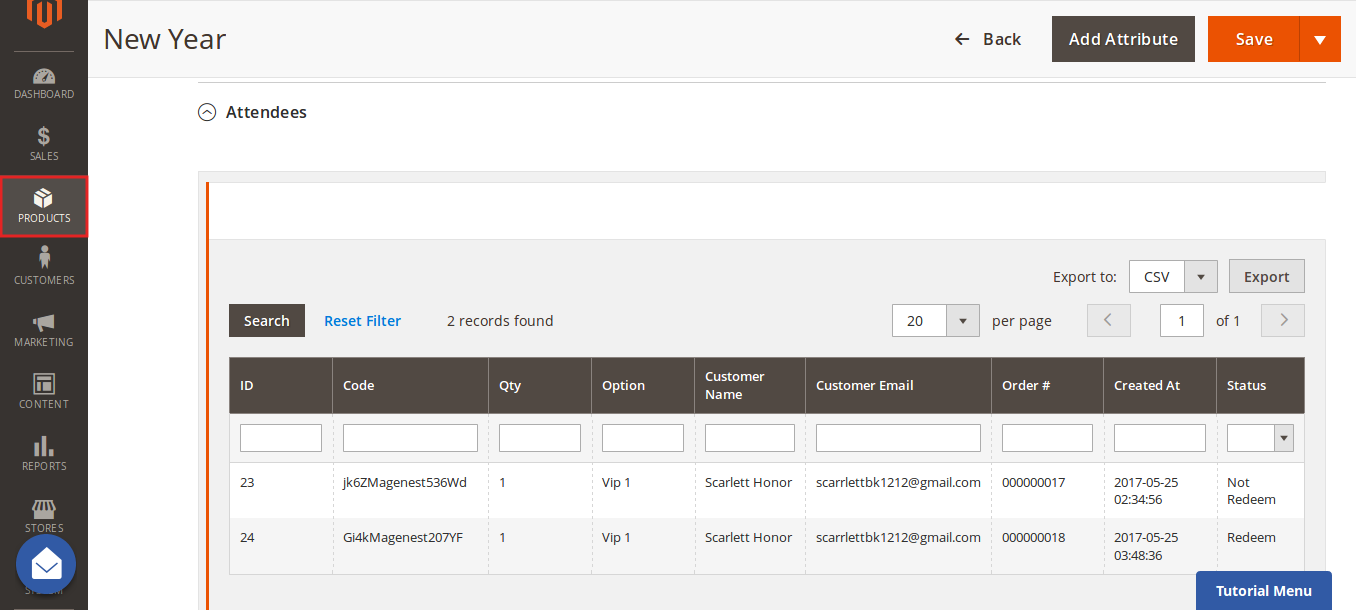
In the Attendees tab, the admin can easily manage the attendees of the event. In this tab, all the event attendees will be listed. Please, note that a customer will appear in this section after their order gets processed.
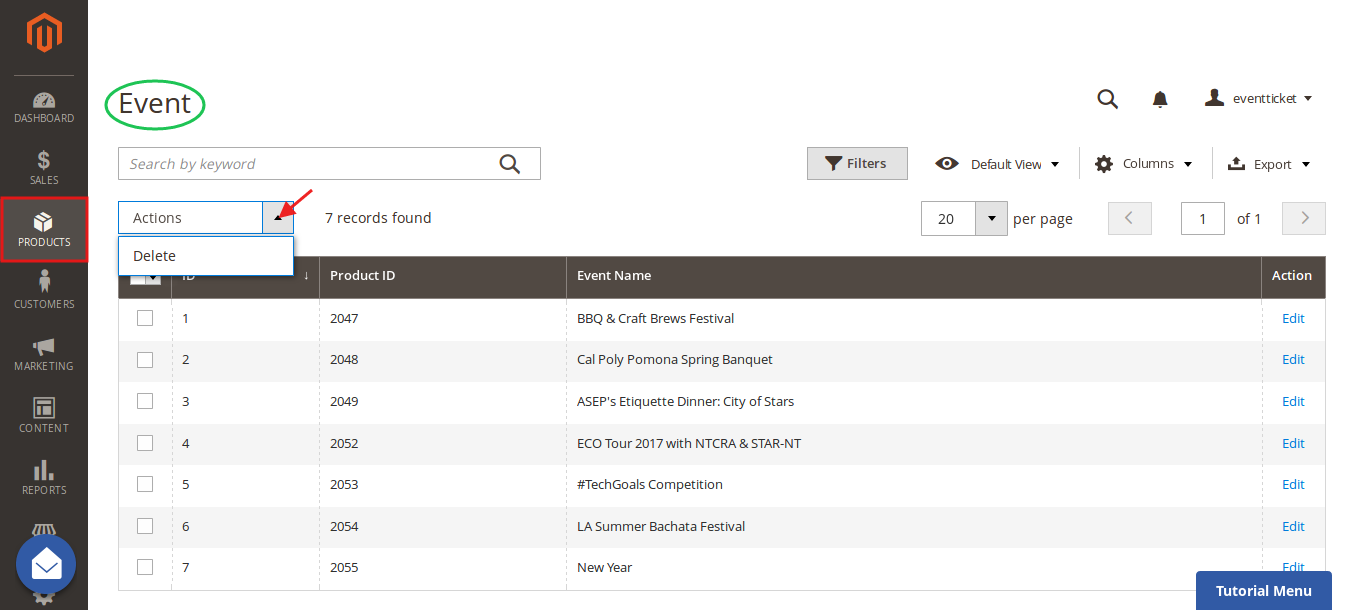
At backend, go to Product menu then select Event tab or Event Ticket tab to displays the actual event & ticket sales.
In the Event tab:
This grid lists ALL the items which had ever had Event Ticket functionality enabled, include: product ID, event name, start time, end time, reminder day, status and location. You can and export to the CSV/XML file.
In the Event Ticket tab:
You can see this grid displays the actual ticket sales and export to the CSV/XML file.
Remember that admin must change status from Not Redeem to Redeem when the ticket has already been scanned.
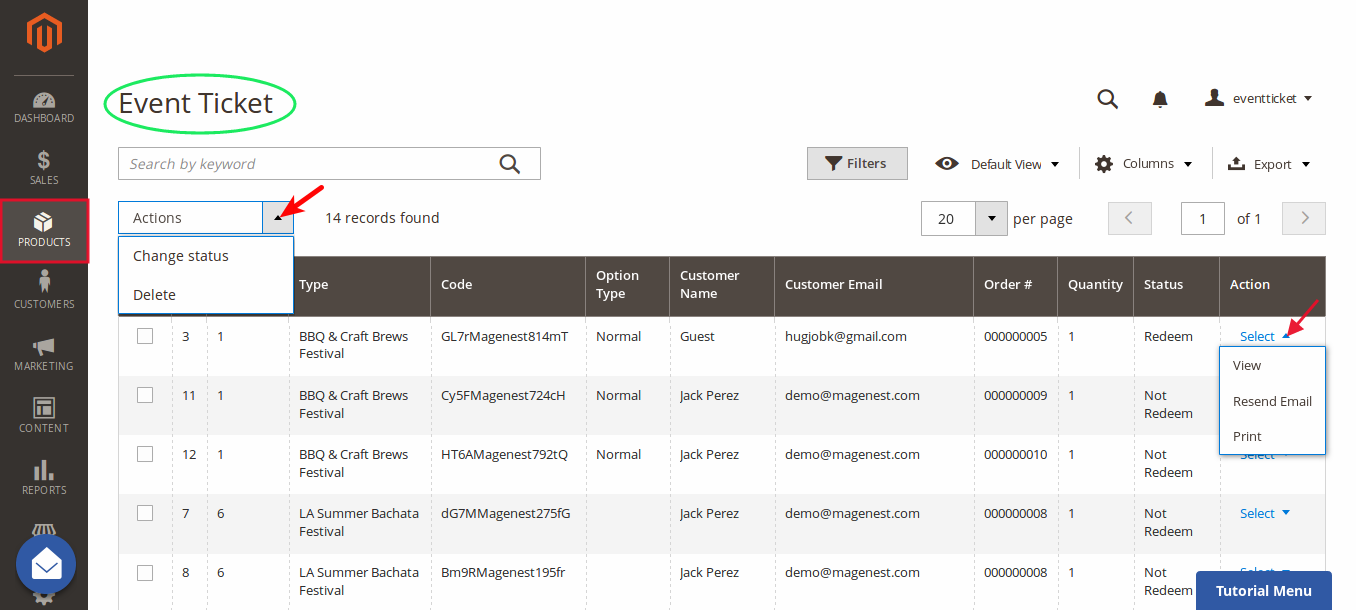
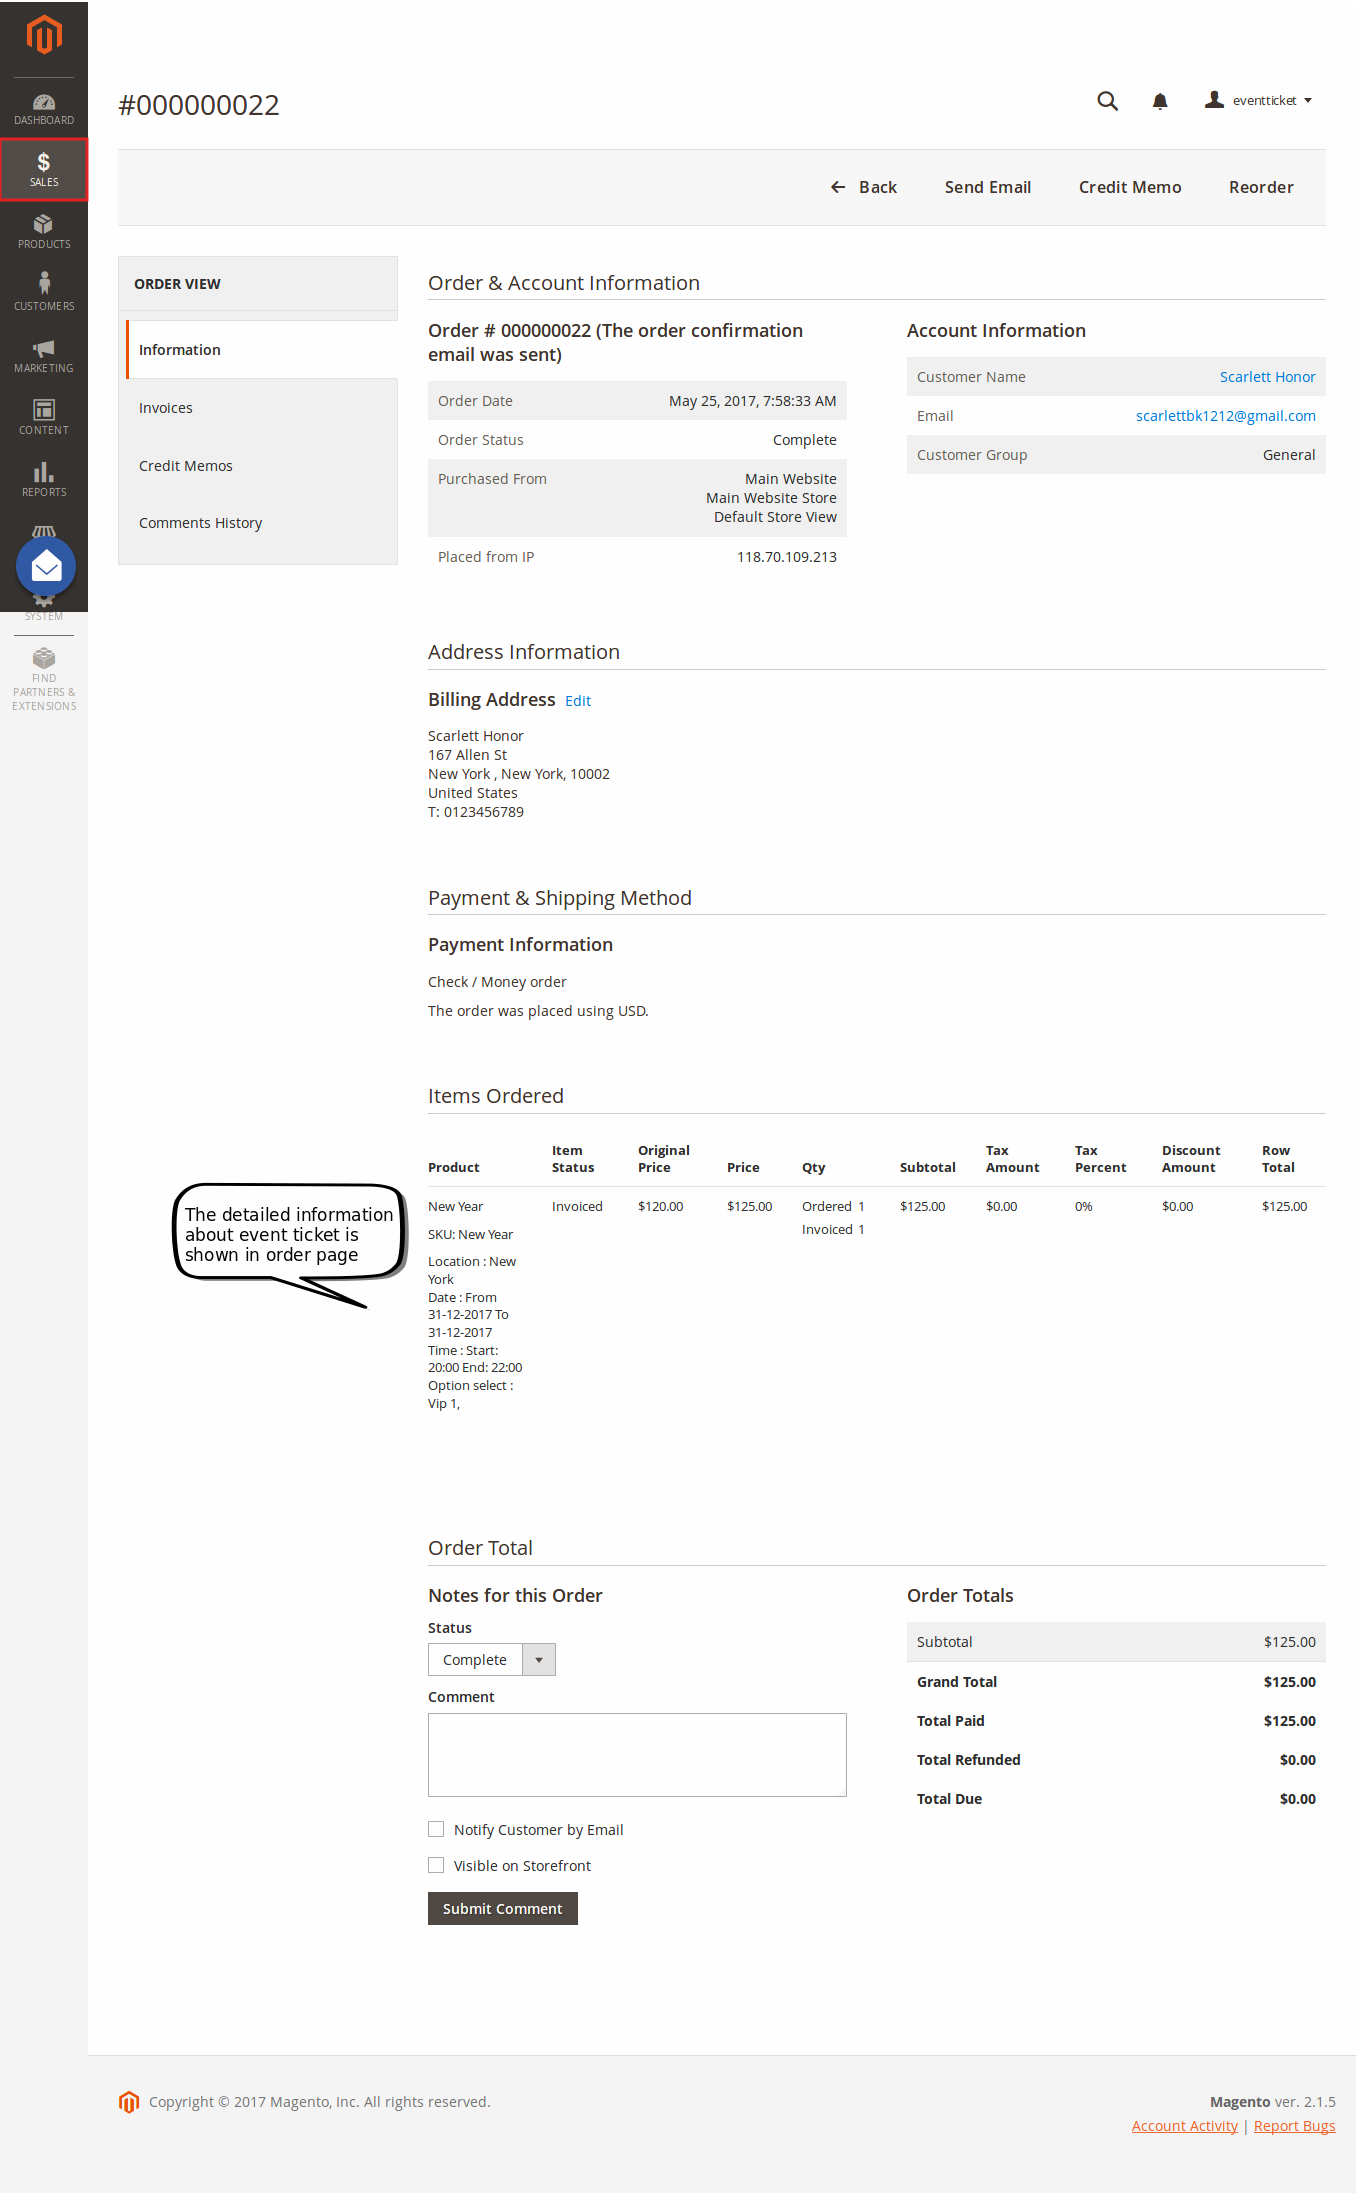
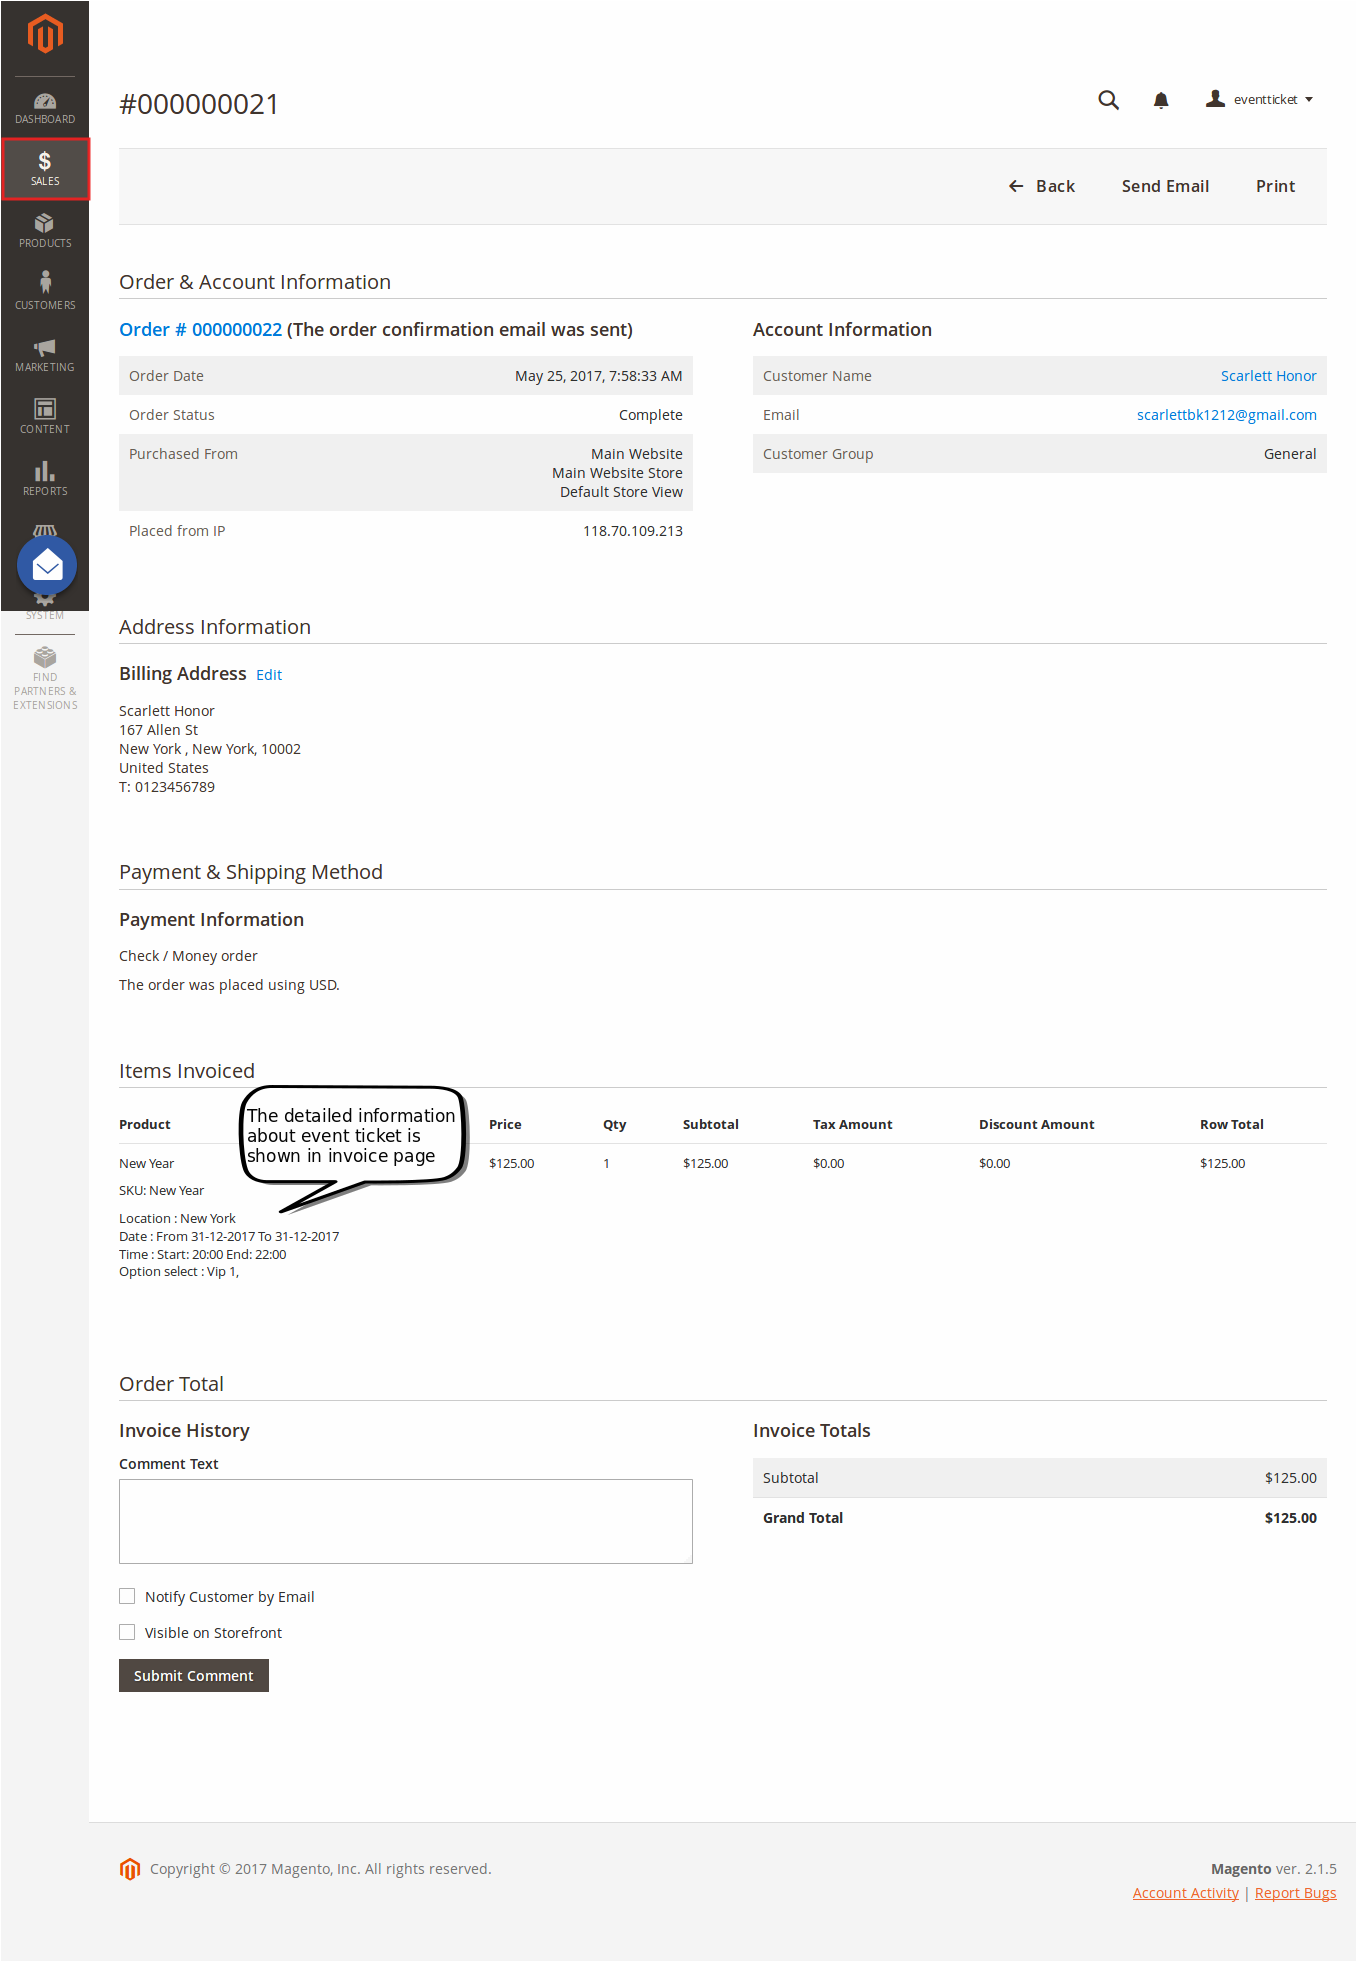
Admin can click on View button to follow the detailed information about the order or the invoice.
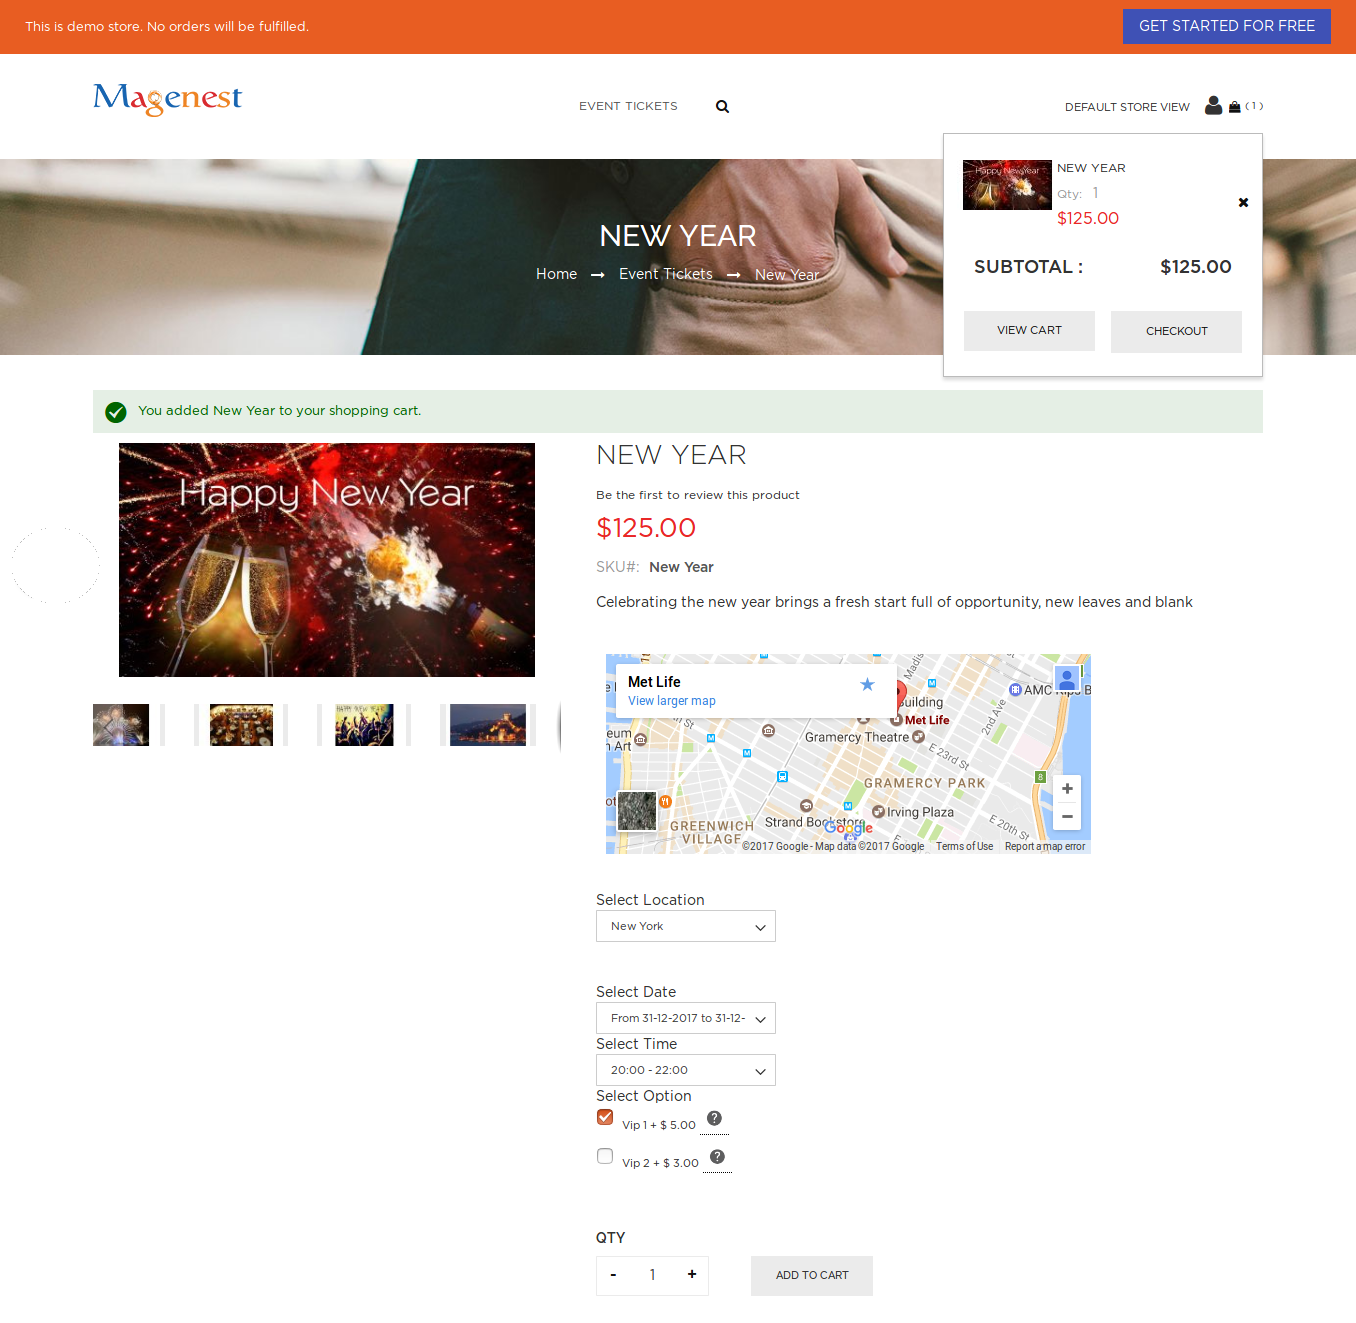
When a customer is on a frontend detail page of a product of type Event Ticket, he will be able to view all information about the event as start time, end time, location, and event options then add to cart.
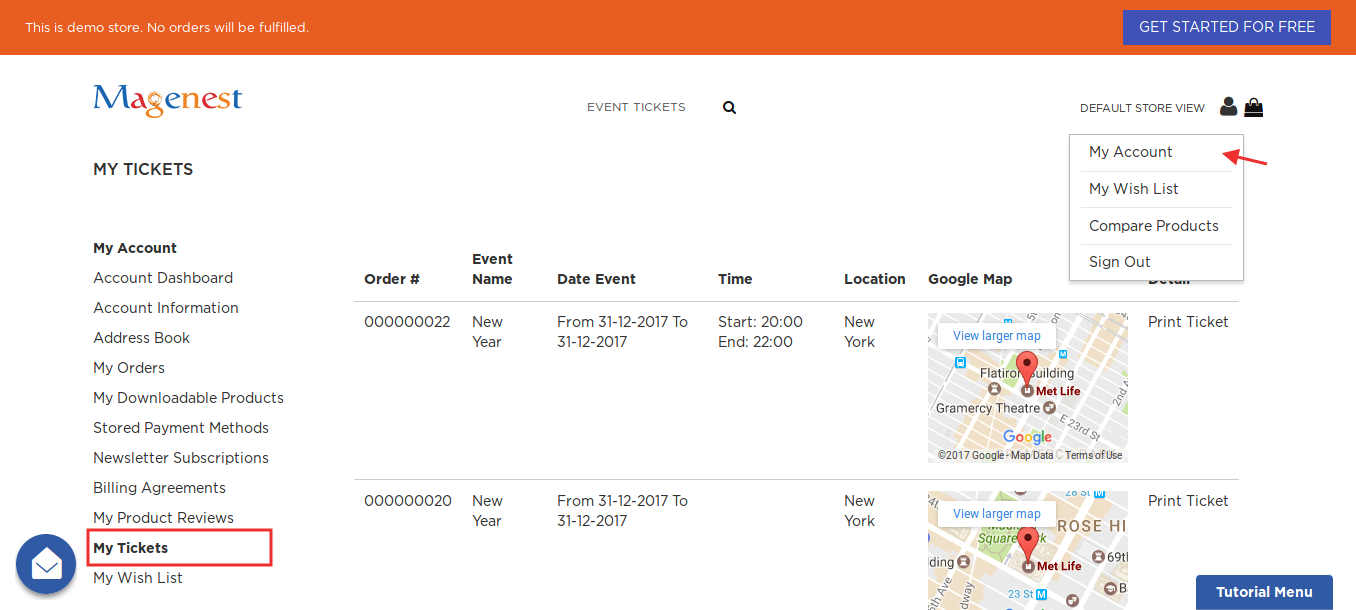
After buying the event ticket successfully, in My Account tab, click on My Ticket, customers can view ticket price, status, duration, and location as well as print PDF Ticket.
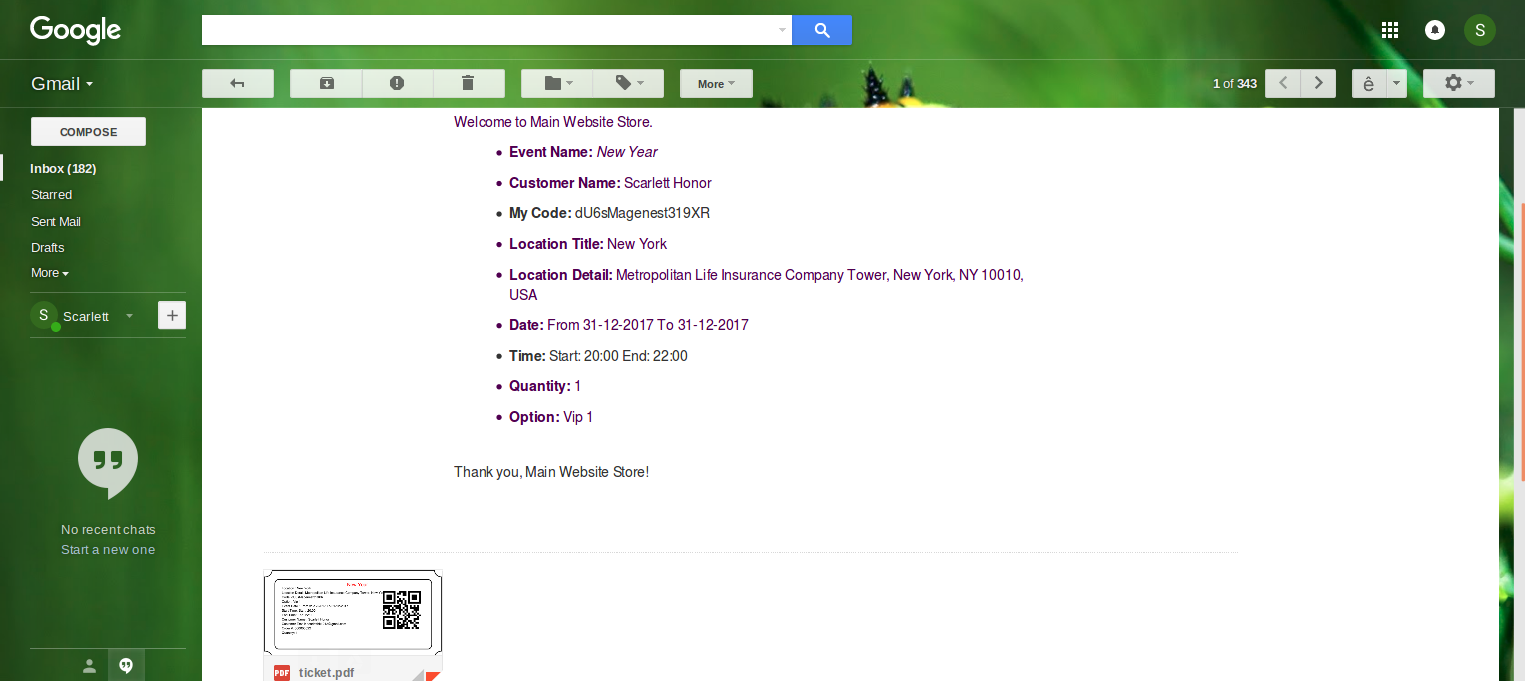
Or customers can take the event ticket from their email.
Your customers should sign in stores when buying tickets. If a guest buys the ticket, the Customer name field in PDF will be blank. |
Once again, thank you for purchasing our extension. If you have any questions relating to this extension, please do not hesitate to contact us for support.