Thank you for purchasing our extension. If you have any questions that are beyond the scope of this document, do not hesitate to leave us an email via our email address below.
Created: 08/11/2016 | By: Magenest | Support Portal: http://servicedesk.izysync.com/servicedesk/customer/portal/22
![]()
Stripe Payment Gateway And Subscription extension by Magenest is the ultimate tool that provides seamless payment experience between your Magento 2 store and the Stripe Payment Gateway.
Extension's page: Stripe Payment Gateway And Subscription.
A lot of features is included in the extension that you can tweak to make it best suit your business, including:
Choose between Authorize Only or Authorize and Capture.
New order status.
Email customer.
Allowed credit card types.
Enable CVC verification.
Allowed country.
Order total threshold.
Easily manage orders and subscriptions.
Easily capture, cancel and refund payments.
The primary aim of the extension is to deliver the most fluent and effortless payment experience to the customers:
Easily checkout using credit card.
Manage subscriptions (view and cancel subscriptions).
Your store should be running on Magento 2 Community Edition version 2.0.x and 2.1.
For this integration you will need to have an account in Stripe websites.
First, go to https://stripe.com. It is necessary for you to connect our extension with Stripe websites to authenticate users before you can exchange data with it.
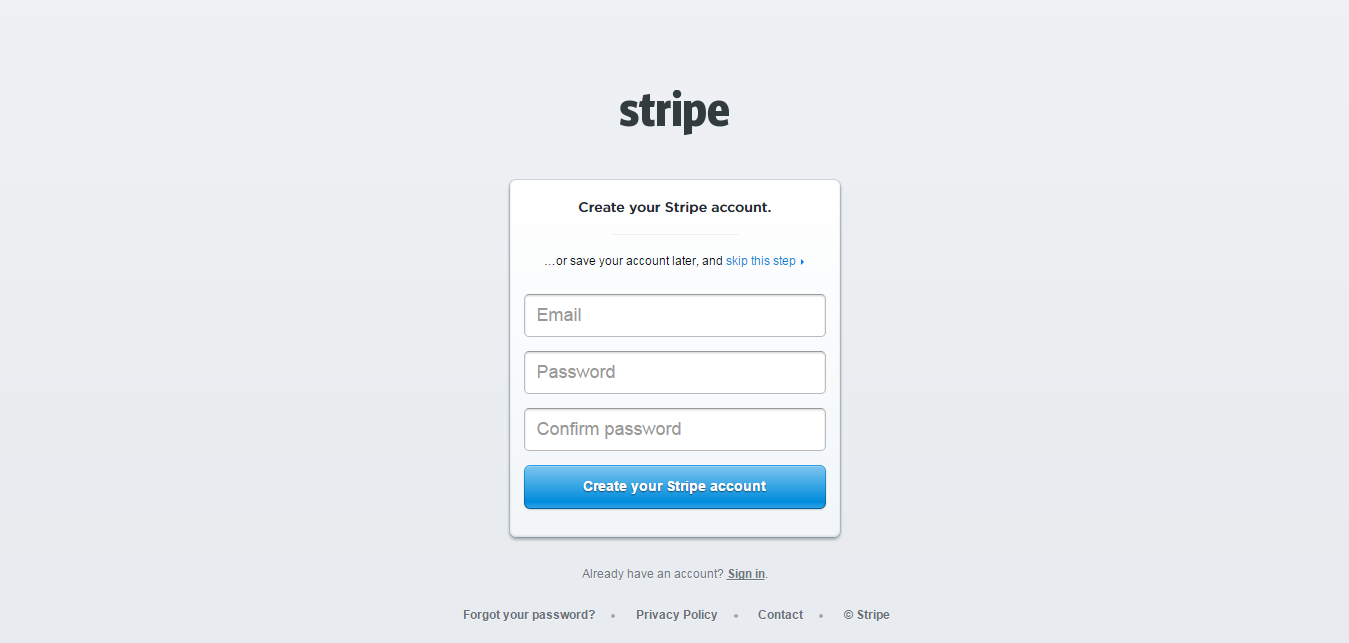
Sign up to create a new one:
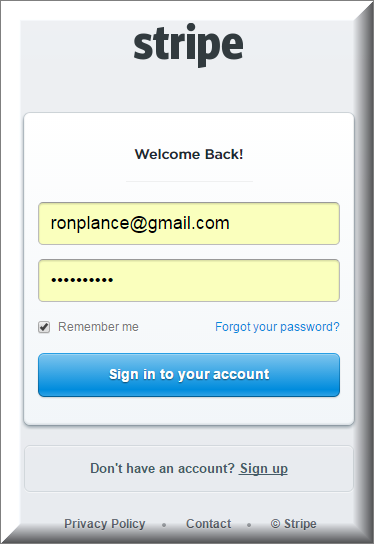
Or log in if you already have an account:
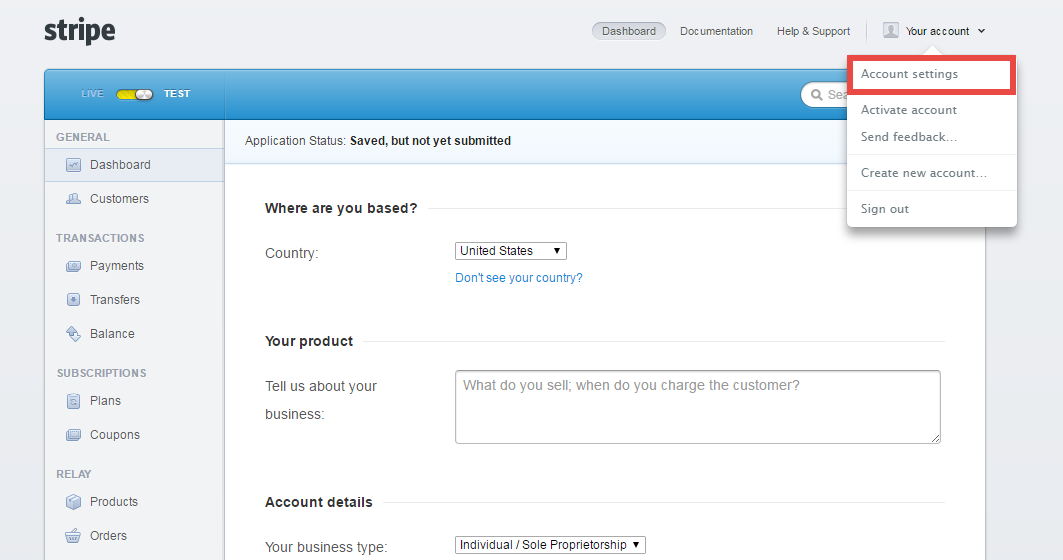
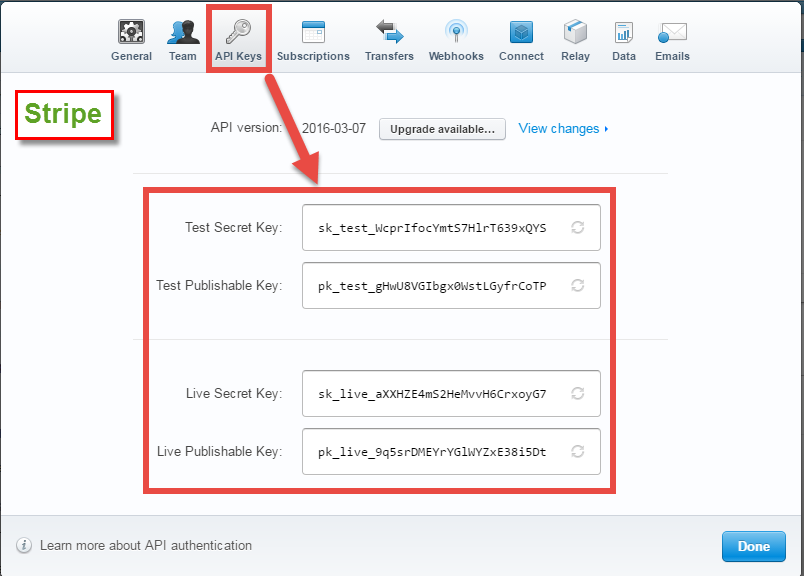
After that, click on Your account at the top right corner > Account settings > API Keys to take API Keys.
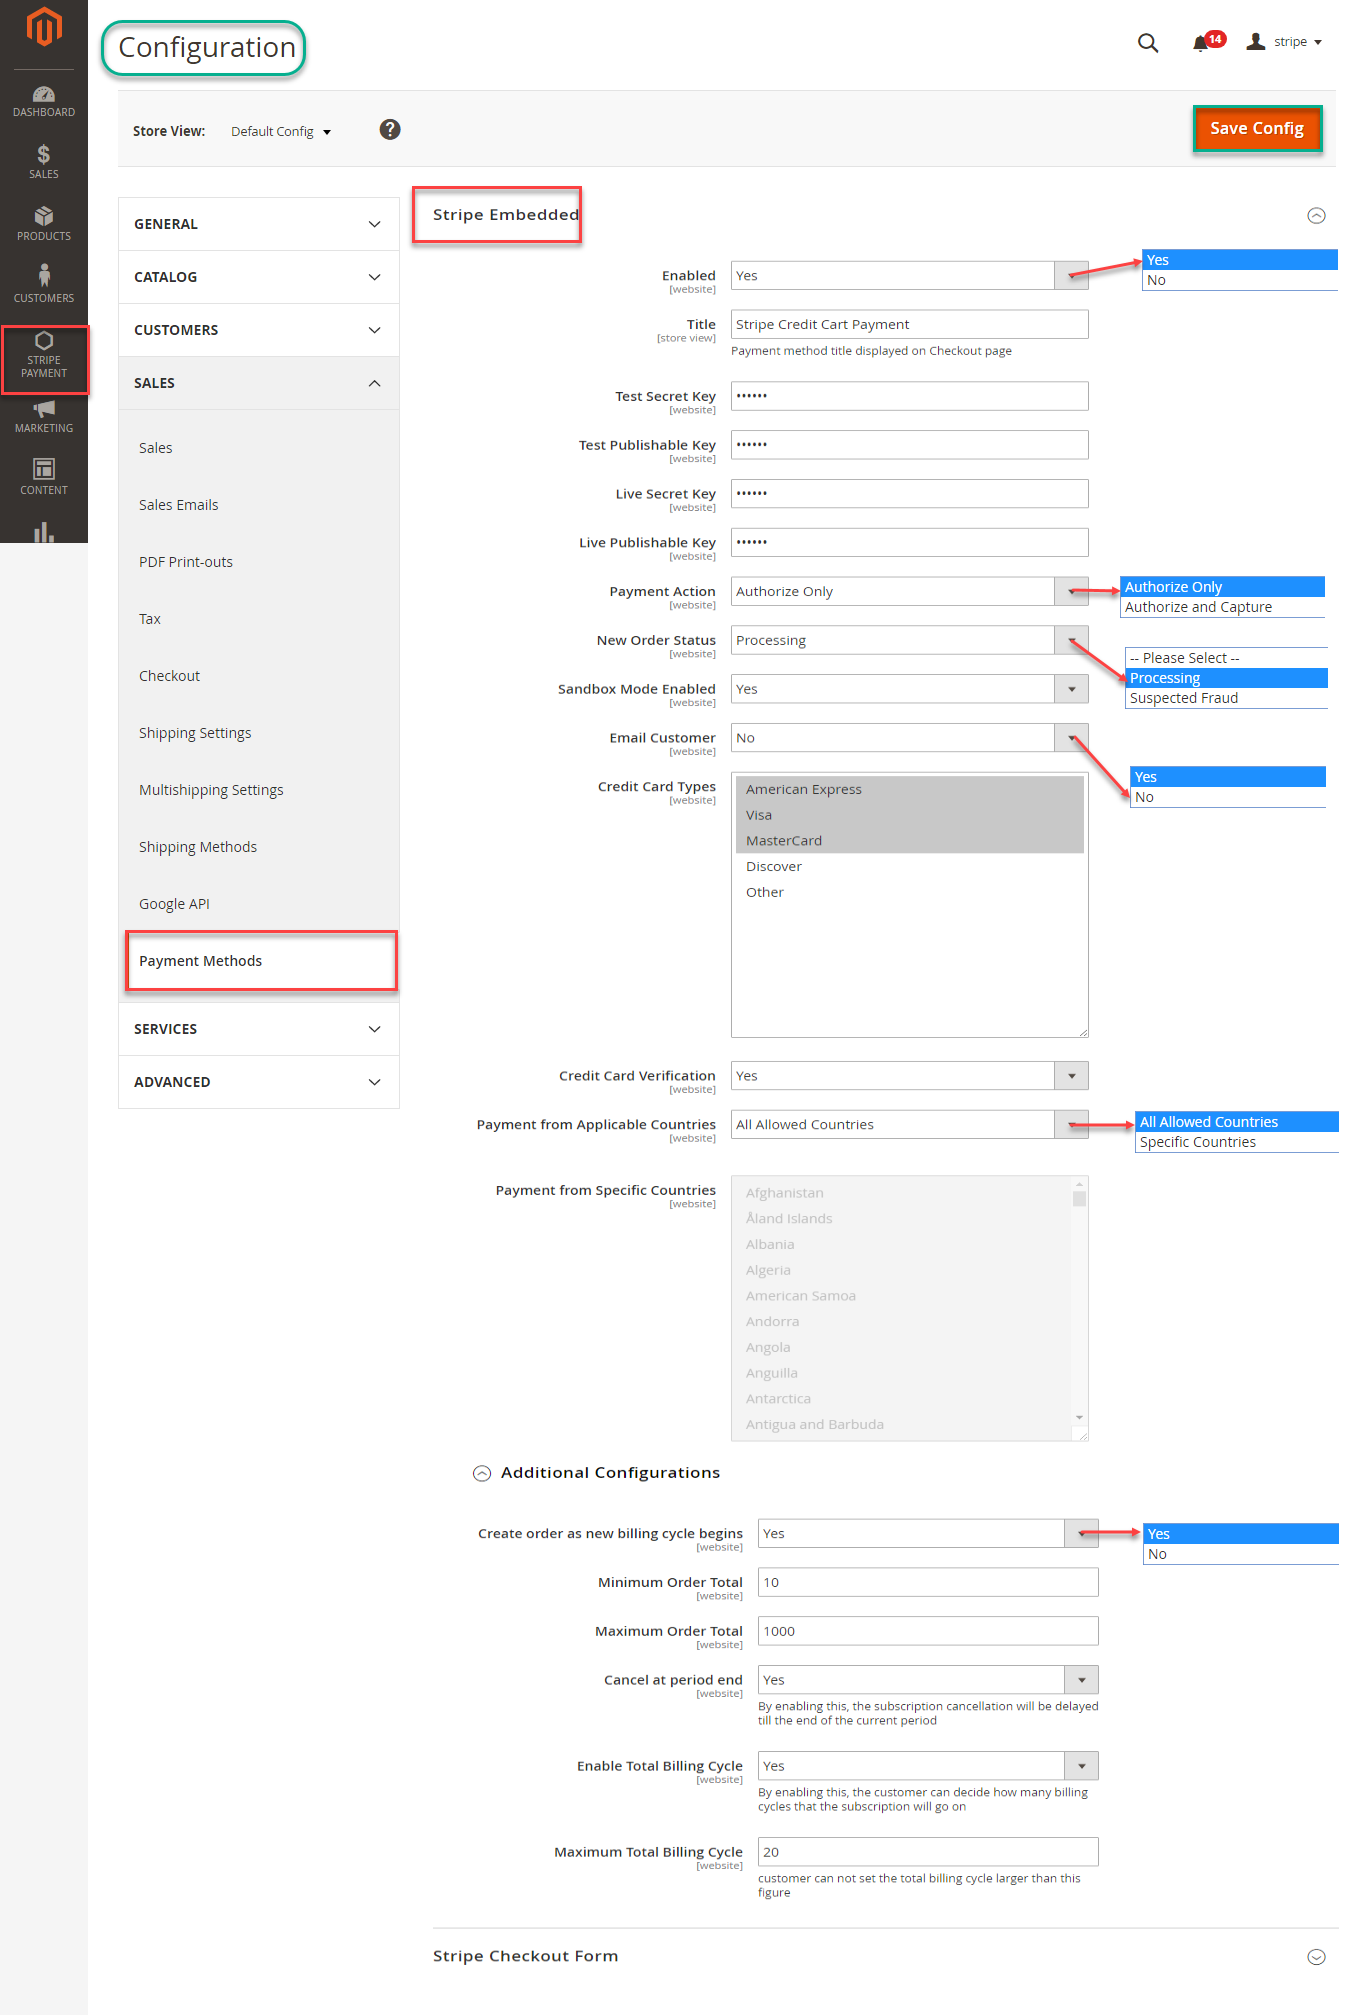
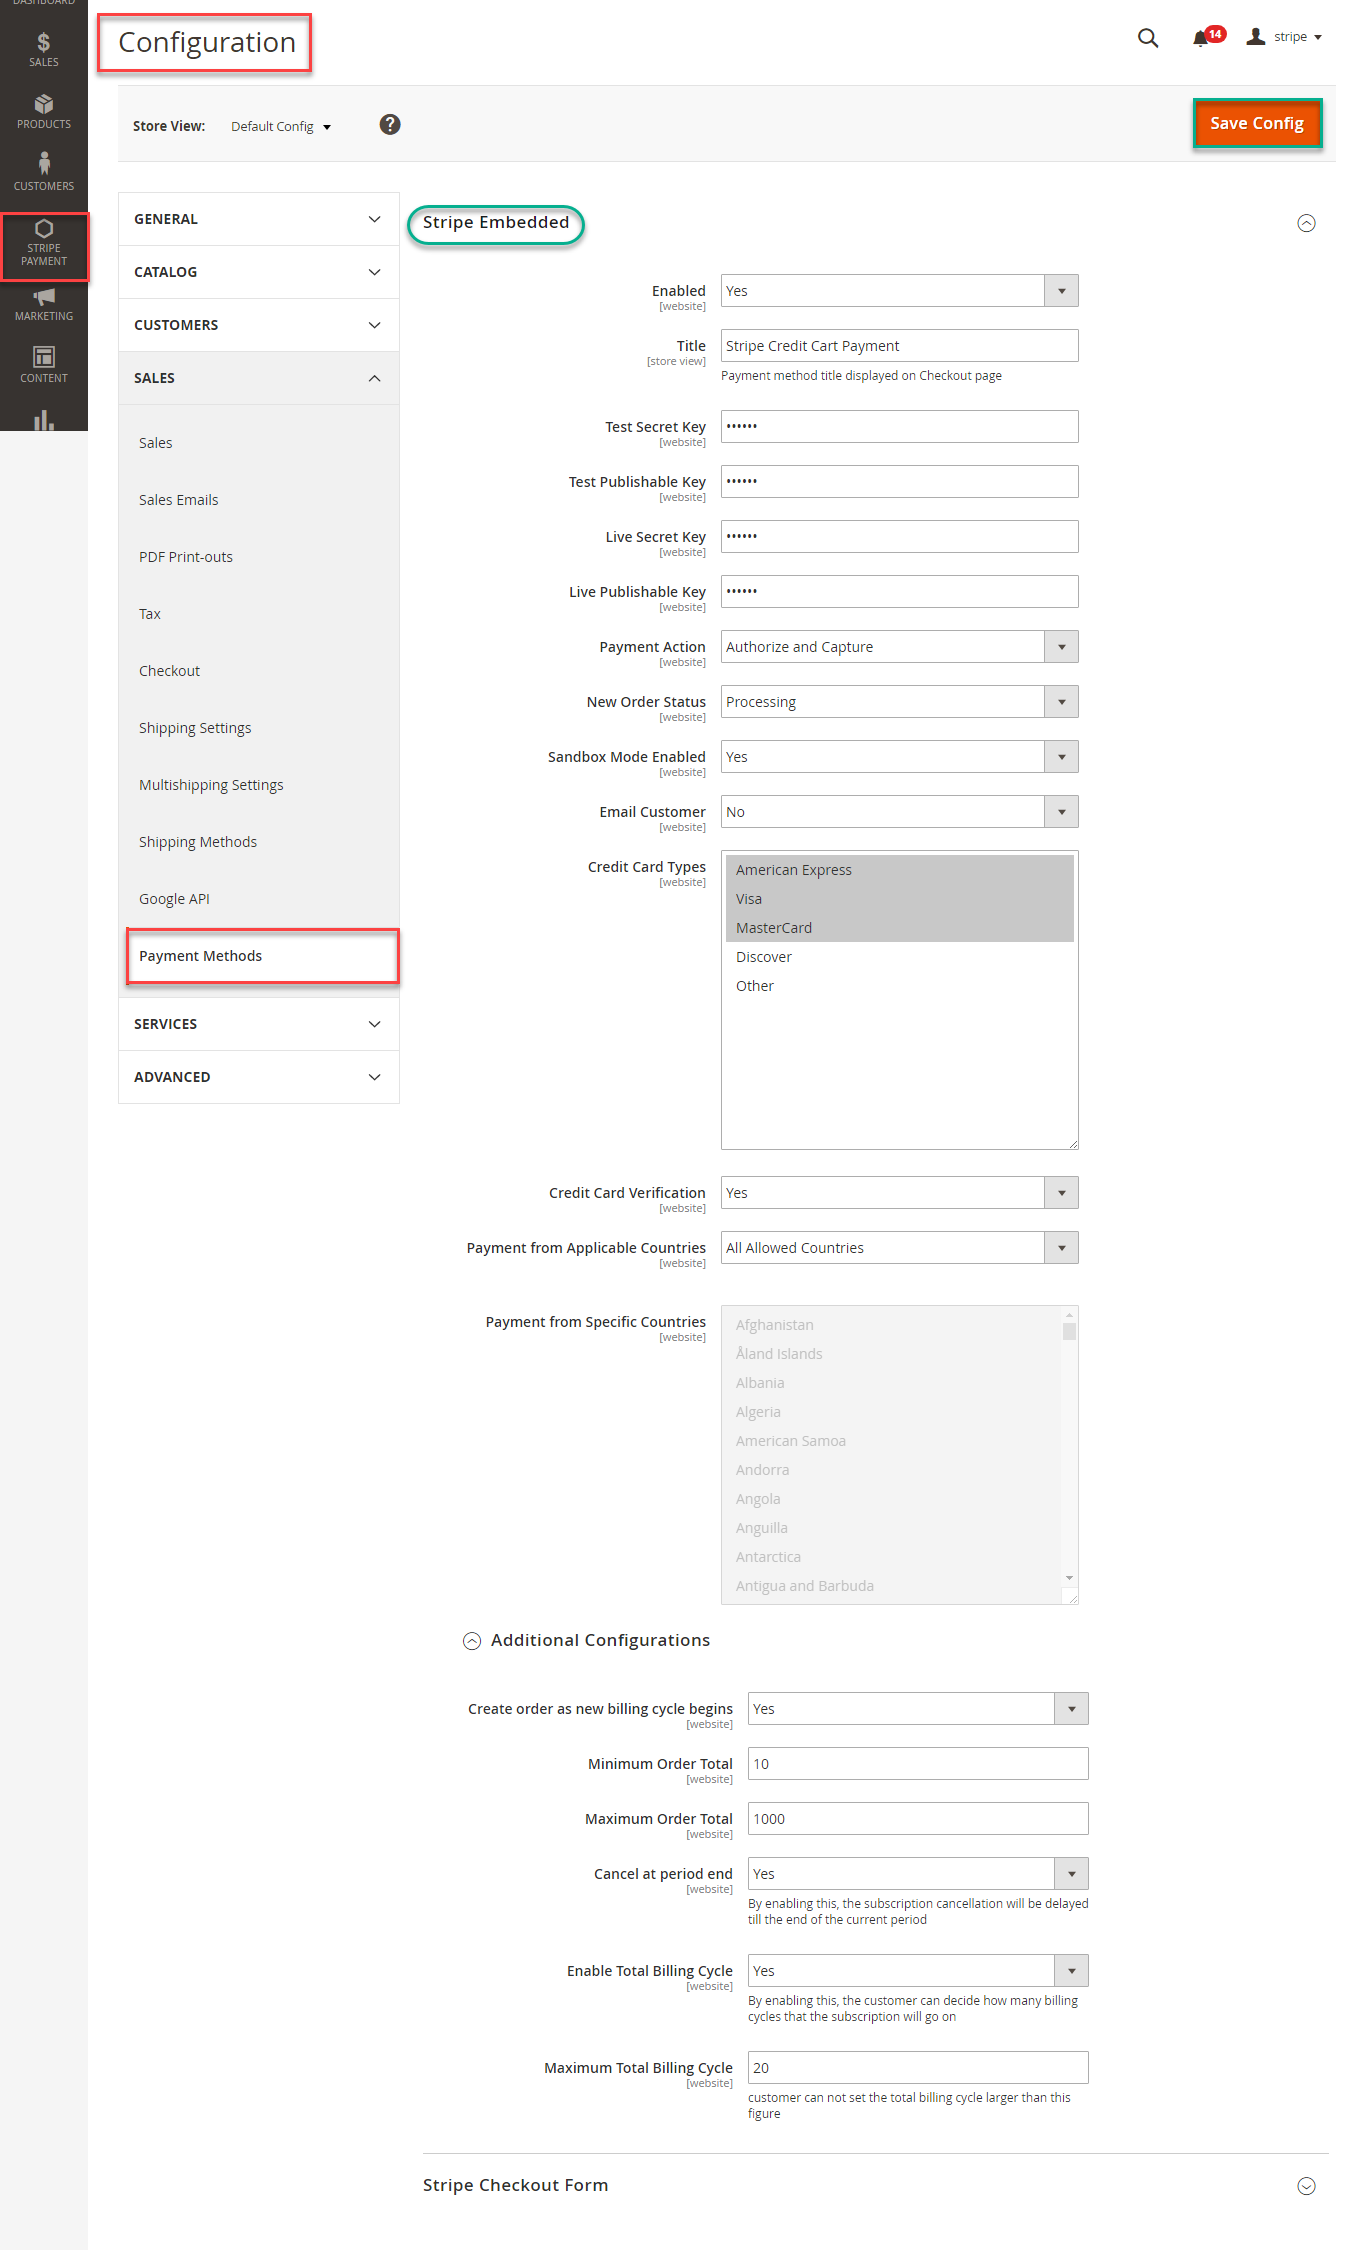
First, navigate to Backend of Magento 2 > Stores > Configuration > Sales > Payment Methods
Admins have the ability of setting Stripe on Magento 2 stores or not. Using API Keys from Stripe websites to fill in the following fields below.
In addition, admins can set information for: Title, Payment Action, New Order Status, Sandbox Mode Enabled, Email Customer, Credit Card Types, Credit Card Verification, Payment from Specific Countries, Minimum or Maximum for Order Total.
Payment Action: choose Authorize Only or Authorize and Capture
Distinguishing between Authorize Only& Authorize and Capture:
Note: This direction can be applied with all Subscription product and non-subscription product.
When done, please press Save Configuration, your configuration is ready to use.
To create a subscription product, admin click on Products > Catalog and choose a product type.
Then, the New Product page will be shown. Regarding the Stripe Payment and Subscriptions extension, admin needs to consider two tabs named Stripe Subscription and Stripe Subscription Billing Options.
At Stripe Subscription tab, admin will set whether a product is a stripe subscription product or not.
+ YES: This product will be shown as a stripe subscription product at front end. This means this product's plans which were set at the Stripe Subscription Billing Options tab will be shown with this product at this product detail page (e.g. Plan ID, Billing Frequency ...). Customers will choose one of them and payment.
+ NO: This product will be shown as a simple product (don't show this product's plans, it will be hidden).
- At Stripe Subscription Billing Options tab, admin will need to set plans if they wish it is a subscription product. There are some fields that admin need to set, include:
+ Plan ID.
+ Period Unit: Select one of the period units (Day, Week, Month, Year).
+ Billing Frequency.
+ Trial Period: Yes/No (Whether the product have a trial version or not). If admin choose Yes, they can define the period time allowing customer can use free the product according to your wish. If admin choose No, this means this product will not have a trail version.
Also, if admin want to add more plans for a product, they only click on Add Option button. Then, admin can add the same as above.
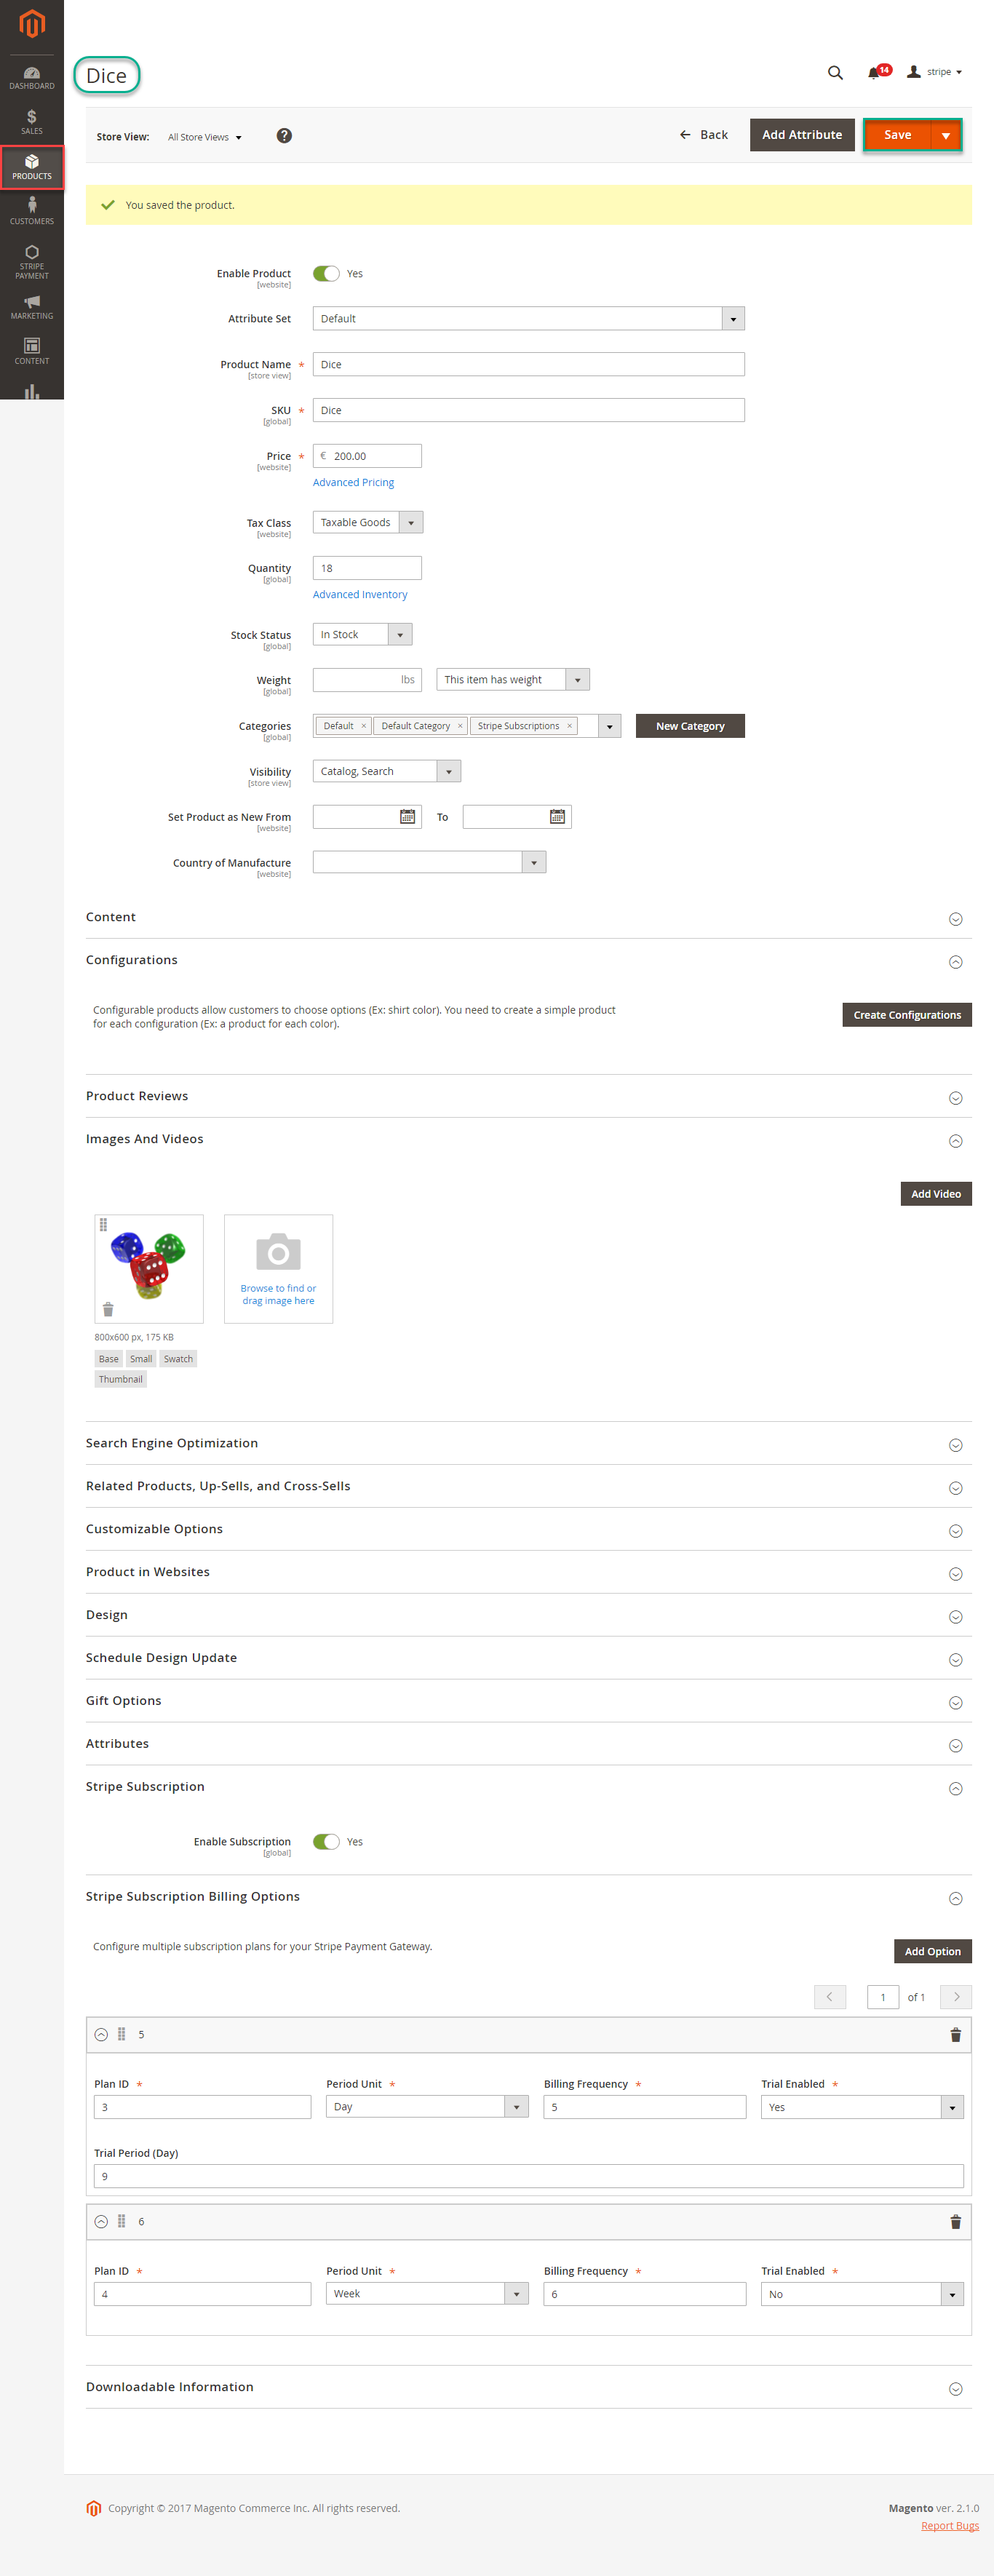
Please click on Save button to complete.
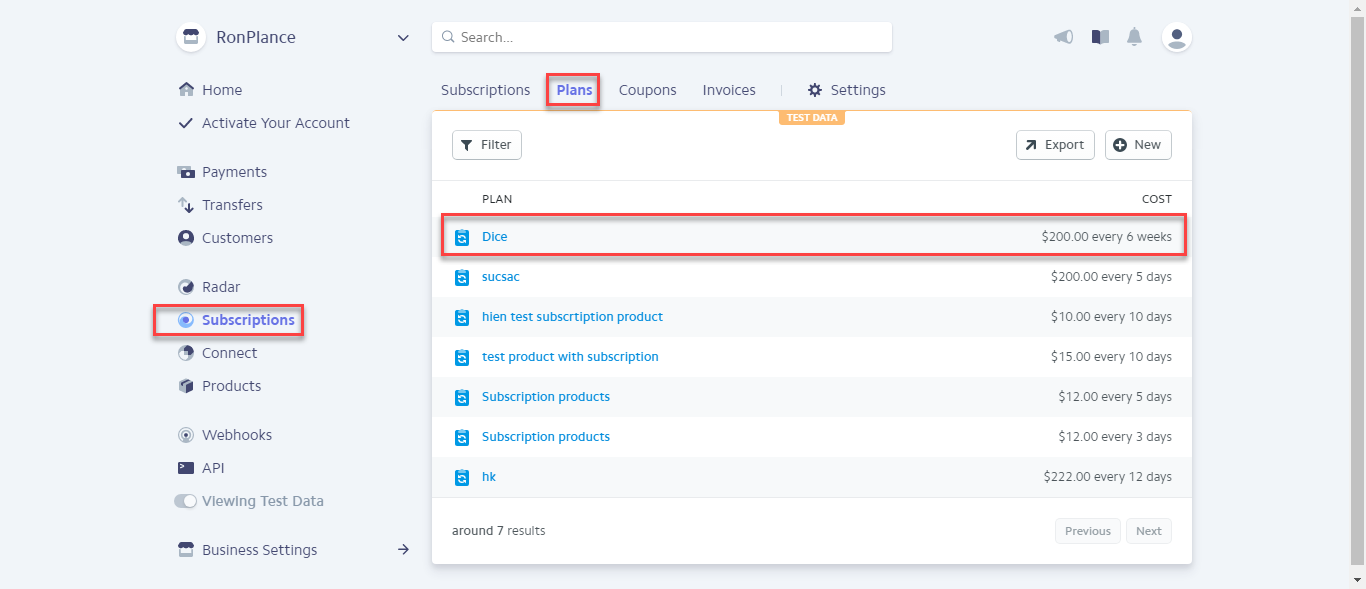
At the same time, your stripe account will also automatically sync a product corresponding with the subscription product created at Plans tab.
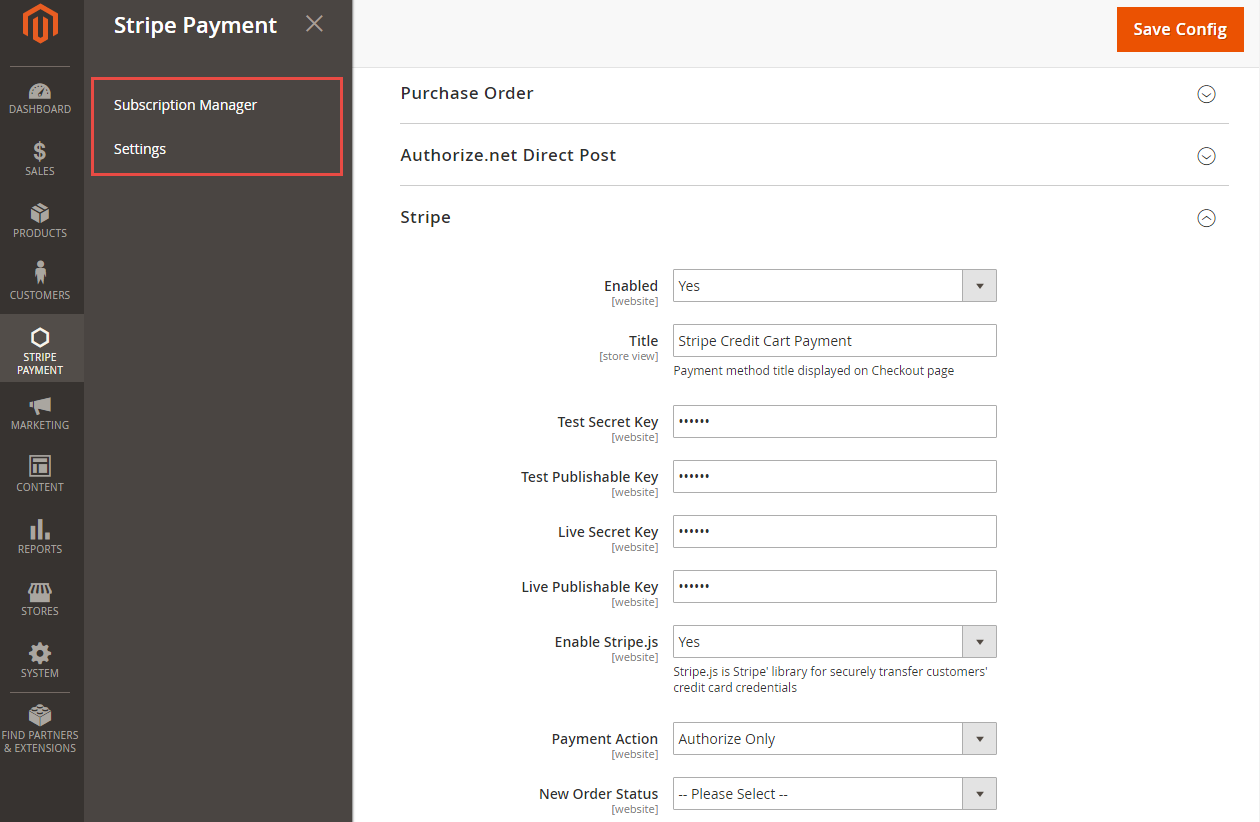
We created a Stripe Payment tab which allows admin can view and manage all of things Stripe Order.
There are two tabs, includes:
With the Settings tab, we provide admins with the fastest way possible to access to Stripe Payment Settings.
Go to Subscription Manager tab, admin will see the list of orders regarding the subscription products.
Admin can view and manage some information such as: Order ID, Subscription ID, Start Date, End Date and Status an easy way.
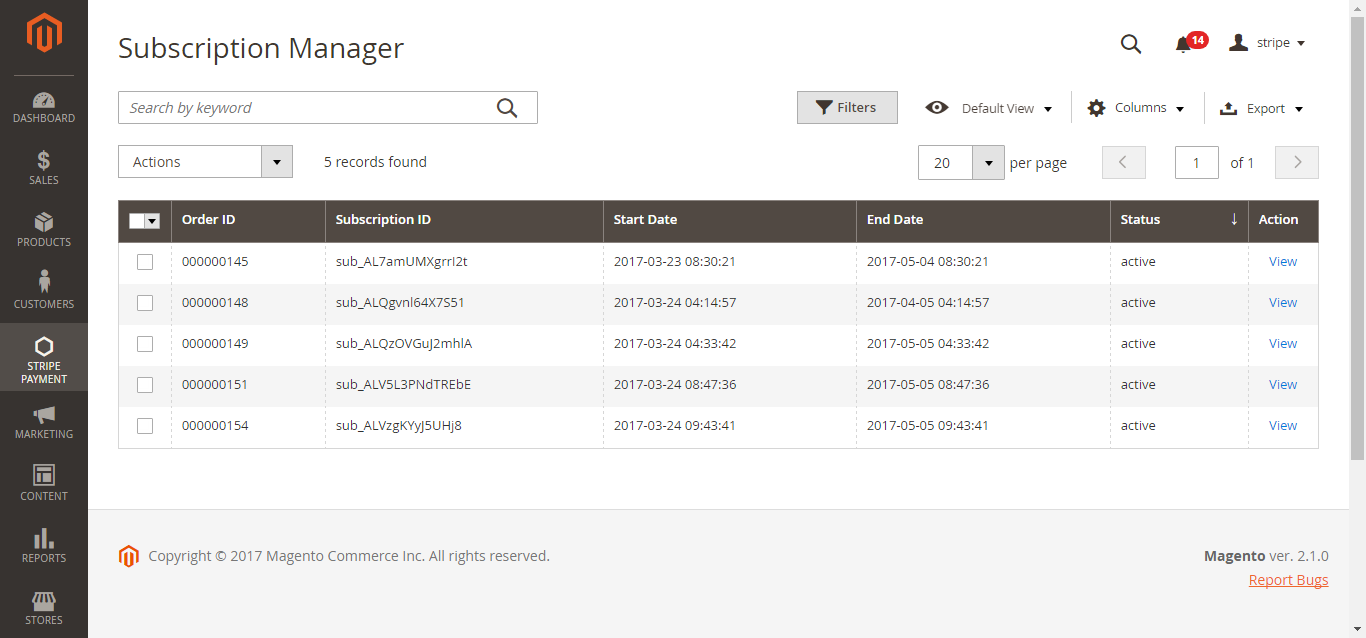
To view more detail, please choose a order that admin consider and click on View.
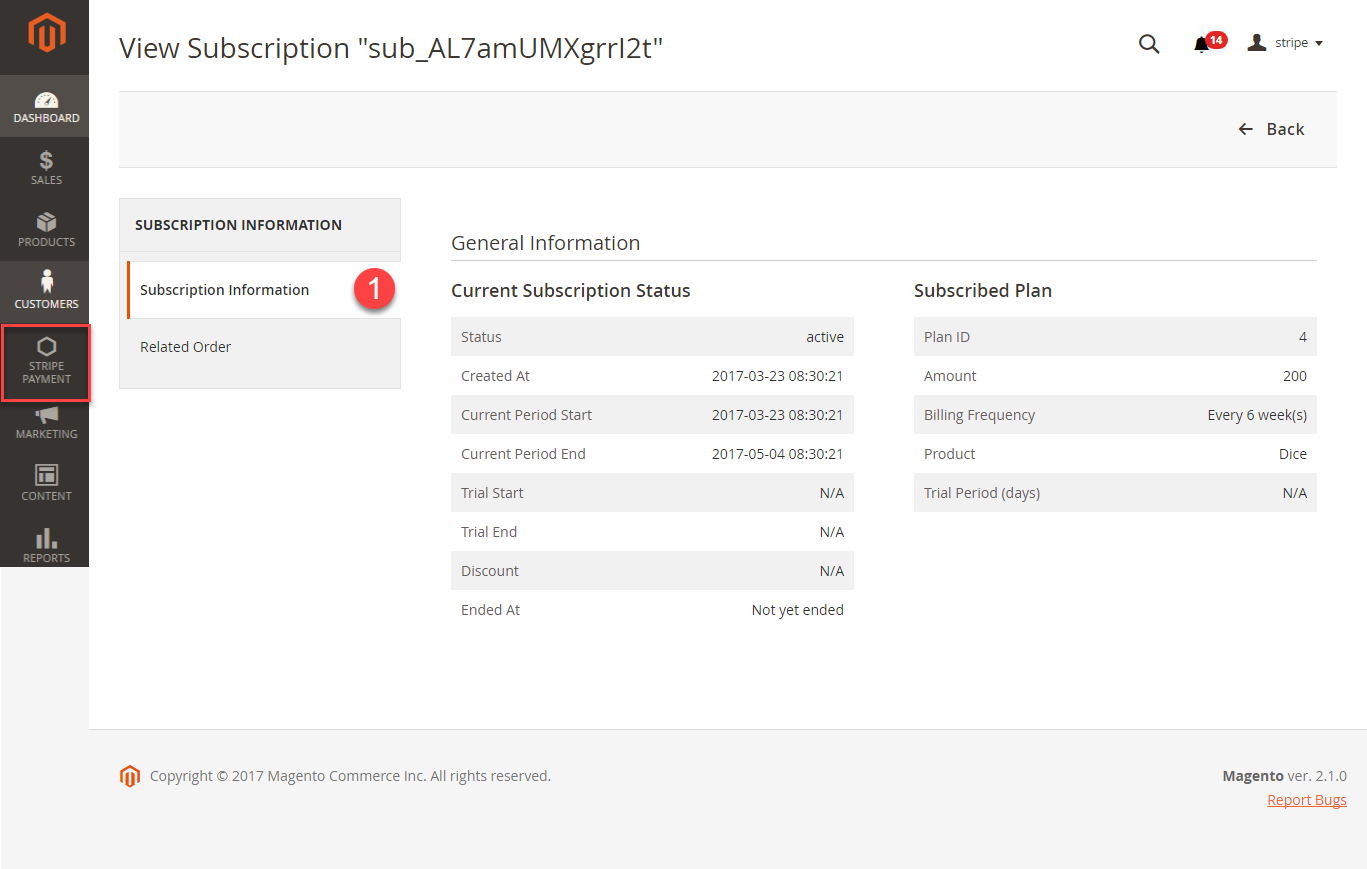
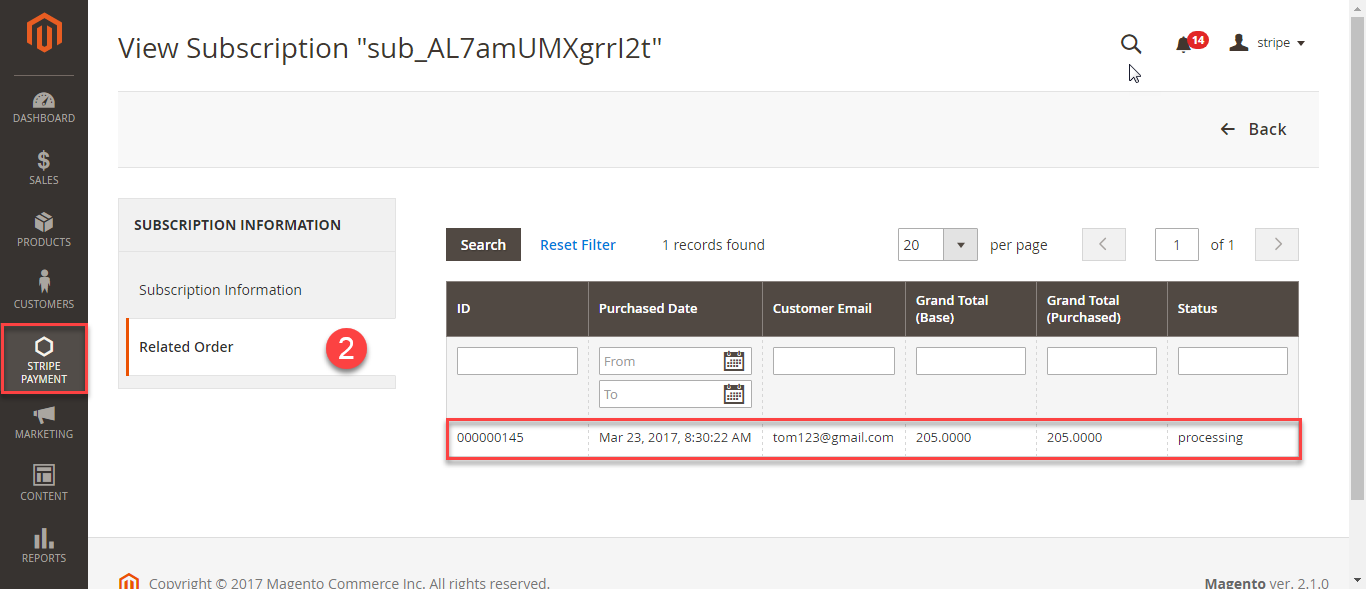
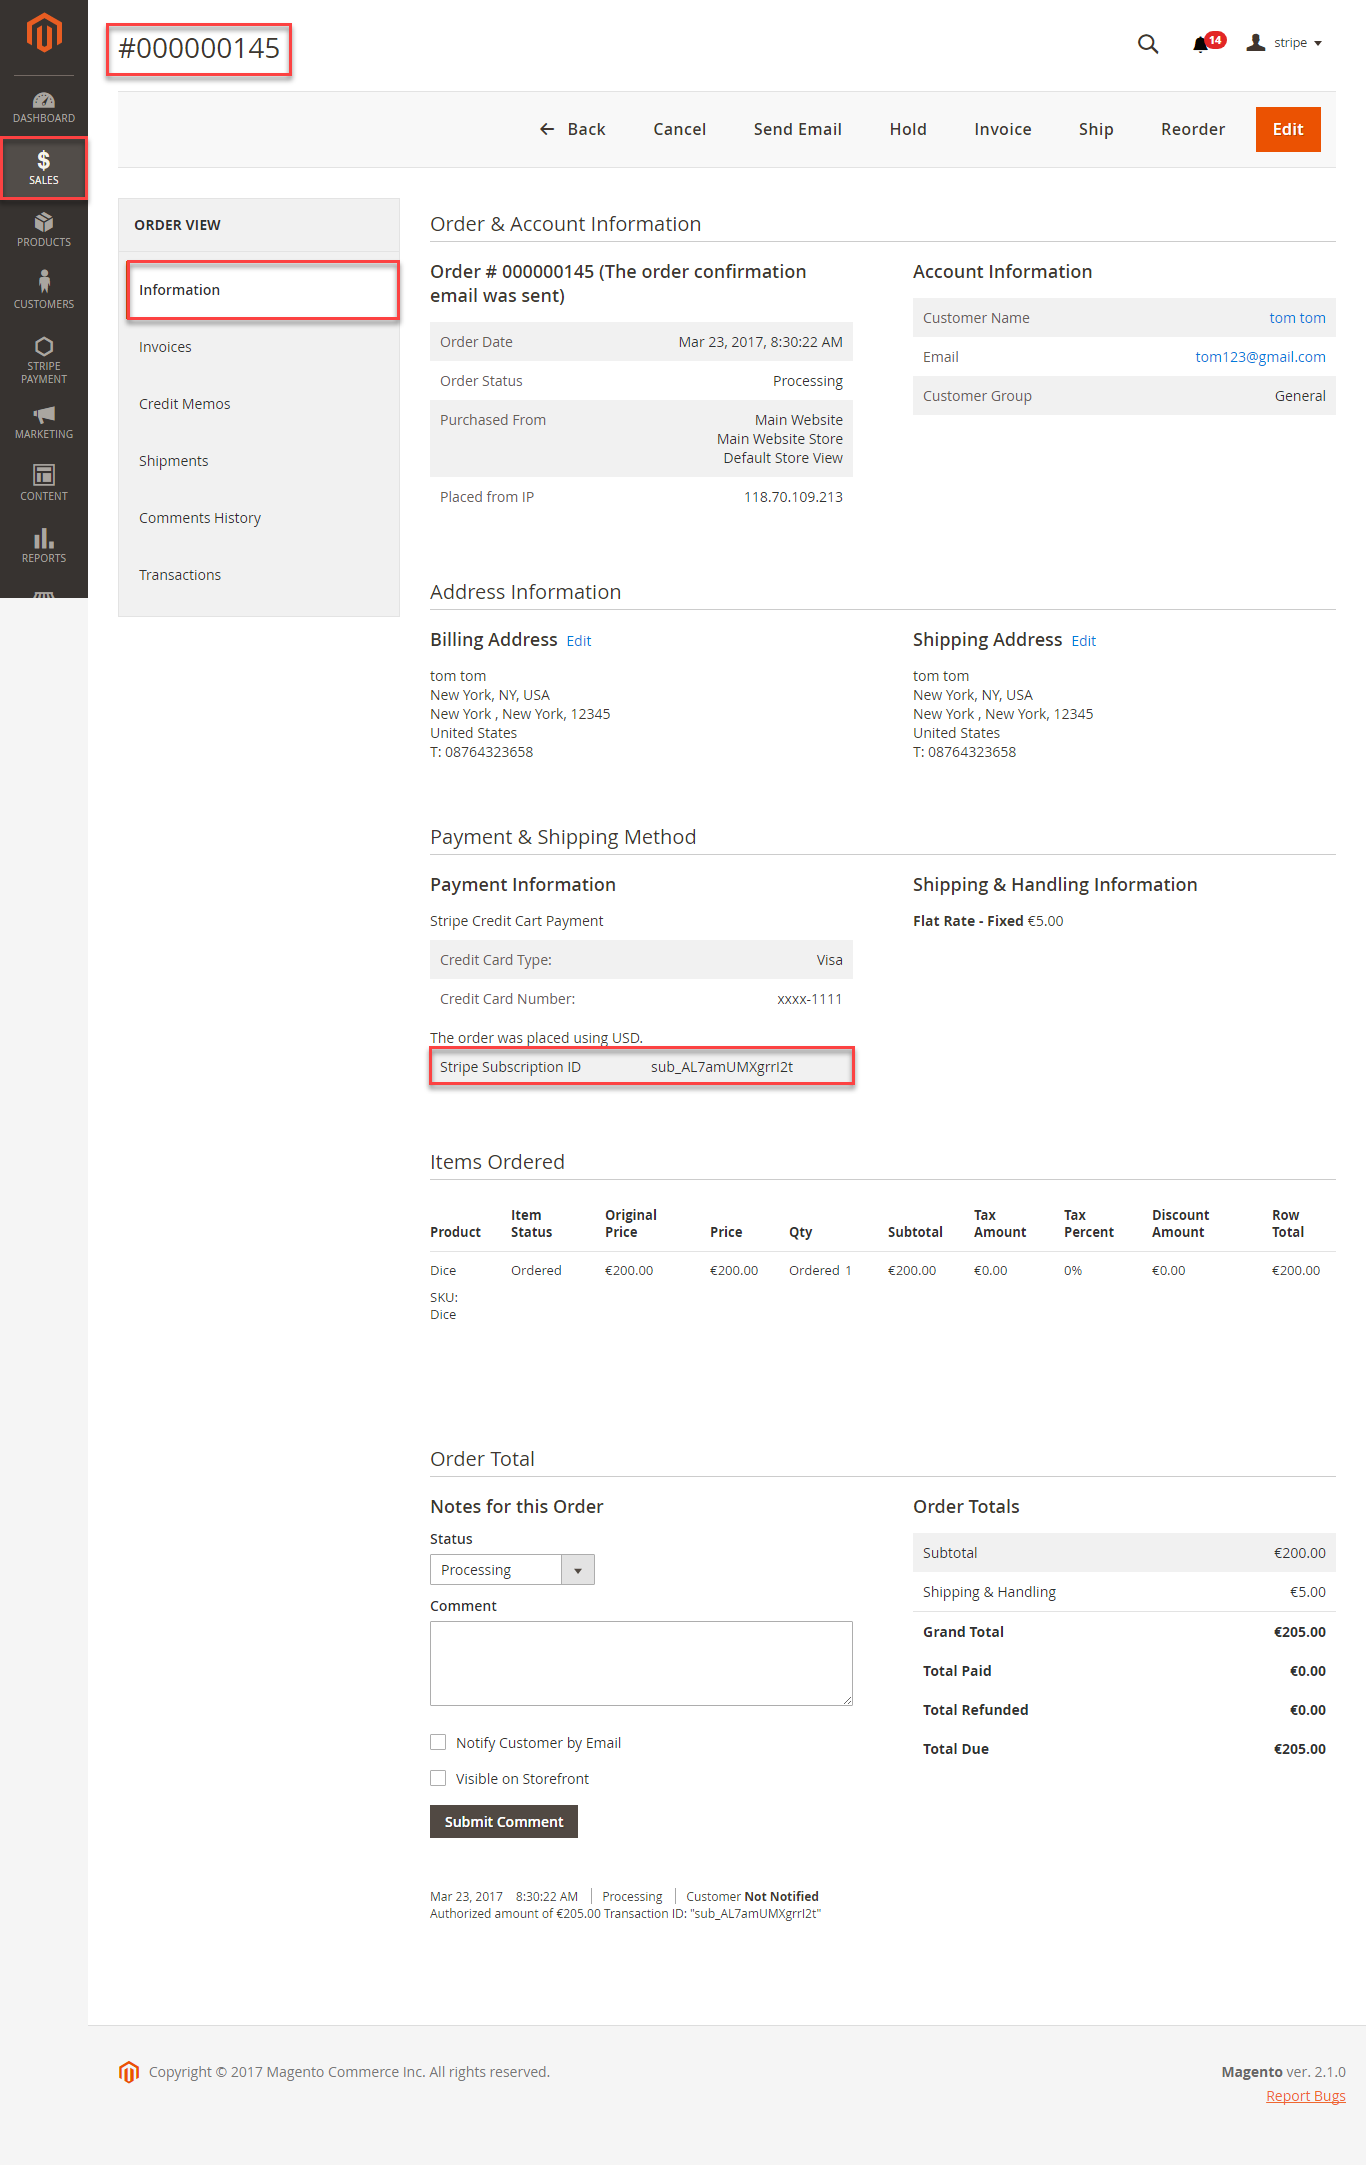
To view more details, admin clicks on the order that admin wants to consider such as Stripe Subcription ID
At front end, customer will need to choose a stripe subscription type and click on Add to Cart button.
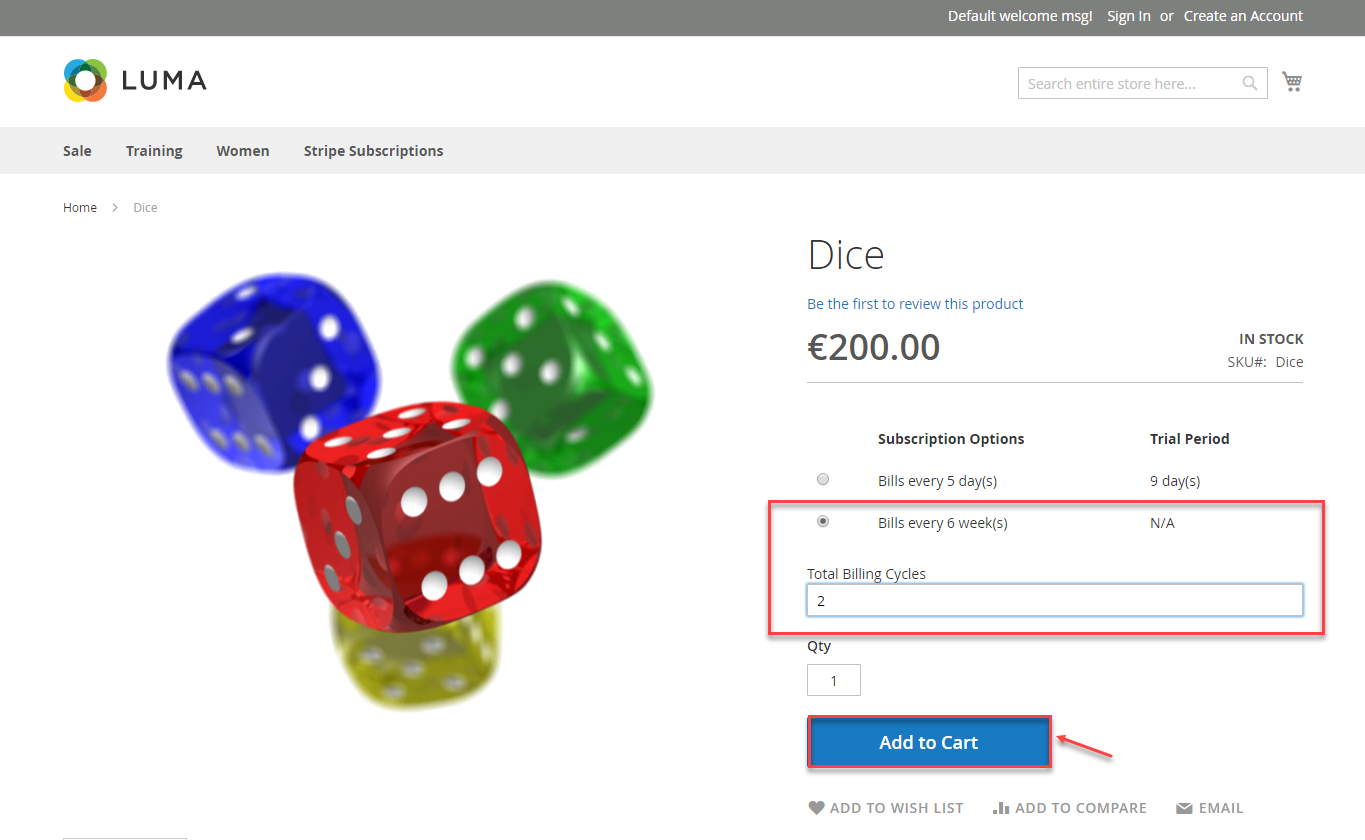
NOTE: For the cart that contains the subscription product, we currently support this cart with only one subscription product.
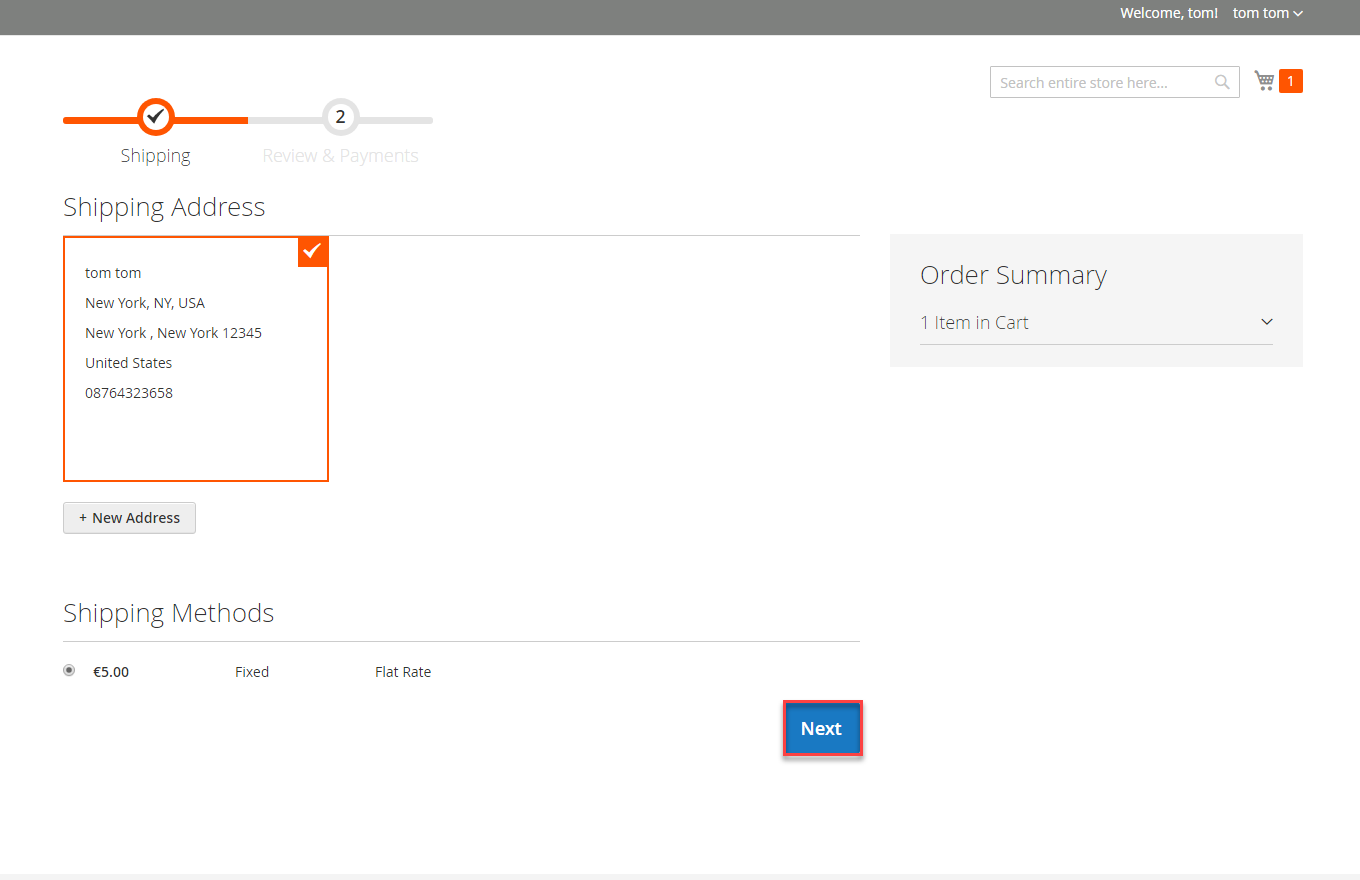
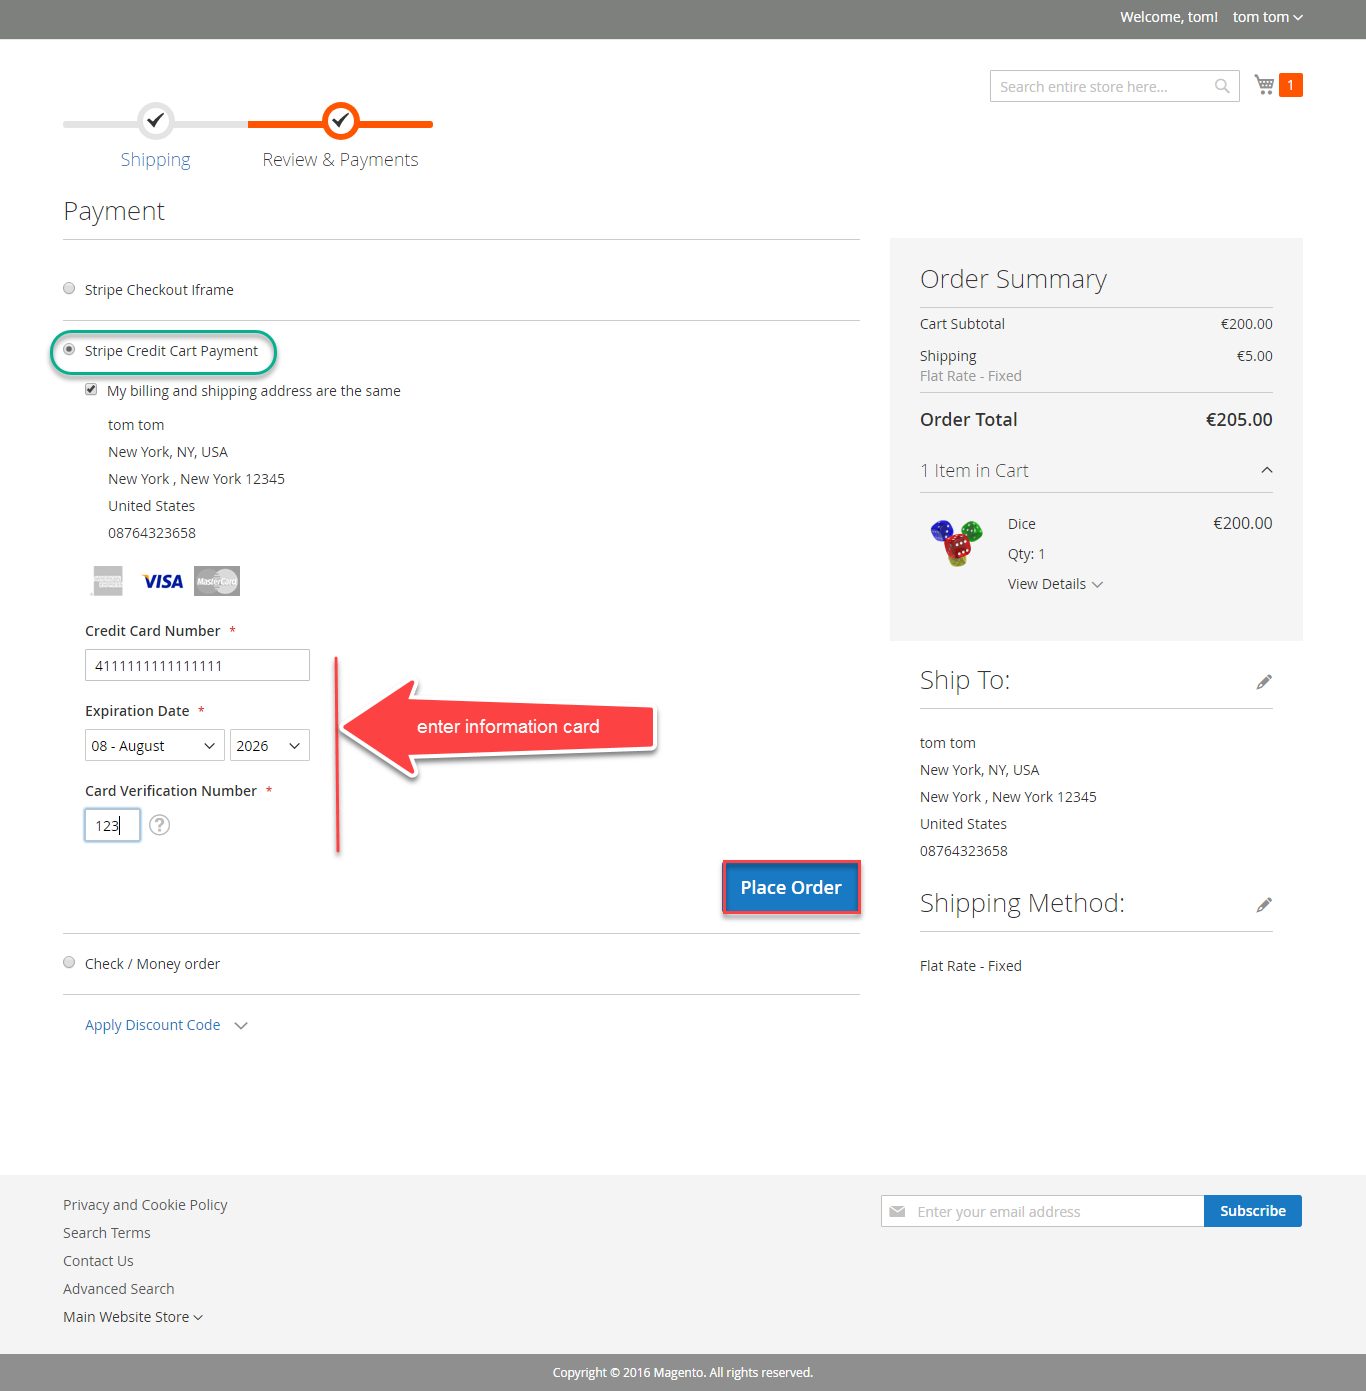
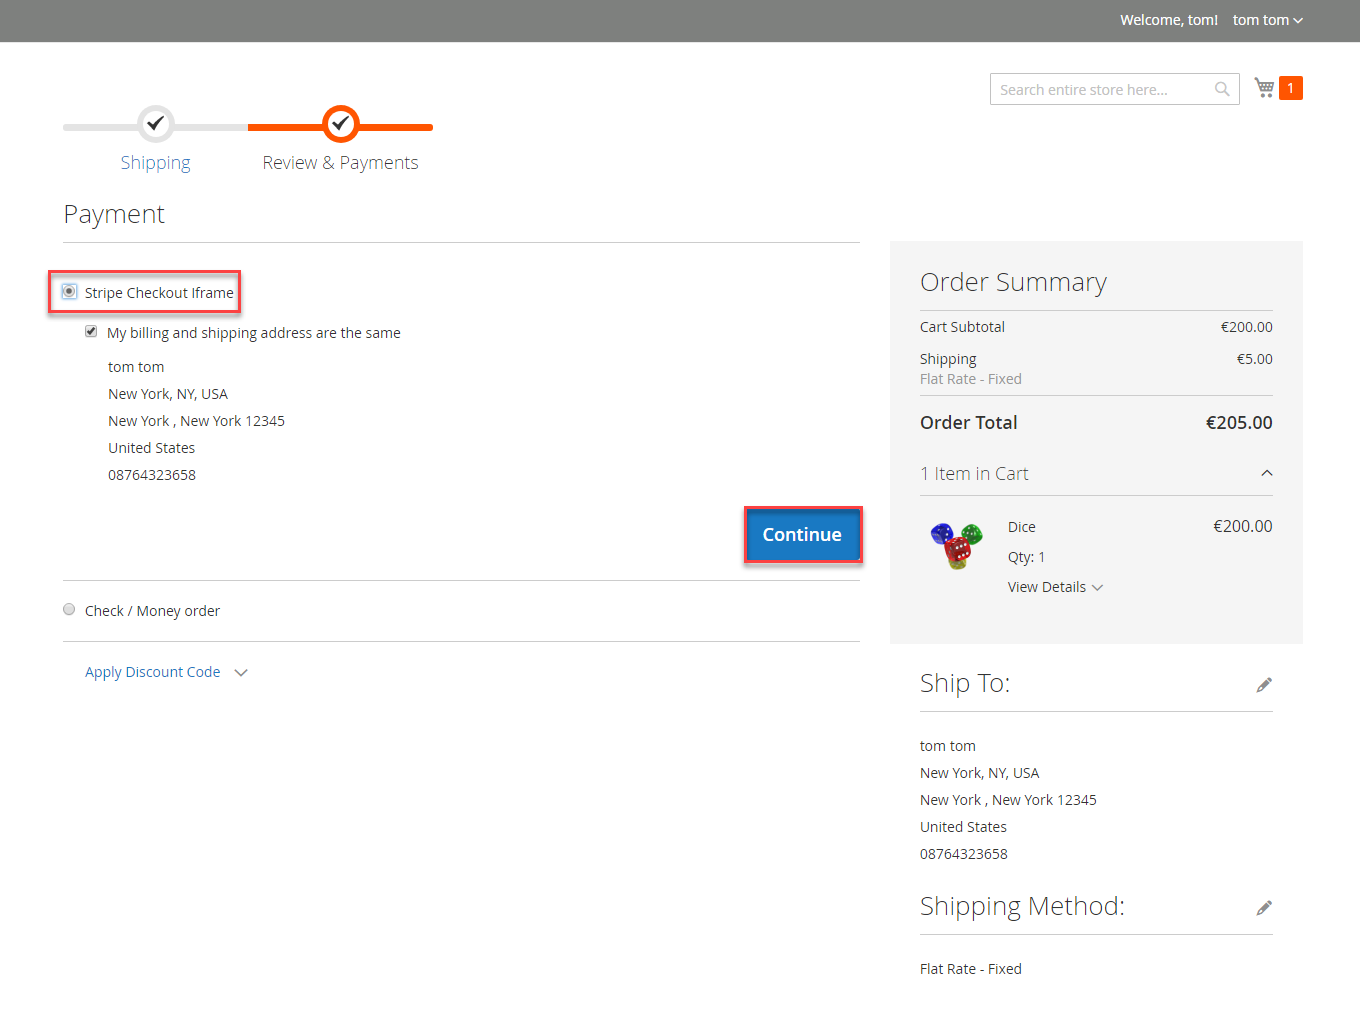
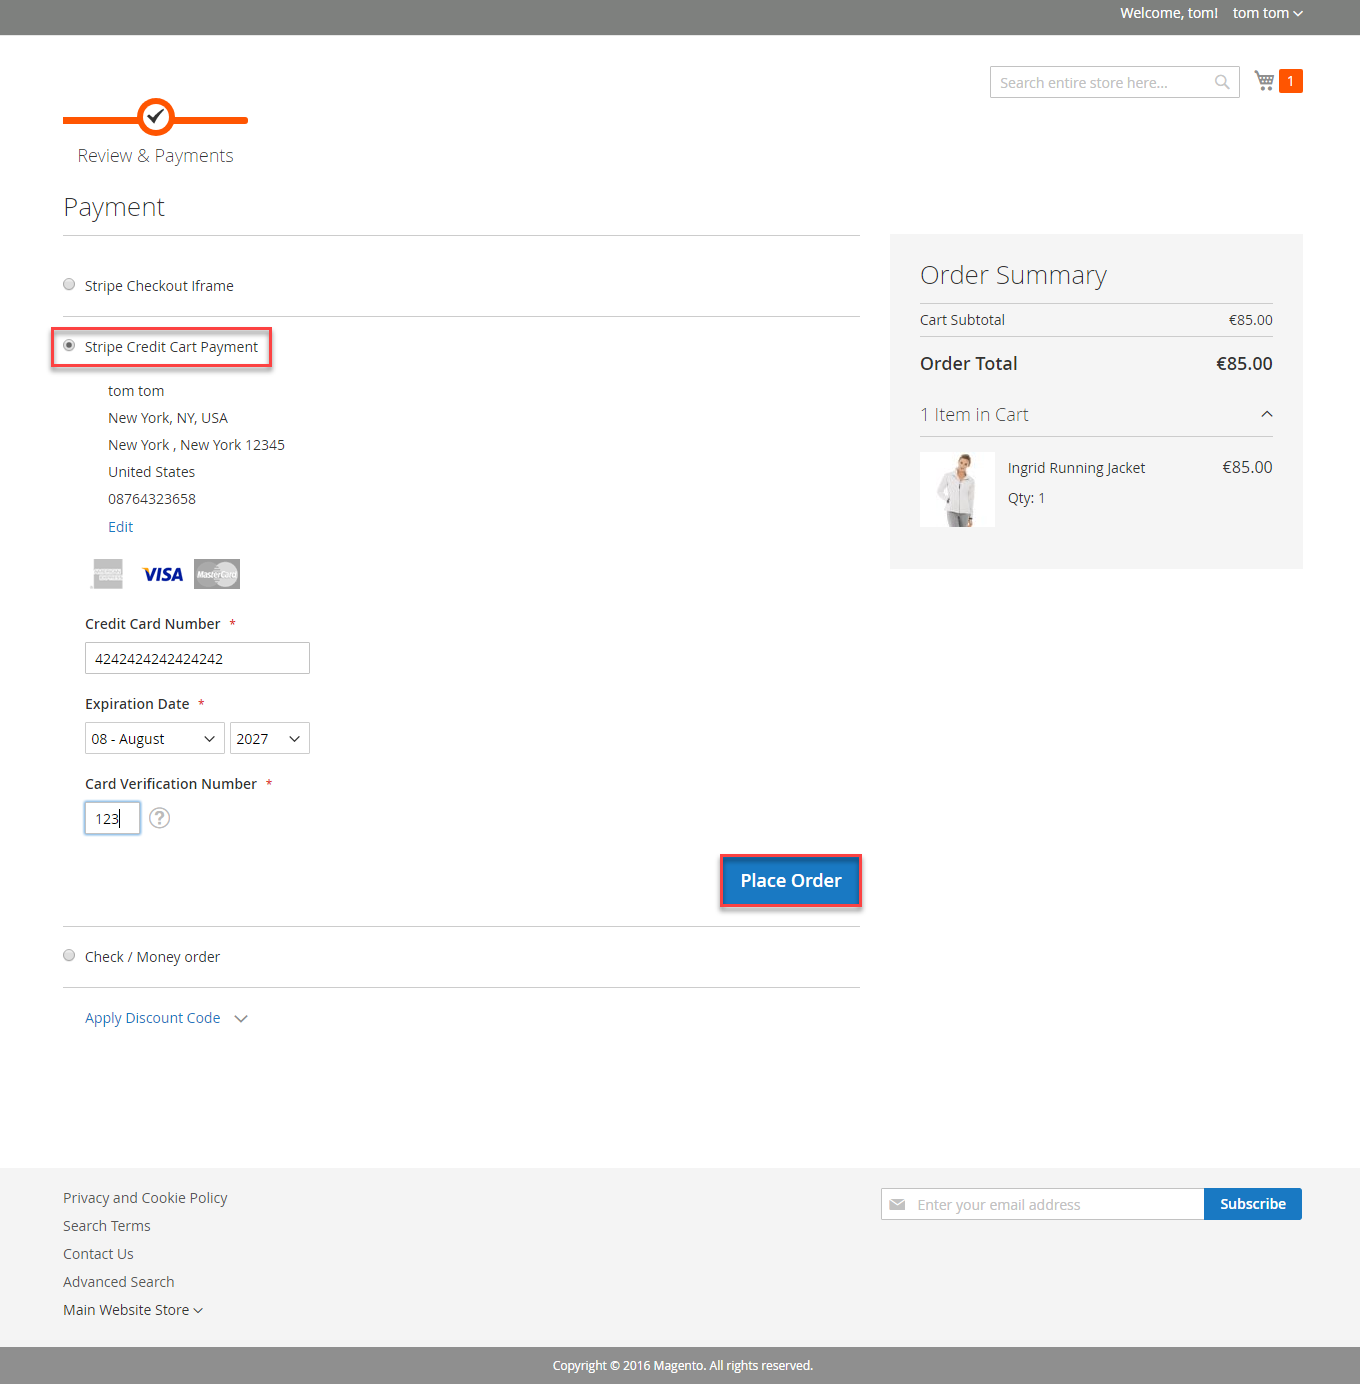
Then, go to checkout and select Stripe Credit Card Payments or Stripe Checkout Iframe instead of Check/Money Order.
Paying with Stripe Credit Card Payment:
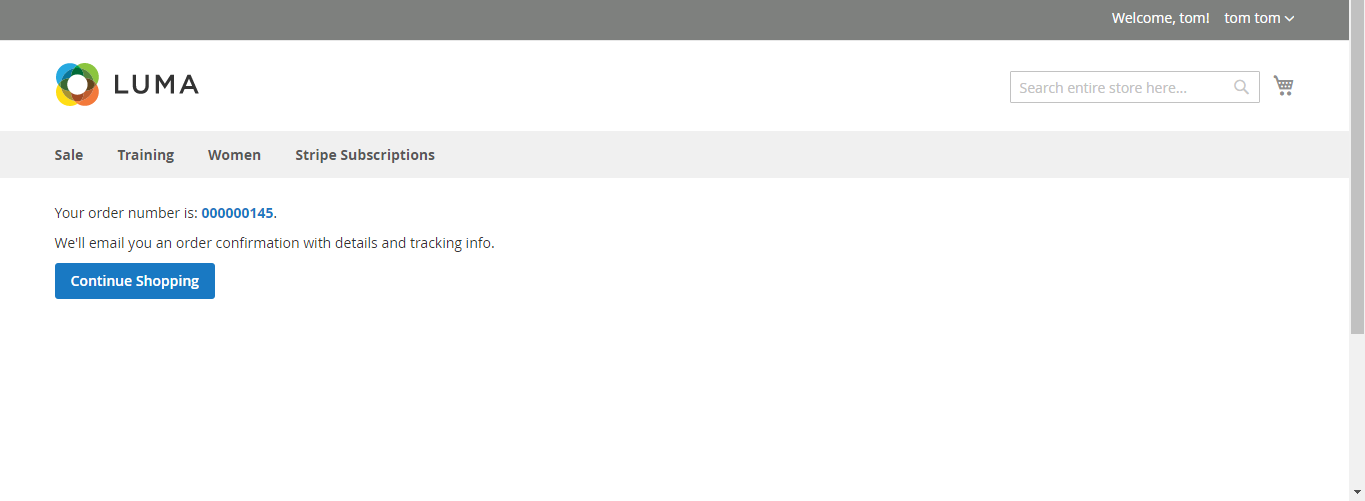
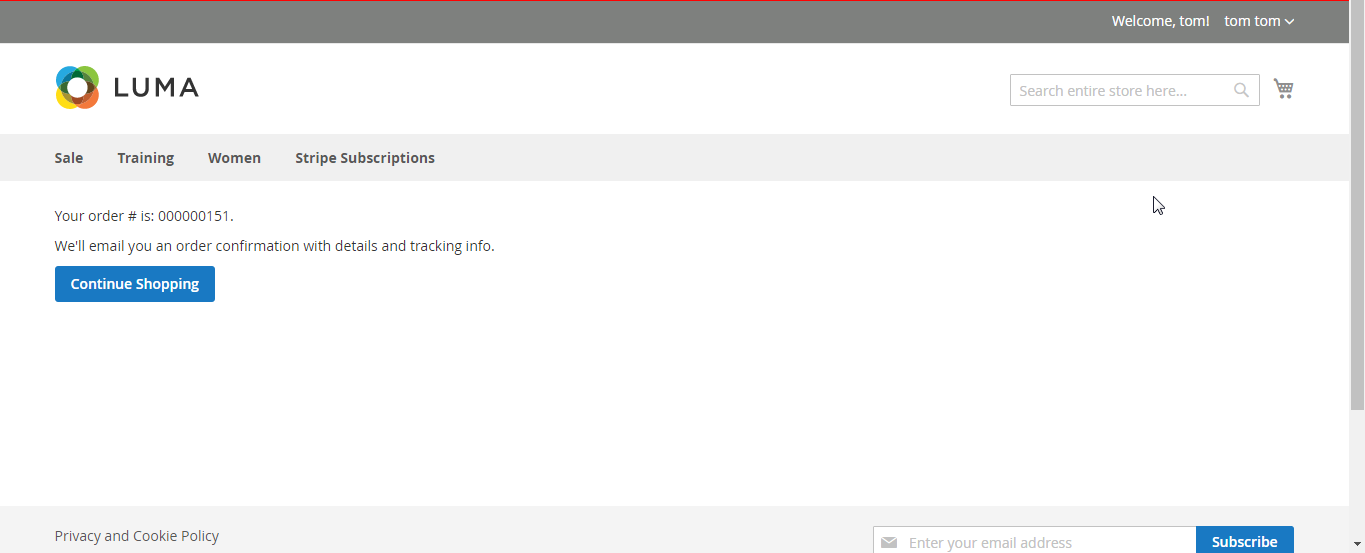
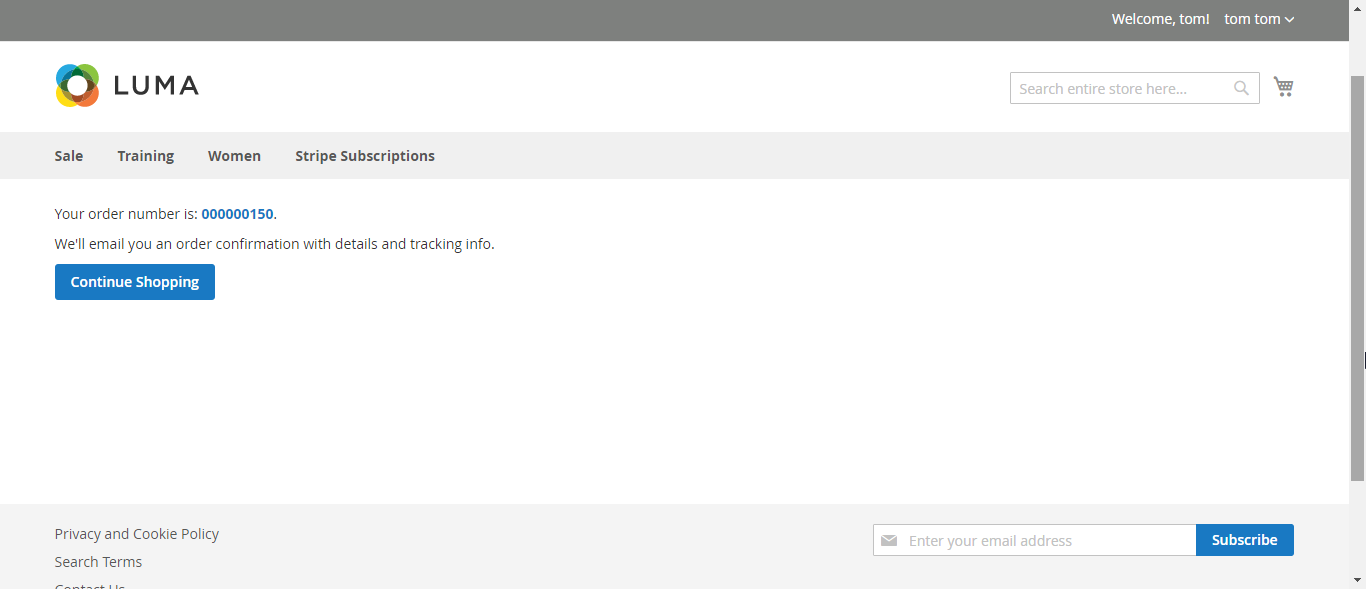
The system will inform order number of the customer in home page and send email to confirm via email. Payment is successful!
Paying with Stripe Checkout Iframe:
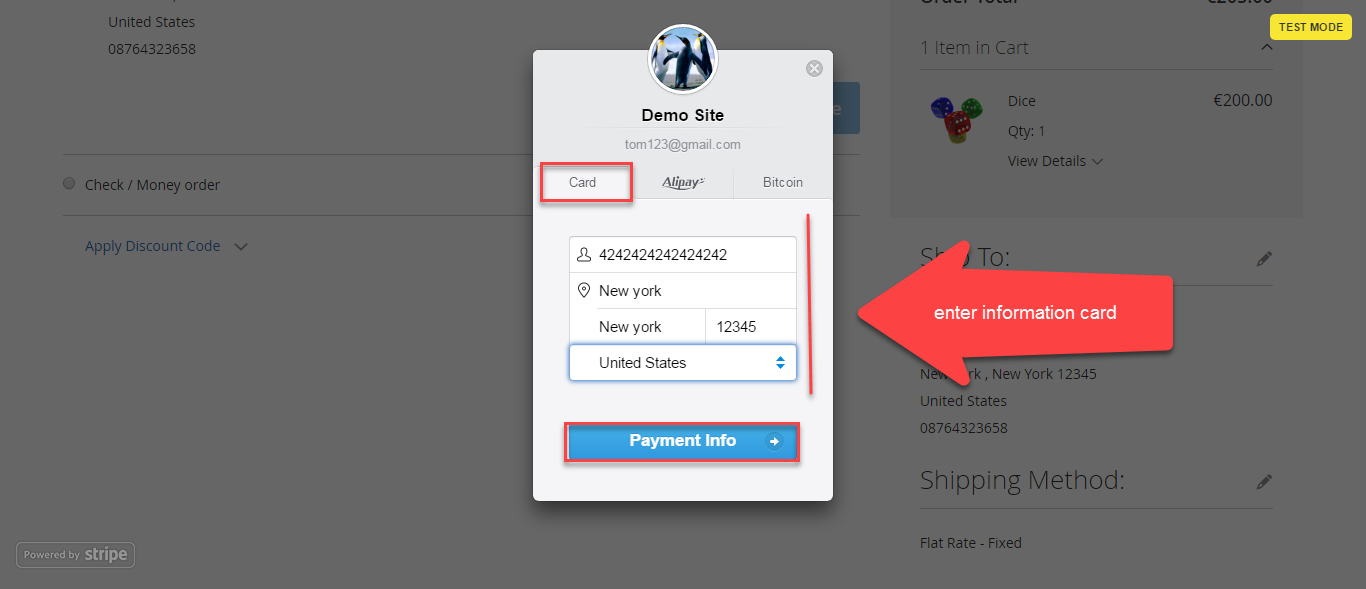
Demo Site payment form is displayed:
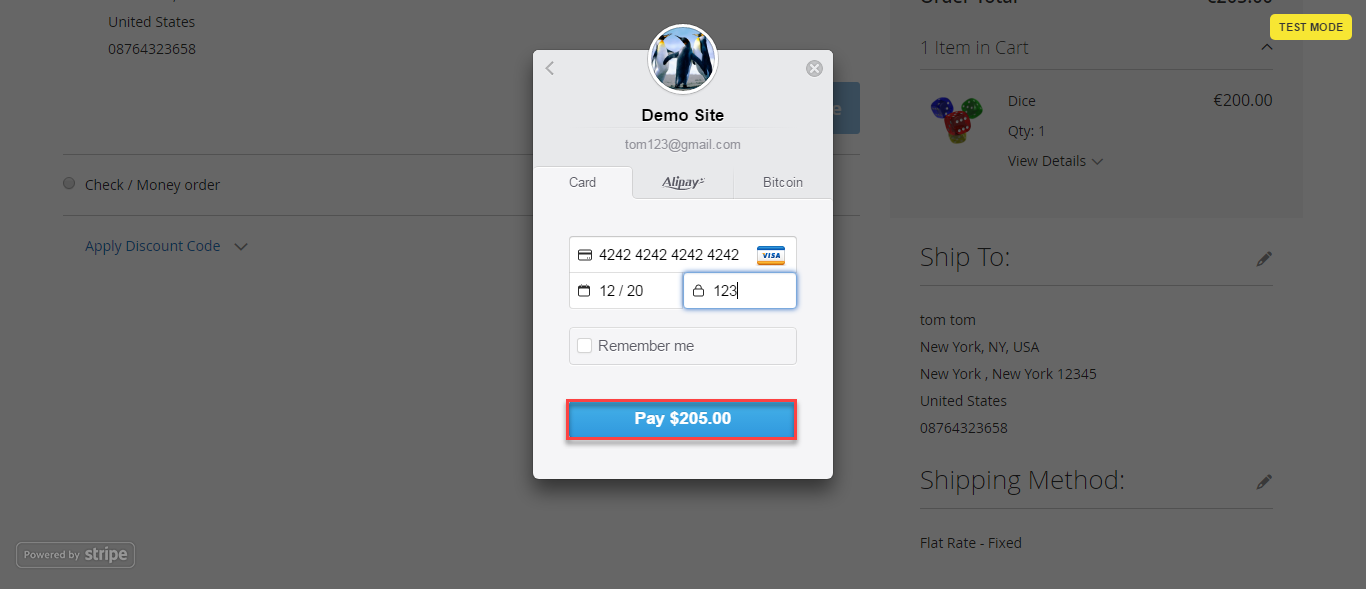
The system will process and send inform to Magento.
After successful payment, at Payments tab of Stripe, the order will be updated corresponding with two options when admin set at Configuration.
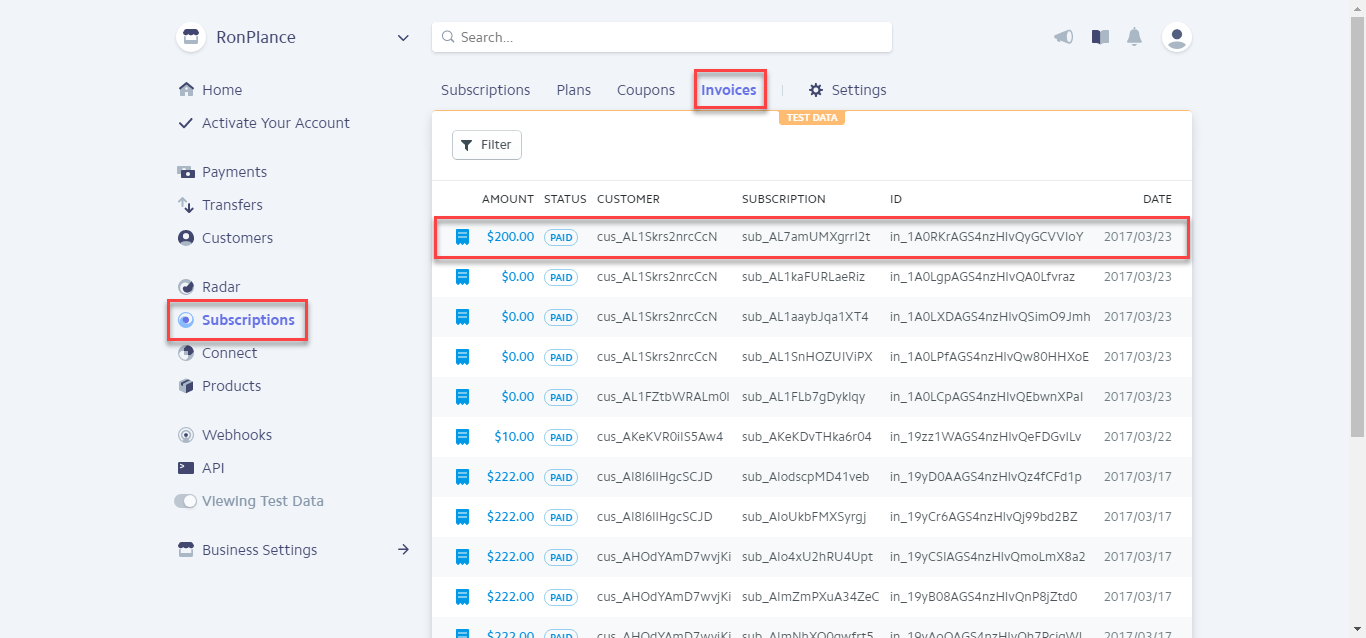
With Subscription product, both Authorize Only and Authorize and Capture return the same status as Paid
For Non-Subscription Product
Authorize Only:
At front end, customer will need to choose a stripe subscription type and click on Add to Cart button.
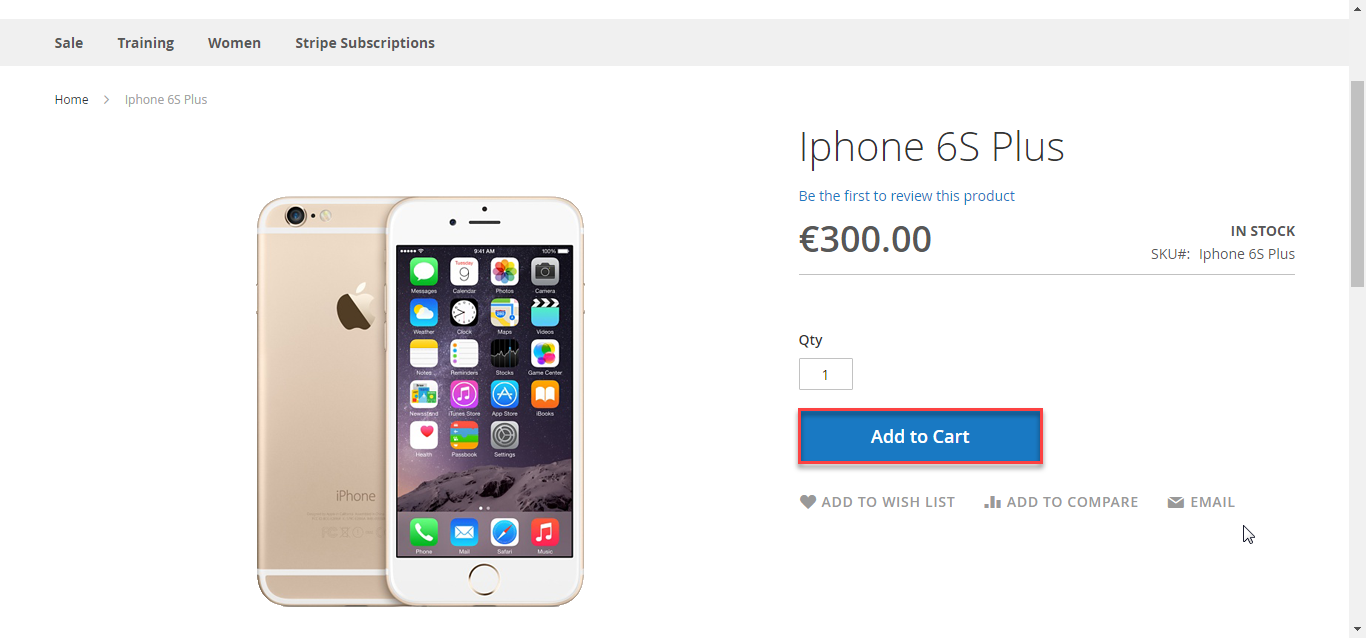
Then, go to checkout and select Stripe Credit Card Payments or Stripe Checkout Iframe instead of Check/Money Order.
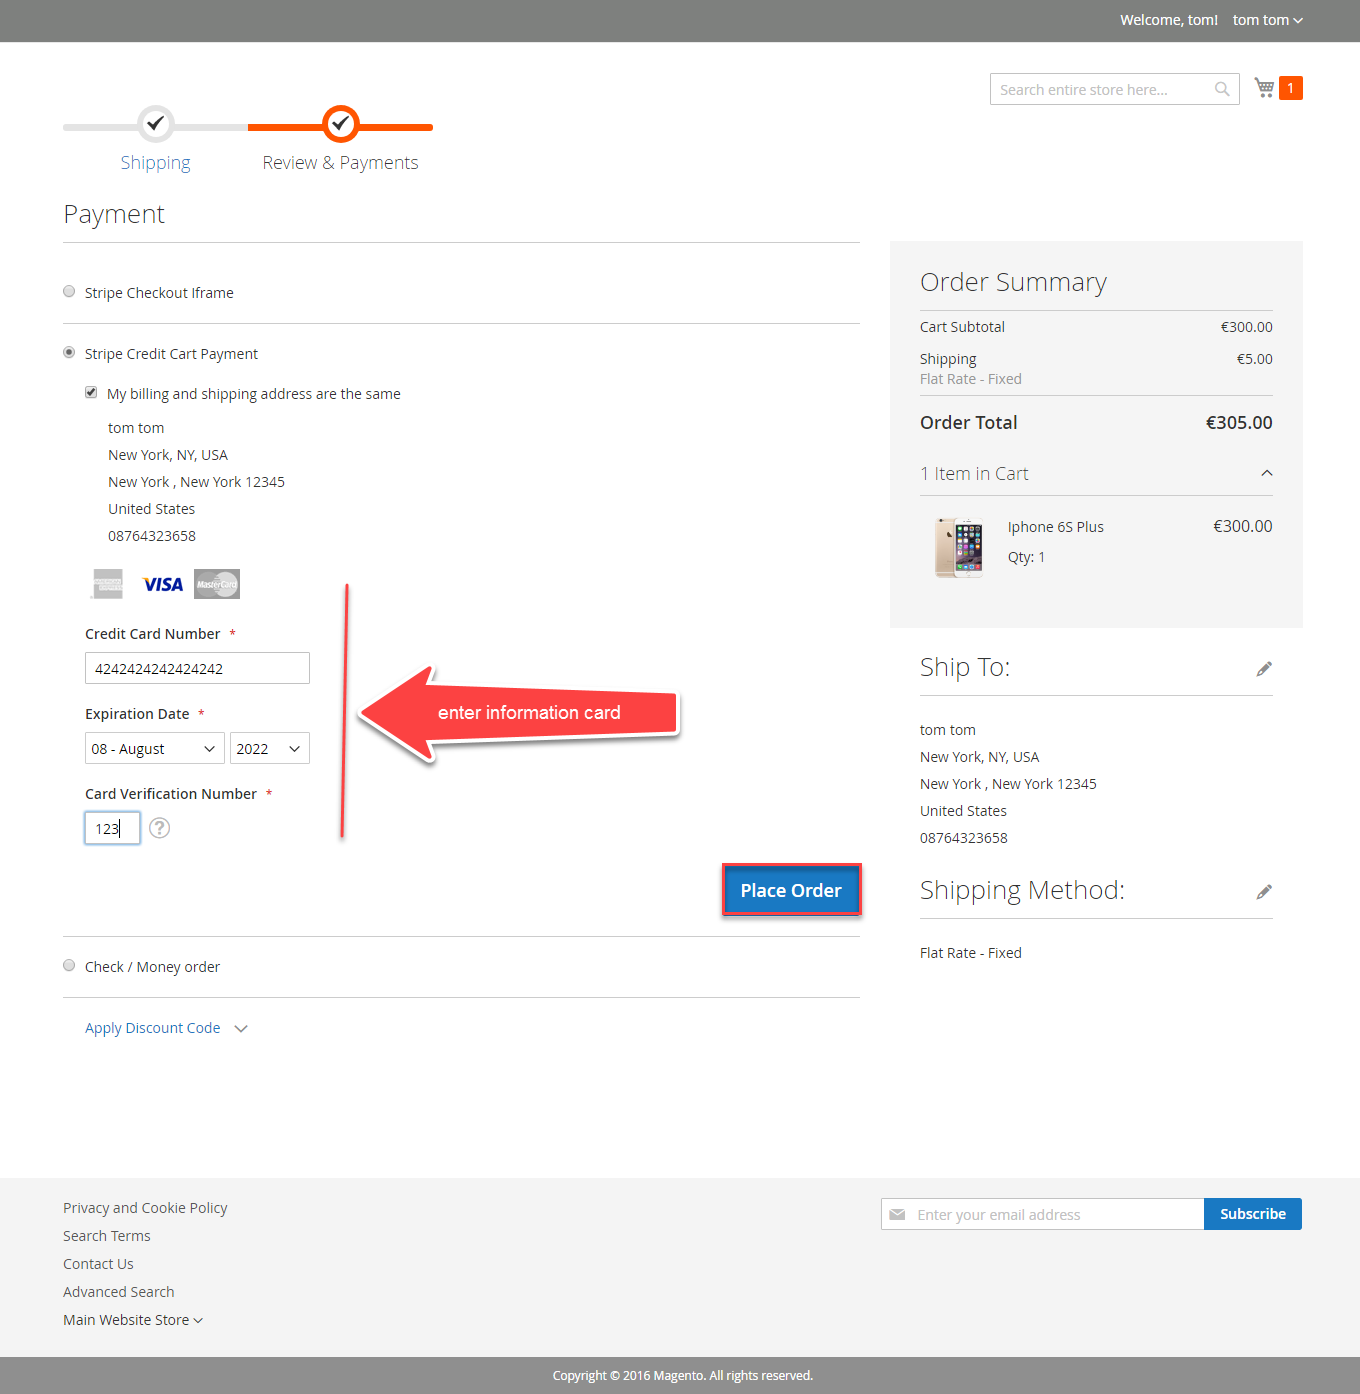
The system will inform order number of the customer in home page and send email to confirm via email. Payment is successful!
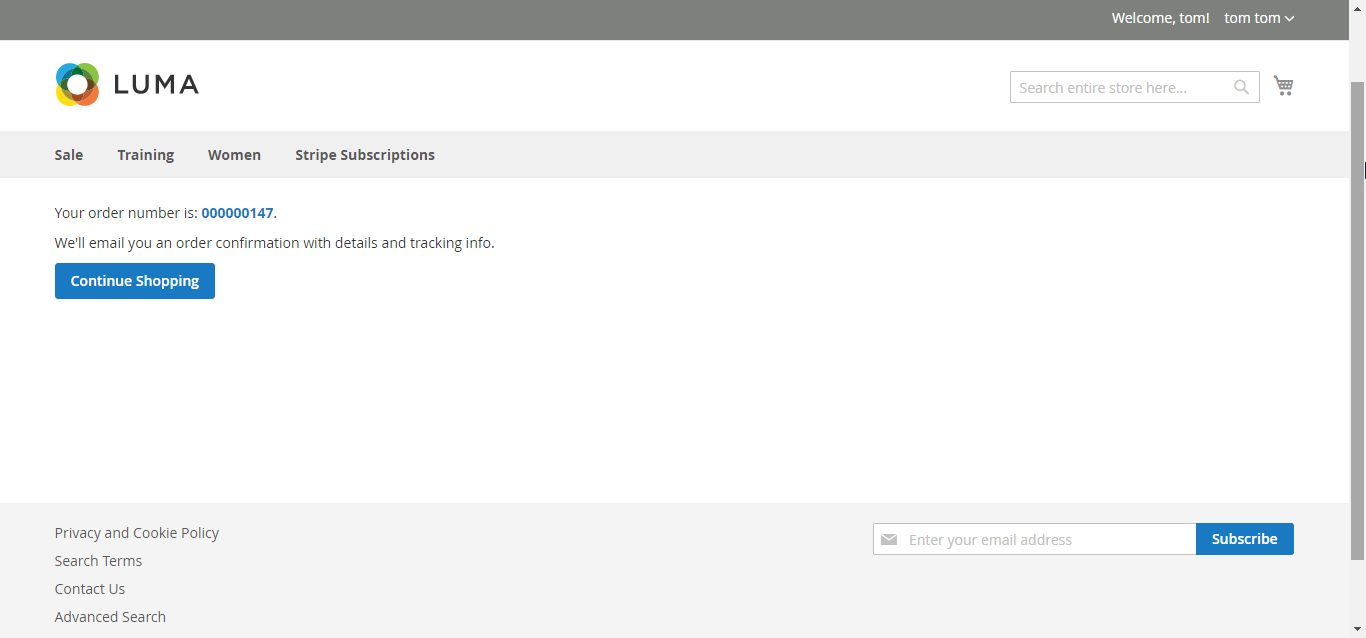
After successful payment, at Payments tab of Stripe, the order will be updated corresponding with two options when admin set at Configuration.
With non-subcription product, order status will be returned both Capture and Uncaptured
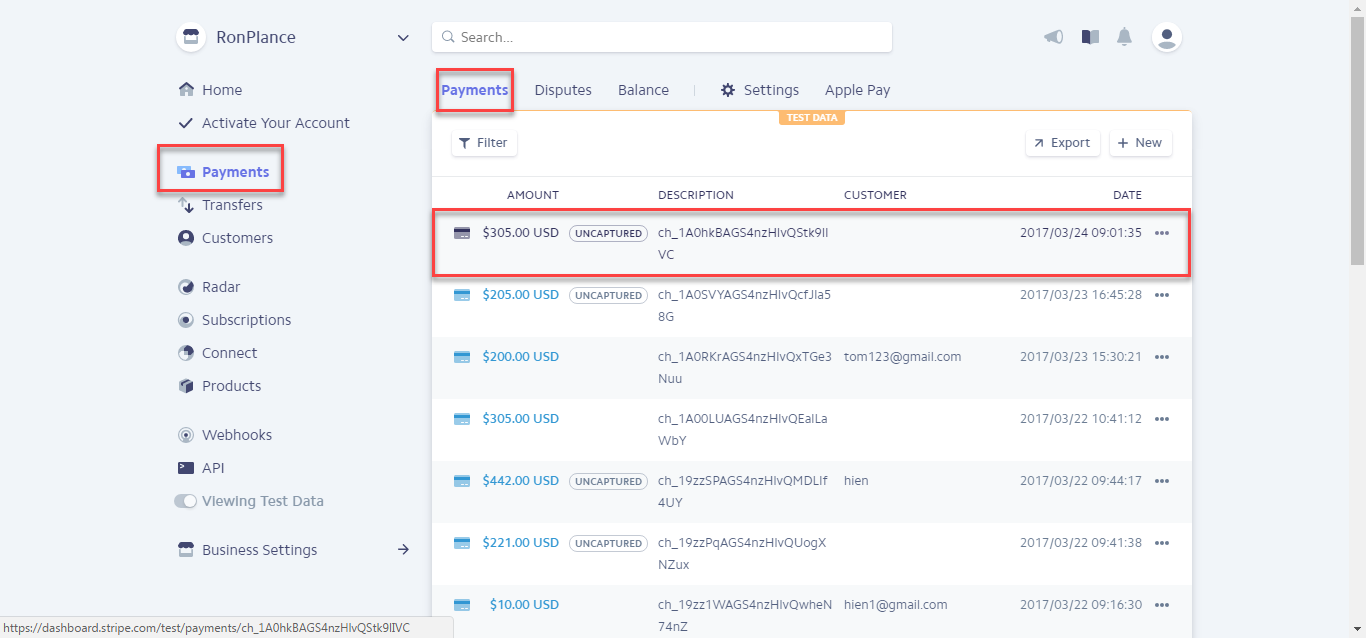
In this case, you click Uncaptured and click Capture button.
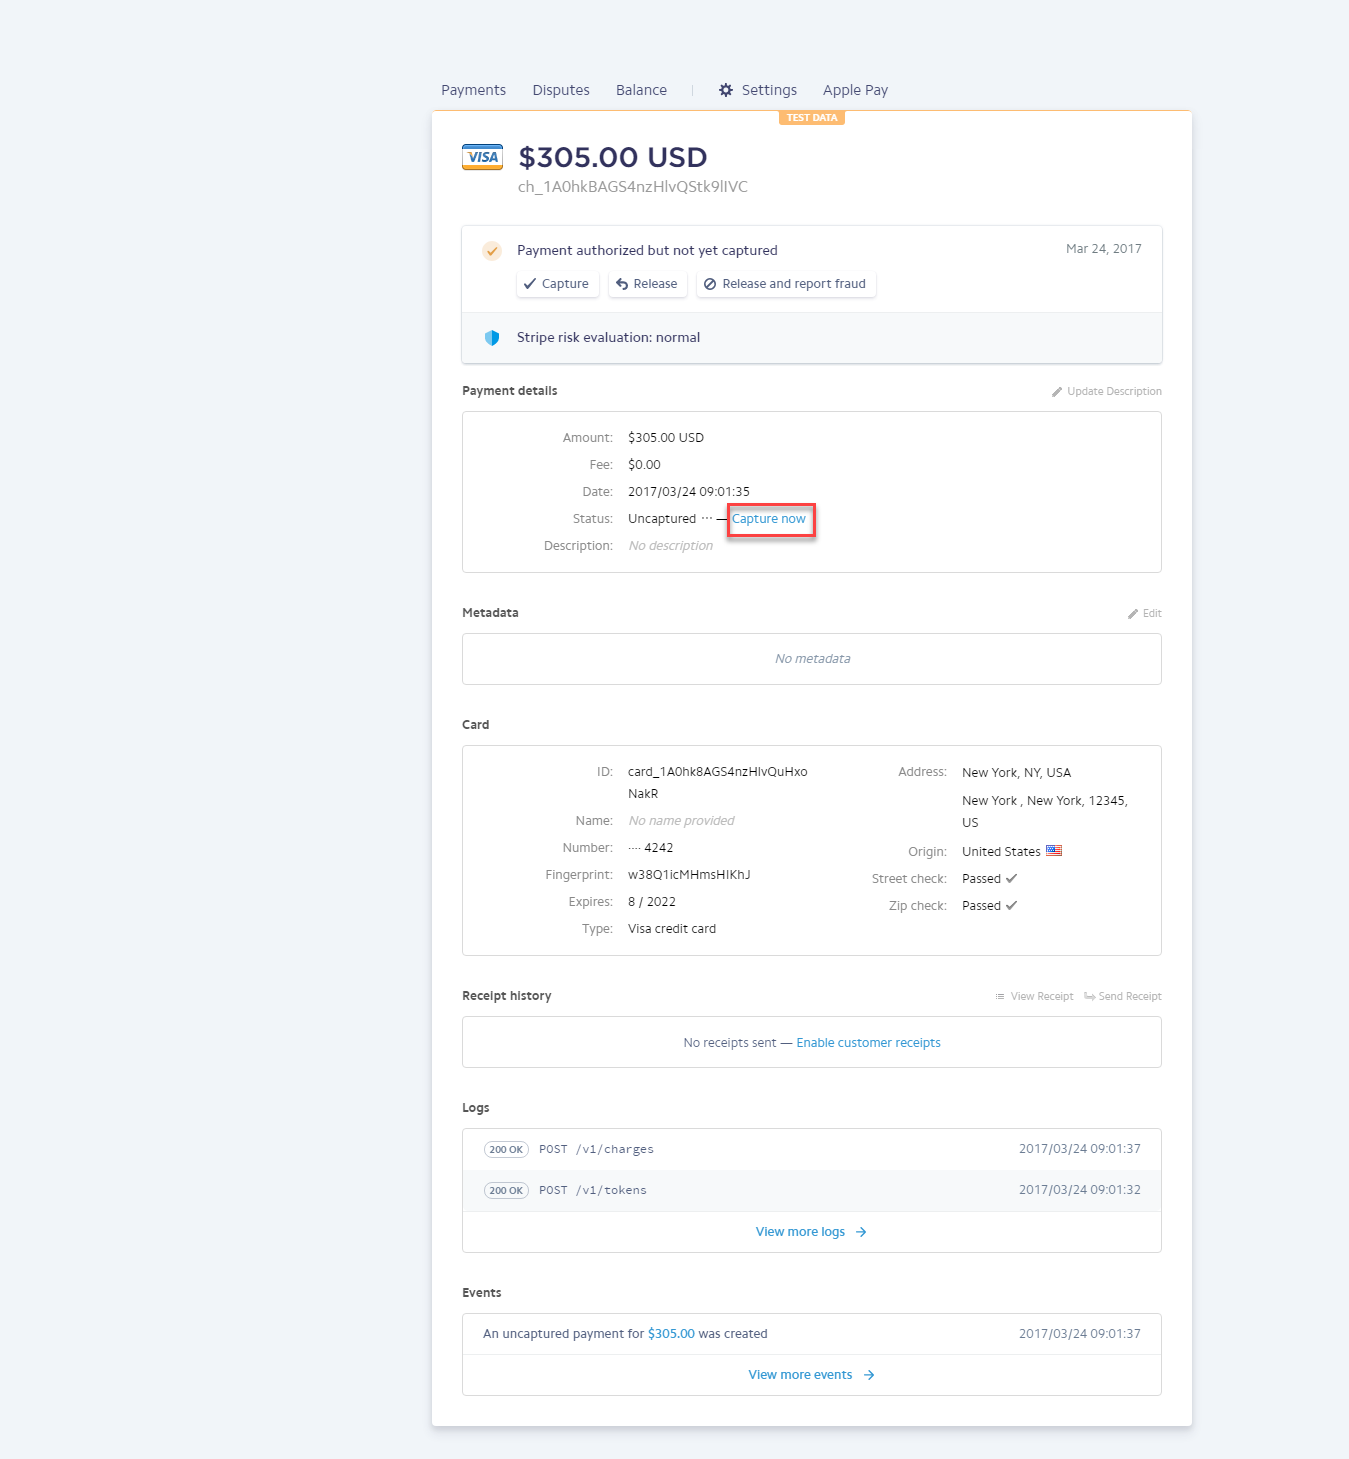
Invoice of transaction will be generated.
To View Orders, click Sales->Orders
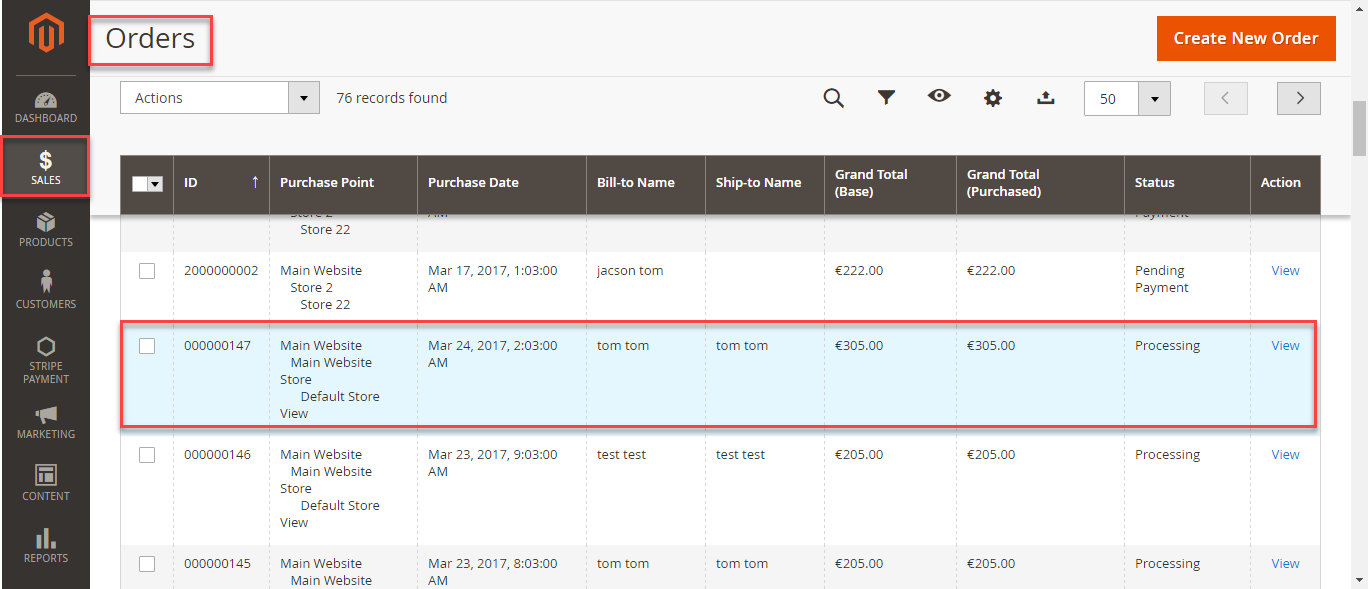
Press View. Apearing Order detail:
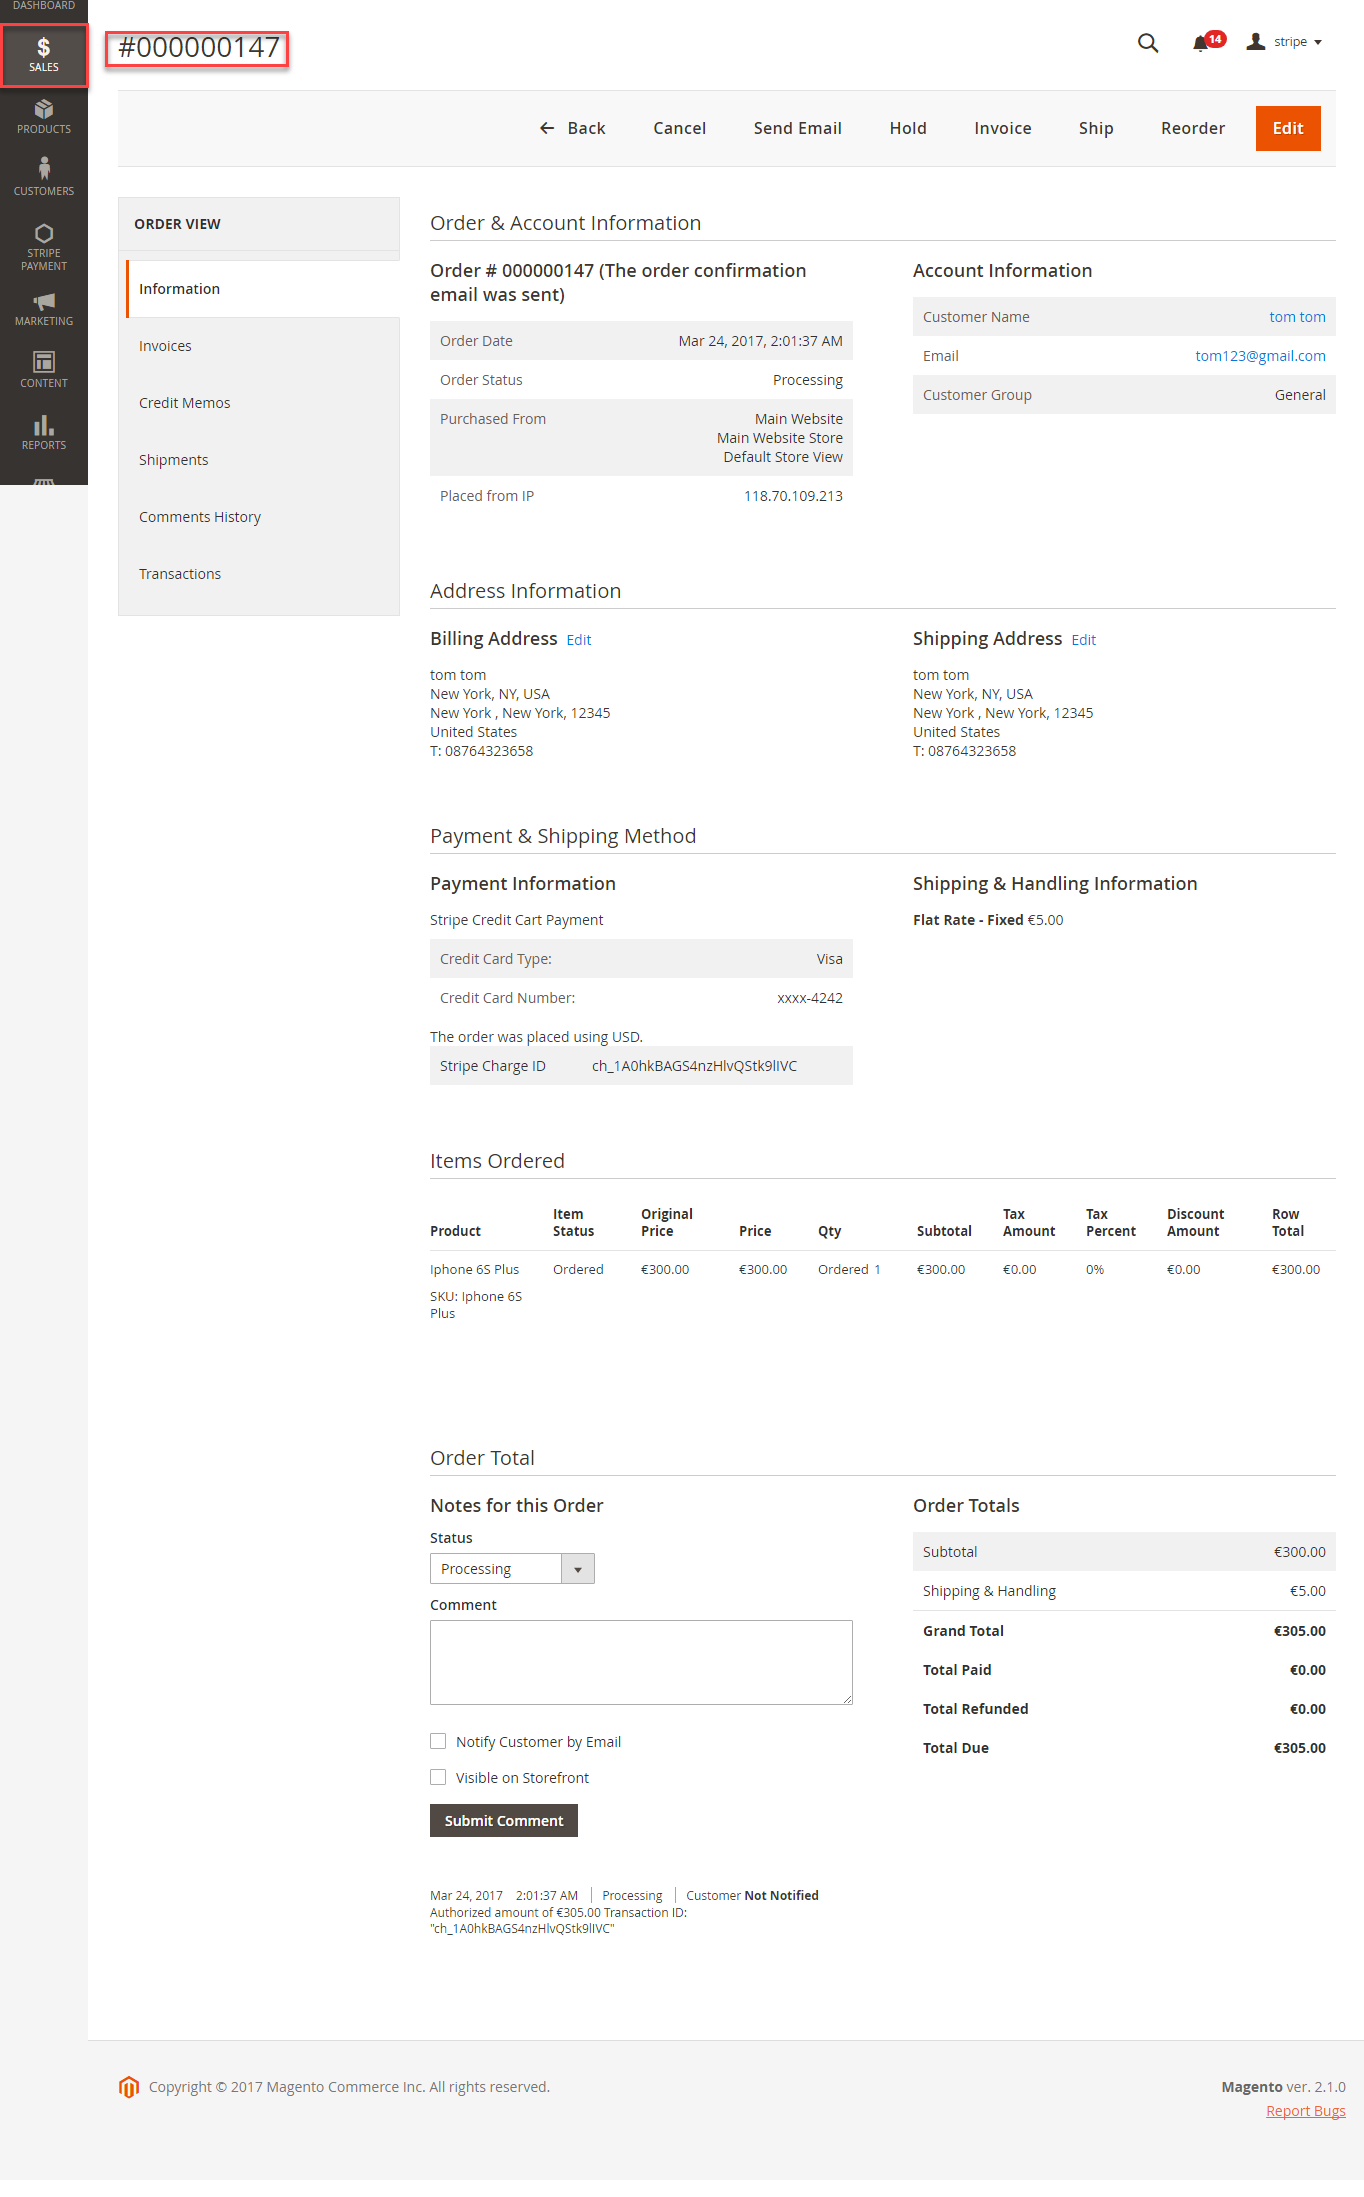
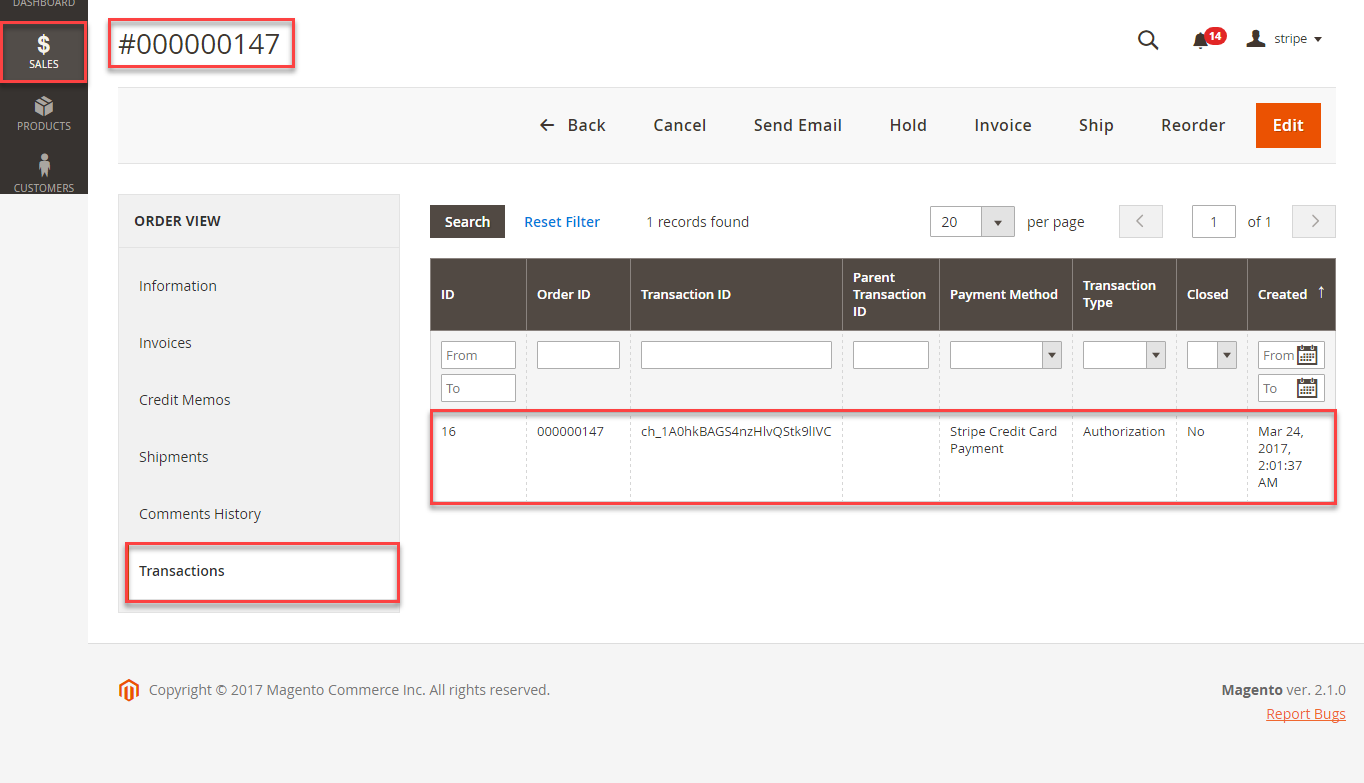
Customer can click Transactions to view total transactions
Set up configuration such as below table:
At frontend, customer will need to choose an item and click on Add to Cart button.

Then, go to checkout and select Stripe Credit Card Payments or Stripe Checkout Iframe instead of Check/Money Order.
The system will inform order number of the customer in home page and send email to confirm via email. Payment is successful!
After successful payment, at Payments tab of Stripe, the order status will be updated.
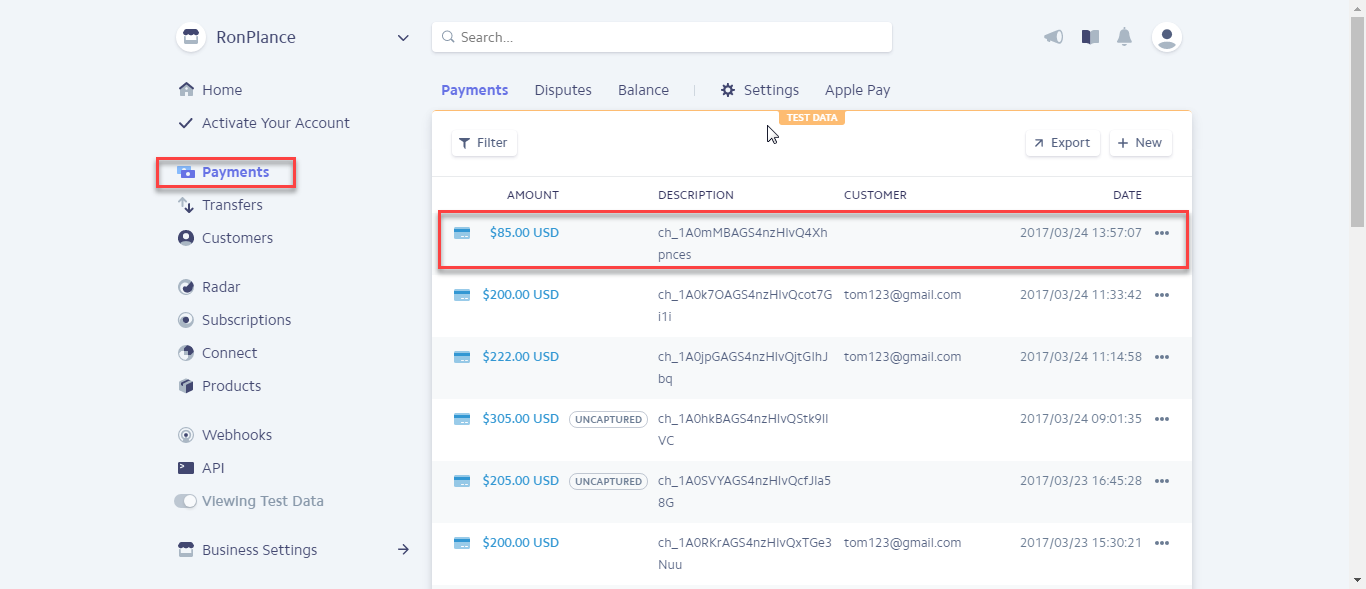
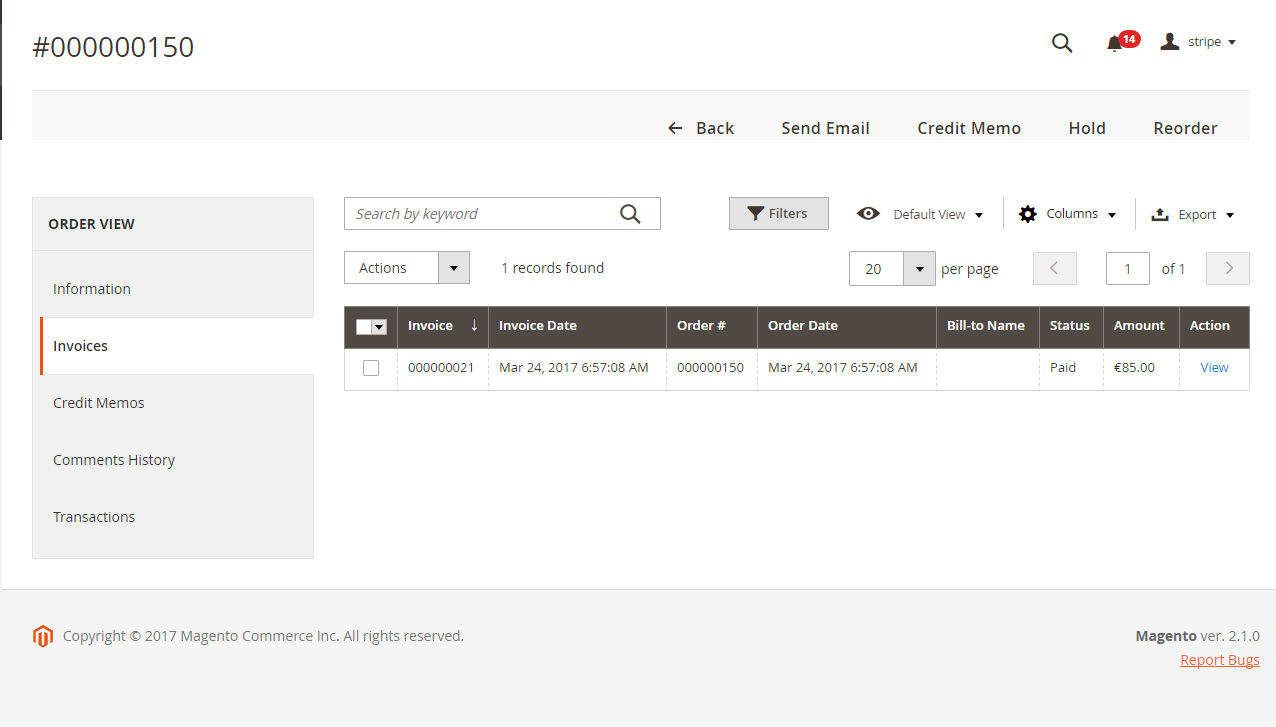
When customers want to refund, you click Sales->Invoices-> Credit Memo->Refund
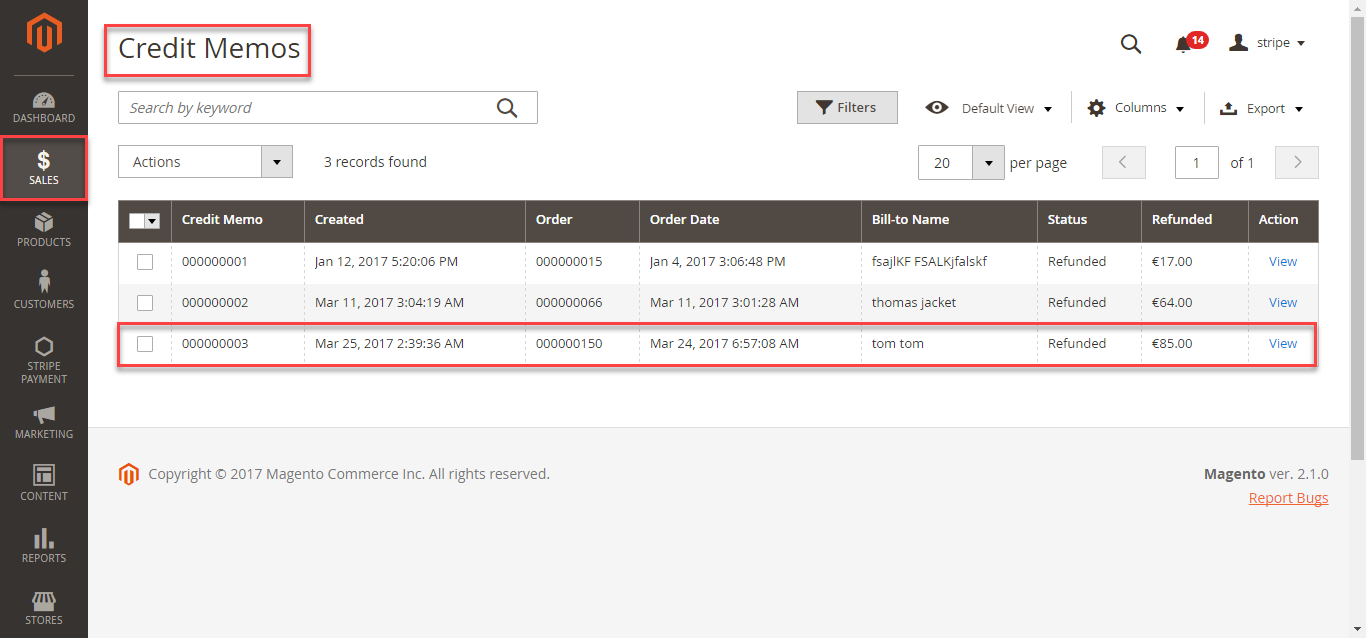
The customer can view refund by navigating to Sales > Credit Memos.
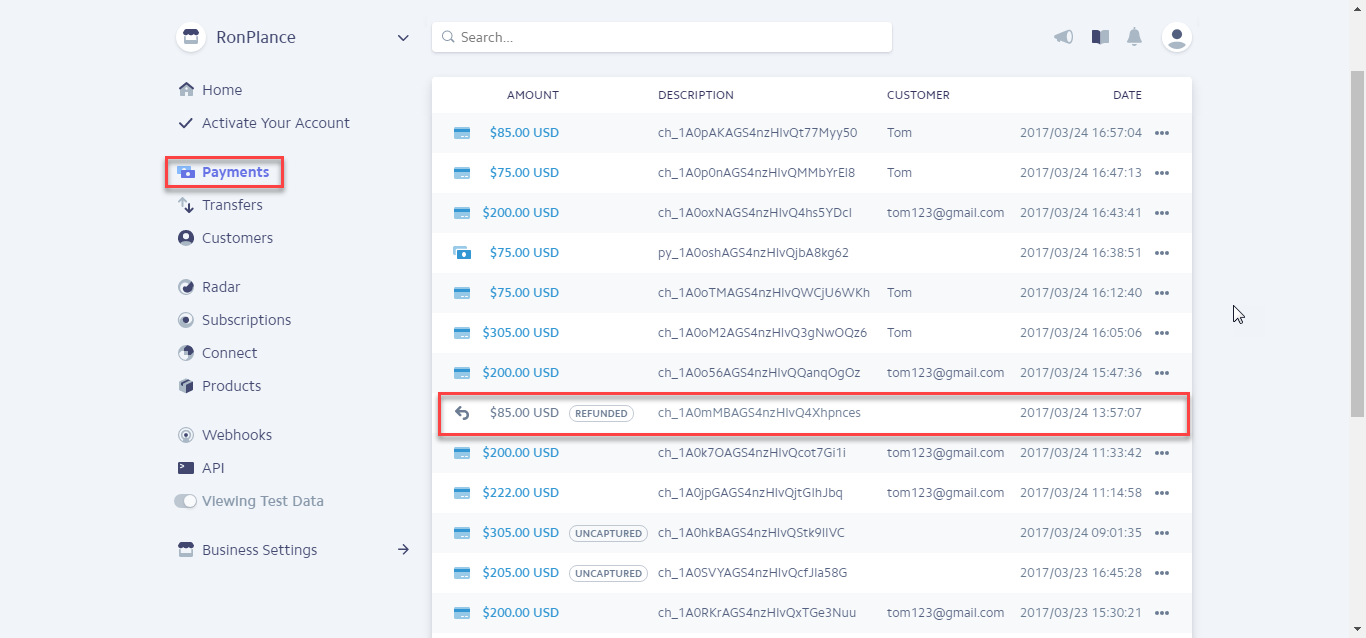
After the order is refunded, at Payments tab of Stripe, the status order will be updated.
Customers can easily view and manage all of things related their subscriptions by clicking on My Account > Stripe Recurring Subscriptions.
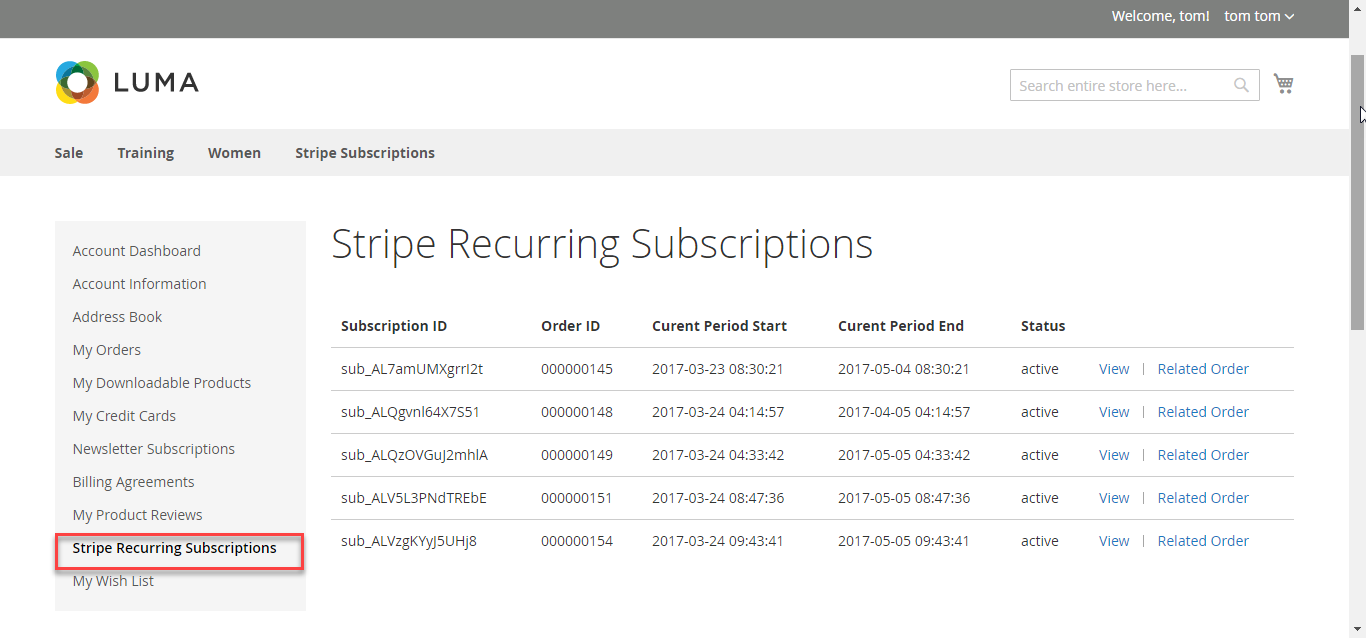
When customer buy items without subscription product, they will normally pay using credit card. Then, data will also automatically updated at Stripe.
Once again, thank you for purchasing our extension. If you have any questions relating to this extension, please do not hesitate to contact us for support.