Here we will guide you through the installation process of our extension. First off, open FileZilla, log in to your host as follows:
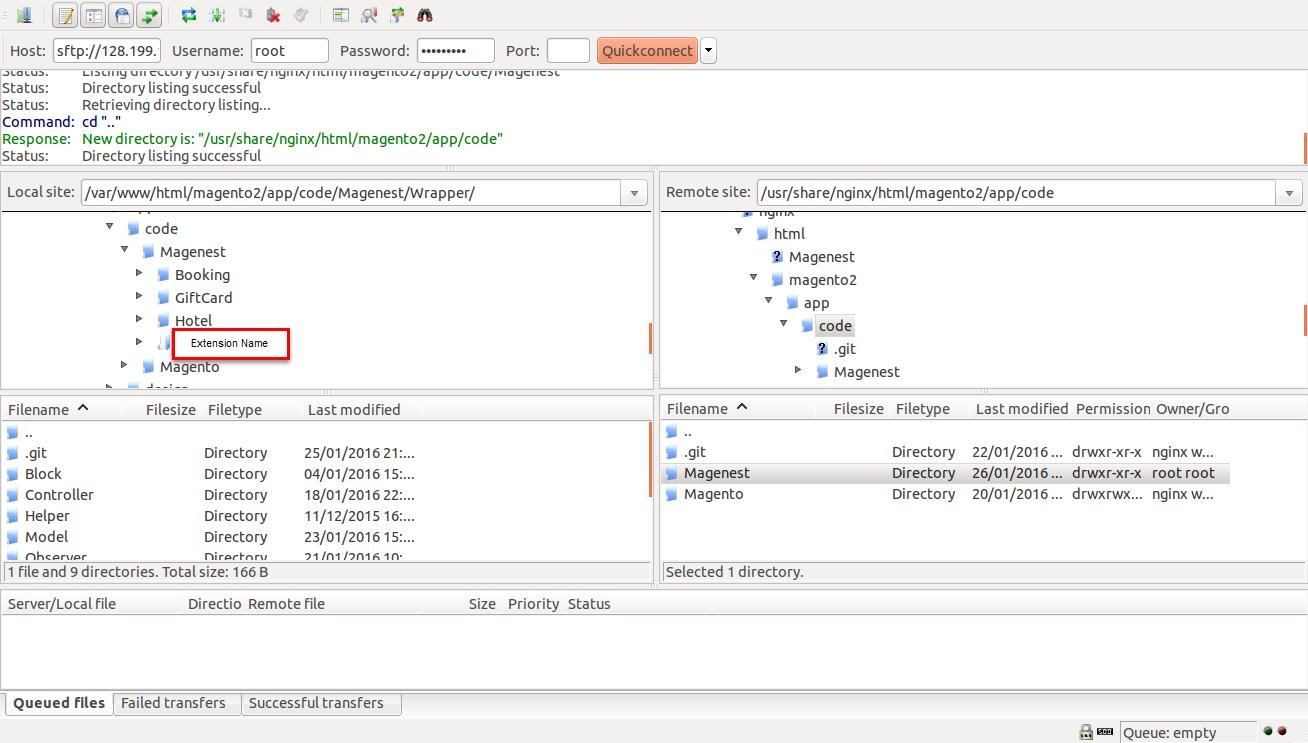
In the above example we switched the local site to the extension directory, and the remote site to the code directory. Now on the remote site window, inside app/code directory, create a folder named Magenest and go inside it. Now on your local site window, right click on Extension Name and click Upload. The extension will be uploaded onto your host in a few minutes.
The second method will require you to compress the extension into .zip or .tar.gz format, then execute the following command in your Command Line/Terminal:
scp <path to your extension> <ssh server>:<path to Magenest directory>Then log into your ssh server, go to Magenest directory and execute the following command to decompress the module:
unzip <.zip compressed extension> Or
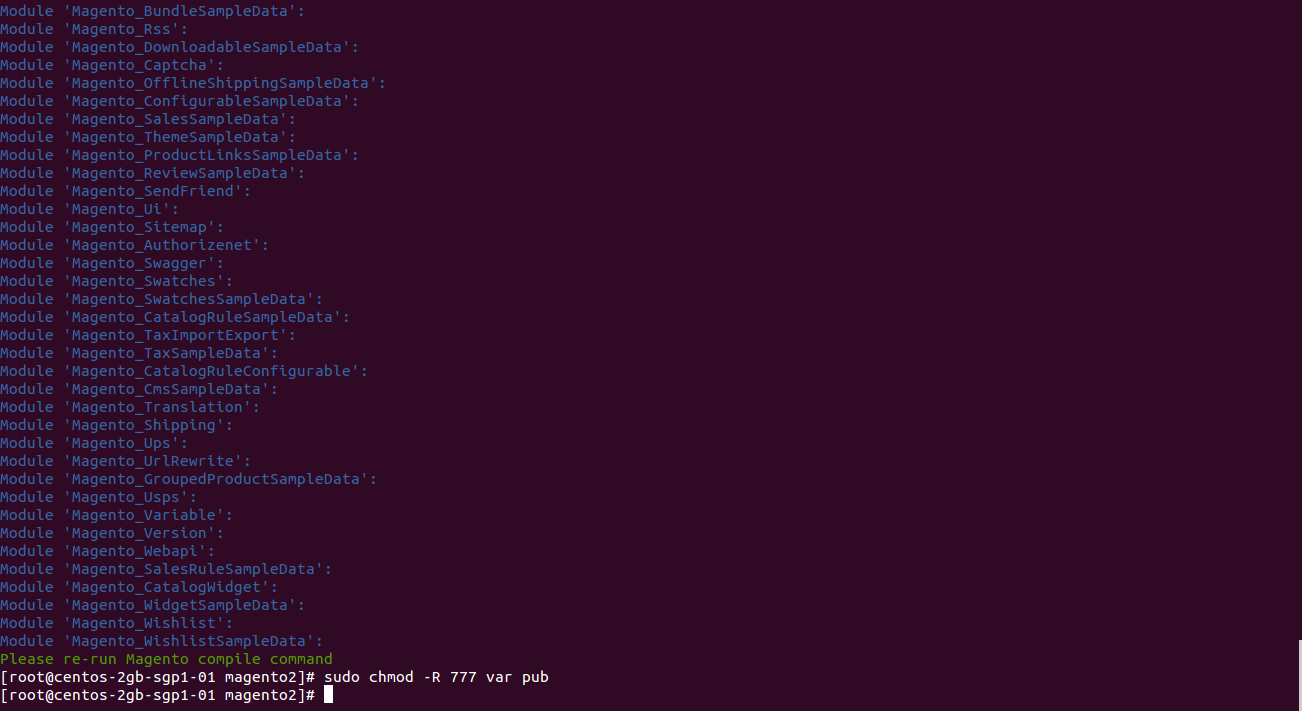
tar -xzvf <.tar.gz compressed extension> Now go to your Magento root directory, say it's named magento2, and execute the following commands:
php bin/magento setup:upgrade php bin/magento setup:static-content:deploy
After running all these, your Command line/Terminal window might look like this:
Finally, you need to flush the cache by either type this into the Command Line/Terminal:
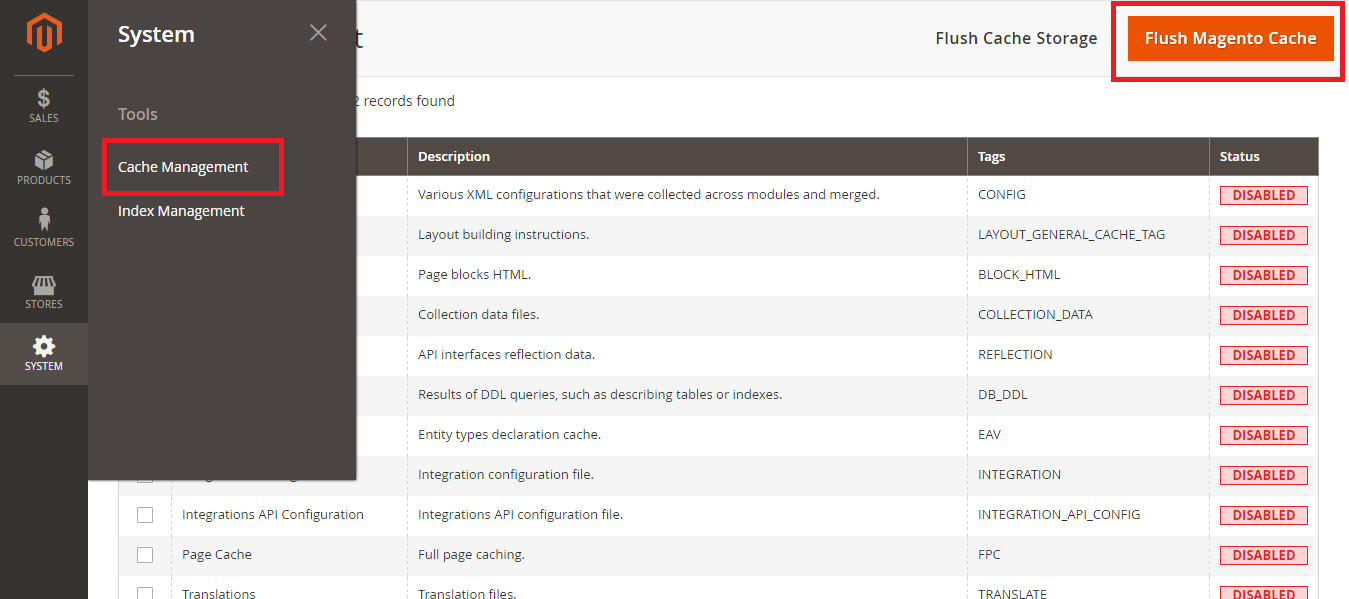
php bin/magento cache:flushOr go to System > Cache Management. Click the following buttons to completely clear the store cache:
1. Flush Magento Cache
2. Flush Cache Storage
3. Flush Catalog Images Cache
4. Flush JavaScript/CSS Cache
Now you can go to your store and check if the extension is working as expected.